

Grow Pears at Home? Absolutely! Imagine stepping into your backyard and plucking a juicy, sun-ripened pear straight from your own tree. Sounds like a dream, right? Well, it doesn’t have to be! This DIY guide is packed with simple, yet effective tricks to help you cultivate your very own pear paradise, even if you think you don’t have a green thumb.
For centuries, pears have been cherished not only for their delicious taste but also for their ornamental beauty. Originating in ancient times, pears were prized by the Romans and Greeks, who meticulously cultivated different varieties. Today, the tradition continues, and you can be a part of it!
Why should you learn to grow pears at home? Let’s face it, store-bought pears often lack the flavor and freshness of homegrown fruit. Plus, growing your own food is incredibly rewarding and sustainable. It’s a fantastic way to connect with nature, reduce your carbon footprint, and enjoy the unparalleled taste of freshly picked pears. This article will give you all the tips and tricks you need to get started, from choosing the right variety for your climate to protecting your precious pears from pests and diseases. So, grab your gardening gloves, and let’s get growing!
Growing Pears at Home: A DIY Guide to a Bountiful Harvest
Okay, so you want to grow pears at home? Awesome! It’s totally doable, and honestly, there’s nothing quite like biting into a pear you’ve grown yourself. It’s a bit of a commitment, but trust me, the reward is worth it. I’m going to walk you through everything you need to know, from choosing the right tree to harvesting those juicy fruits. Let’s get started!
Choosing the Right Pear Tree
This is probably the most important step, so pay close attention! You can’t just pick any pear tree and expect it to thrive in your backyard. Here’s what you need to consider:
* Climate: Pears generally need a certain amount of “chill hours” – that’s the number of hours below 45°F (7°C) during the winter. This chilling period is essential for the tree to break dormancy and produce fruit. Check your local climate and choose a variety that suits your region’s chill hour requirements. Some varieties are low-chill, perfect for warmer climates, while others need a good, hard winter.
* Pollination: Most pear trees aren’t self-pollinating, meaning they need another pear tree nearby to produce fruit. You’ll need to plant two different varieties that bloom at the same time for cross-pollination to occur. Some nurseries sell “self-fruitful” varieties, but even these often produce better crops with a pollinator. Research which varieties are good pollinators for the one you want.
* Rootstock: The rootstock affects the tree’s size, disease resistance, and fruit production. Dwarf rootstocks will result in smaller trees, making them easier to manage and harvest from, but they might need staking. Standard rootstocks produce larger, more vigorous trees.
* Disease Resistance: Pears are susceptible to certain diseases, like fire blight. Choosing disease-resistant varieties can save you a lot of headaches down the road.
* Taste Preference: Of course, you want to grow pears you actually enjoy eating! Consider the flavor, texture, and ripening time of different varieties. Some are sweet and juicy, others are crisp and tart.
Planting Your Pear Tree
Alright, you’ve picked out your perfect pear tree (or trees!). Now it’s time to get them in the ground.
1. Timing is Key: The best time to plant pear trees is in the early spring or late fall, when the tree is dormant. This gives it time to establish its roots before the growing season begins.
2. Choose the Right Location: Pears need at least 6-8 hours of sunlight per day. Make sure the location you choose is sunny and well-drained. Avoid planting in areas where water tends to pool.
3. Prepare the Soil: Pear trees prefer well-drained, slightly acidic soil (pH 6.0-7.0). Before planting, amend the soil with compost or other organic matter to improve drainage and fertility. Dig a hole that’s twice as wide as the root ball and just as deep.
4. Planting the Tree: Gently remove the tree from its container and loosen any circling roots. Place the tree in the hole, making sure the top of the root ball is level with the surrounding soil. Backfill the hole with soil, tamping it down gently to remove air pockets.
5. Water Thoroughly: After planting, water the tree deeply to help settle the soil and encourage root growth.
6. Mulch: Apply a layer of mulch around the base of the tree, keeping it a few inches away from the trunk. Mulch helps retain moisture, suppress weeds, and regulate soil temperature.
7. Staking (If Necessary): If you’re planting a dwarf tree or live in a windy area, you may need to stake the tree for support. Use soft ties to attach the tree to the stake, making sure not to damage the bark.
Caring for Your Pear Tree
Once your pear tree is planted, it’s important to provide it with the care it needs to thrive.
1. Watering: Water your pear tree regularly, especially during dry periods. Young trees need more frequent watering than established trees. Water deeply, allowing the soil to dry out slightly between waterings.
2. Fertilizing: Fertilize your pear tree in the spring with a balanced fertilizer. Follow the instructions on the fertilizer package. Avoid over-fertilizing, as this can lead to excessive growth and reduced fruit production.
3. Pruning: Pruning is essential for maintaining the shape and health of your pear tree. Prune in late winter or early spring, before the tree begins to grow. Remove any dead, damaged, or crossing branches. Prune to create an open, vase-shaped structure that allows sunlight to penetrate the canopy.
4. Pest and Disease Control: Keep an eye out for pests and diseases. Common pear tree pests include aphids, pear psylla, and codling moths. Common diseases include fire blight, pear scab, and leaf spot. Treat any problems promptly with appropriate insecticides or fungicides. Always follow the instructions on the product label.
5. Thinning Fruit: If your pear tree produces a heavy crop of fruit, you may need to thin it out. Thinning helps improve the size and quality of the remaining fruit. Remove some of the fruit when it’s about the size of a marble, leaving only one or two fruits per cluster.
Protecting Your Pear Tree
Sometimes, you need to give your pear tree a little extra protection from the elements and critters.
* Frost Protection: Late spring frosts can damage pear blossoms and reduce fruit production. If frost is predicted, cover your tree with a blanket or tarp to protect the blossoms. You can also use sprinklers to create a layer of ice that insulates the blossoms.
* Bird Protection: Birds love to eat pears! To protect your fruit, you can cover your tree with netting.
* Deer Protection: Deer can also damage pear trees, especially young trees. Protect your tree by fencing it off or using deer repellent.
Harvesting Your Pears
Finally, the moment you’ve been waiting for – harvesting your pears!
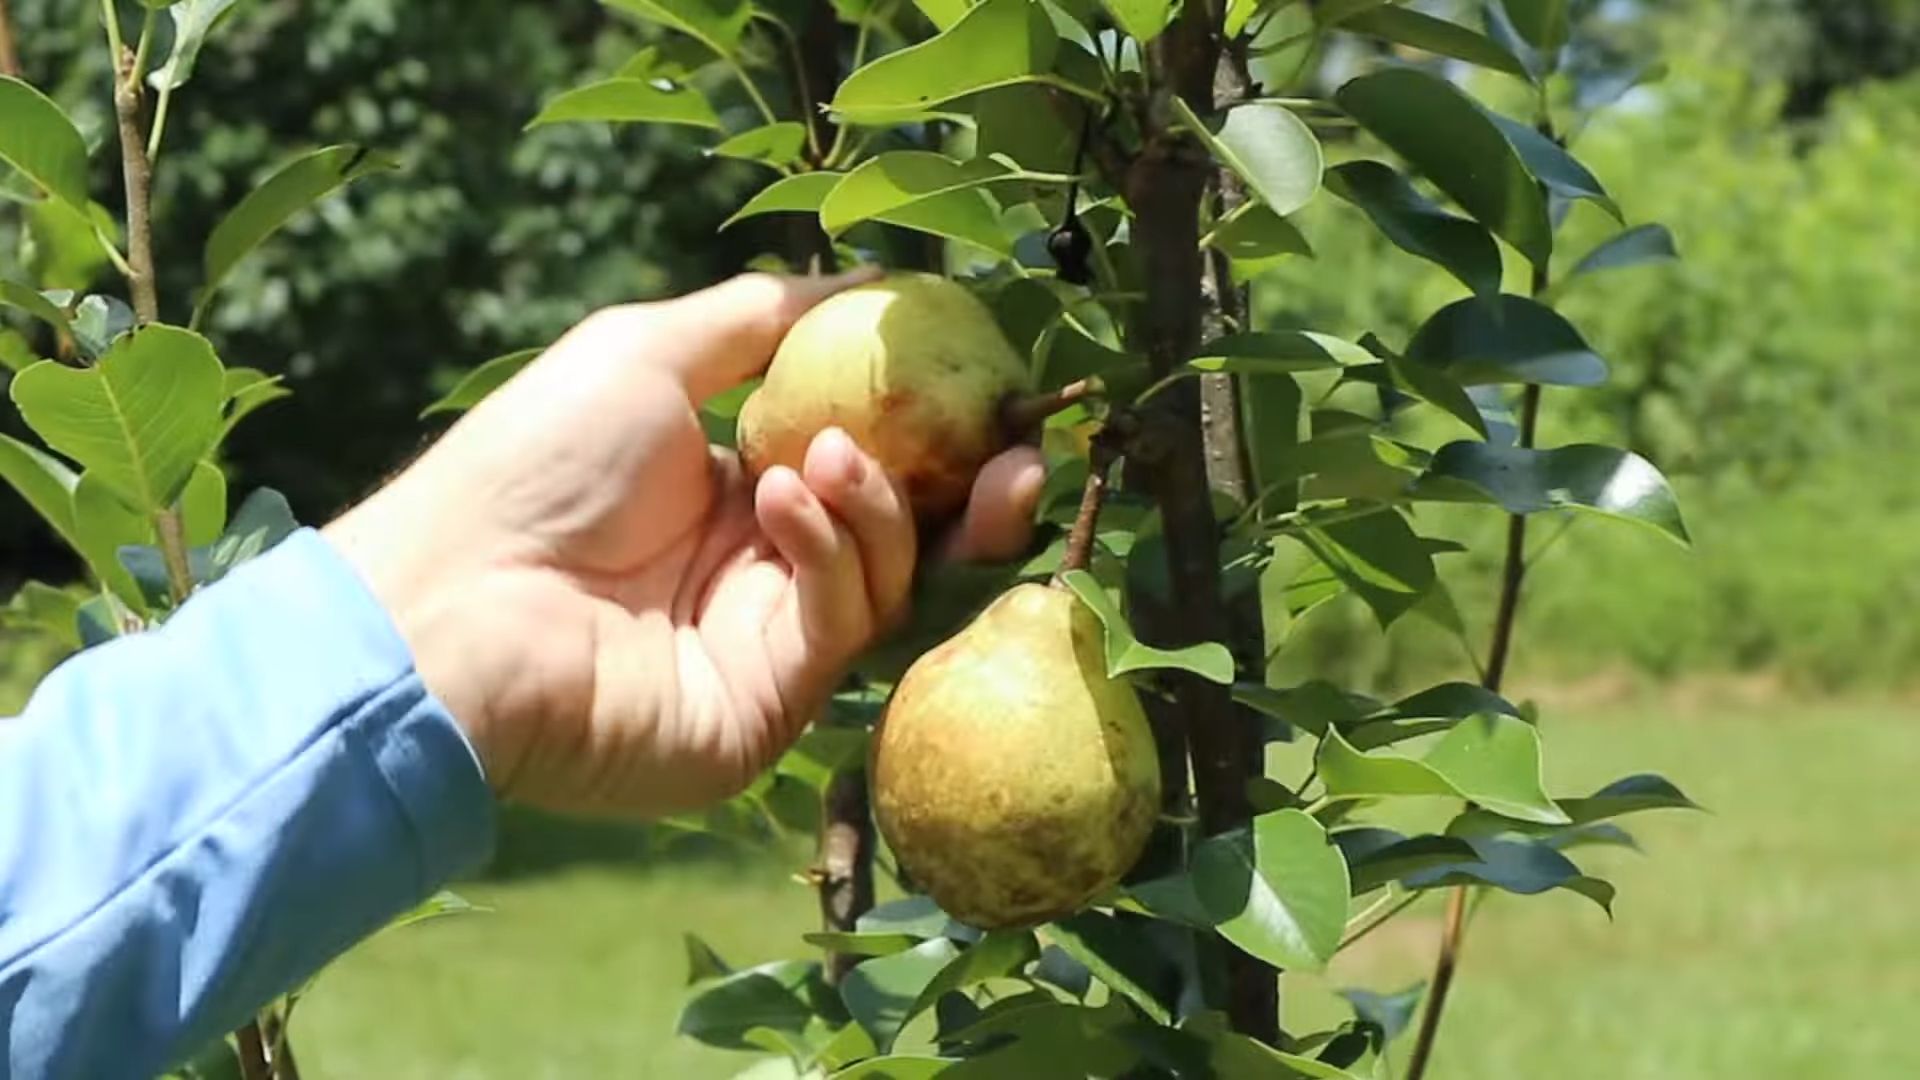
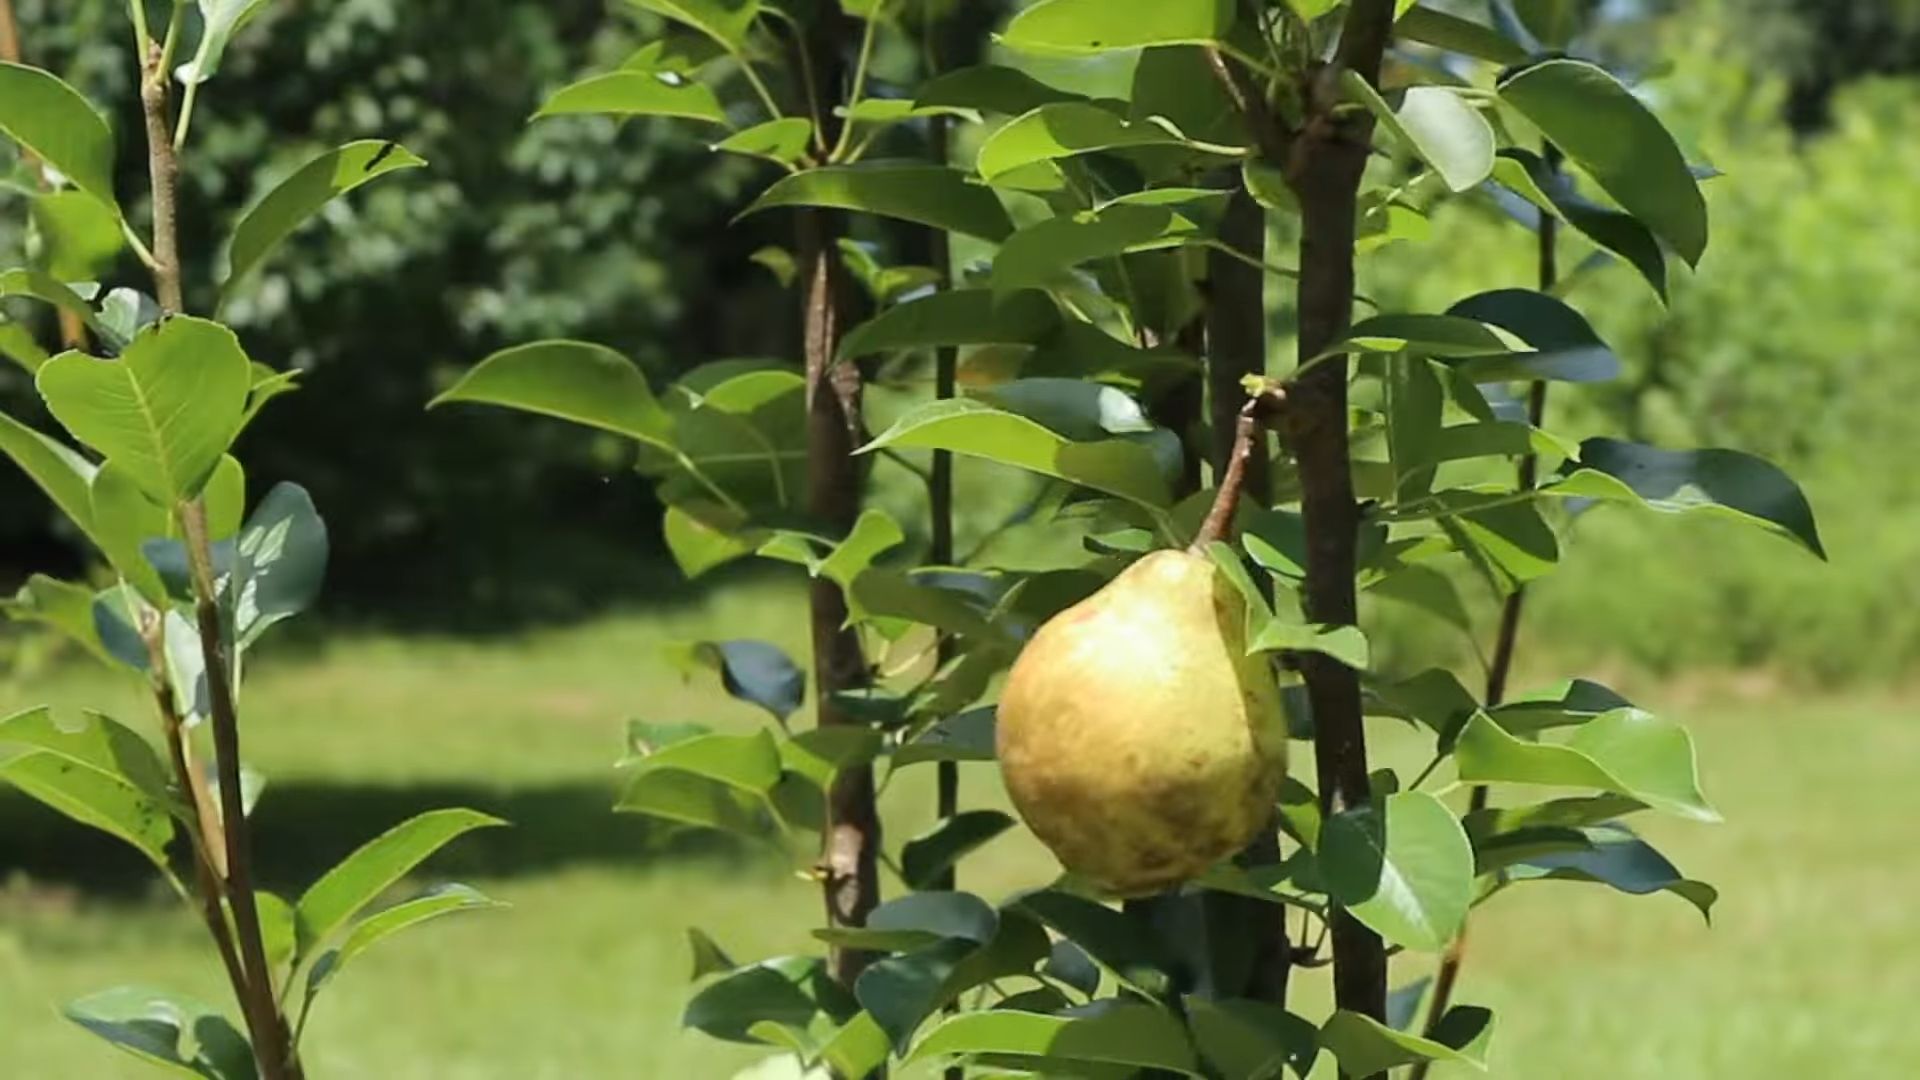
1. Knowing When to Pick: Pears are best harvested when they’re mature but still firm. They’ll ripen fully off the tree. The exact timing depends on the variety, but generally, pears are ready to harvest in late summer or early fall. A good way to tell if a pear is ready is to gently lift it and twist. If it comes off the tree easily, it’s ripe.
2. Harvesting Carefully: Handle pears carefully to avoid bruising them. Gently twist or clip the pears from the tree.
3. Ripening: Pears ripen best at room temperature. Place them in a paper bag with a ripe banana or apple to speed up the ripening process. Check them daily and enjoy them when they’re soft and juicy.
4. Storing: Ripe pears can be stored in the refrigerator for a few days.
Troubleshooting Common Pear Tree Problems
Even with the best care, you might encounter some problems along the way. Here are a few common issues and how to deal with them:
* No Fruit: If your pear tree isn’t producing fruit, it could be due to a number of factors, including lack of pollination, insufficient chill hours, poor soil, or improper pruning. Make sure you have a pollinator tree nearby, and that your tree is getting enough sunlight and water.
* Fire Blight: Fire blight is a bacterial disease that can kill pear trees. Symptoms include blackened, scorched-looking leaves and branches. Prune out infected branches immediately, cutting well below the infected area. Disinfect your pruning tools after each cut.
* Pear Scab: Pear scab is a fungal disease that causes dark, scabby spots on the leaves and fruit. Treat with a fungicide in the spring.
* Pest Infestations: Keep an eye out for pests like aphids, pear psylla, and codling moths. Treat infestations with appropriate insecticides.
Enjoying Your Homegrown Pears
Growing pears at home takes time and effort, but it’s incredibly rewarding. There’s nothing quite like the taste of a fresh, juicy pear that you’ve grown yourself. Enjoy your harvest in pies, jams, salads, or simply eat them fresh off the tree. You’ve earned it!
Remember, patience is key! It can take a few years for your pear tree to start producing fruit, but with proper care, you’ll be enjoying a bountiful harvest for years to come. Good luck, and happy growing!
Conclusion
So, there you have it! Growing pears at home might seem daunting at first, but with a little patience and the right approach, you can enjoy the sweet reward of homegrown fruit. This DIY method, focusing on [specific method mentioned in the article, e.g., container gardening, grafting, espalier], offers a fantastic way to overcome common challenges like limited space, pest control, and even pollination issues.
Why is this a must-try? Because it puts you in control. You choose the variety, you manage the growing conditions, and you harvest the fruit at its peak ripeness. Store-bought pears simply can’t compare to the flavor and satisfaction of a pear you’ve nurtured from a sapling (or even a grafted branch!). Plus, you’ll be contributing to a more sustainable lifestyle by reducing your reliance on commercially grown produce.
Don’t be afraid to experiment! Consider different pear varieties suited to your climate. For warmer regions, try ‘Kieffer’ or ‘Orient’ pears, known for their heat tolerance. If you live in a colder area, ‘Bartlett’ or ‘Bosc’ are excellent choices. You can also explore different training methods, such as espalier, to maximize fruit production in a small space and create a beautiful ornamental feature in your garden. Another variation to consider is companion planting. Planting herbs like basil or lavender near your pear tree can help deter pests naturally.
Remember, success in growing pears at home often comes down to consistent care and attention. Regular watering, proper fertilization, and diligent pest control are key. But the effort is well worth it when you bite into that first juicy, homegrown pear.
We wholeheartedly encourage you to give this DIY trick a try. It’s a rewarding experience that connects you with nature and provides you with delicious, healthy fruit. And most importantly, we want to hear about your journey! Share your experiences, successes, and even challenges in the comments below. Let’s build a community of home pear growers and learn from each other. What variety did you choose? What challenges did you face, and how did you overcome them? Your insights could be invaluable to other aspiring pear growers. So, grab your gardening gloves, choose your pear variety, and get ready to enjoy the fruits (literally!) of your labor. This **DIY pear growing** method is sure to bring you years of delicious rewards.
Frequently Asked Questions (FAQ)
What is the best time of year to plant a pear tree?
The ideal time to plant a pear tree is during the dormant season, either in late fall or early spring. This allows the tree to establish its roots before the growing season begins. Avoid planting during the heat of summer or when the ground is frozen. If you are planting a bare-root tree, early spring is generally preferred. For container-grown trees, you have more flexibility, but still aim for fall or spring planting.
How much sunlight does a pear tree need?
Pear trees need at least 6-8 hours of direct sunlight per day to thrive and produce fruit. Choose a planting location that receives ample sunlight throughout the day. If your tree is shaded for a significant portion of the day, it may not produce as much fruit, and the fruit that it does produce may be smaller and less flavorful.
What kind of soil is best for pear trees?
Pear trees prefer well-drained soil that is rich in organic matter. The soil should be slightly acidic to neutral, with a pH between 6.0 and 7.0. Before planting, amend the soil with compost or other organic matter to improve drainage and fertility. Avoid planting in heavy clay soil, as this can lead to root rot. If you have clay soil, consider planting your pear tree in a raised bed or container.
How often should I water my pear tree?
Water your pear tree regularly, especially during the first year after planting. Water deeply and less frequently, rather than shallowly and often. Allow the soil to dry out slightly between waterings. During hot, dry weather, you may need to water more frequently. Mature pear trees are more drought-tolerant, but they still benefit from regular watering, especially during fruit development.
Do I need to prune my pear tree?
Yes, pruning is essential for maintaining the health and productivity of your pear tree. Prune your tree annually during the dormant season to remove dead, damaged, or diseased branches. Pruning also helps to improve air circulation and sunlight penetration, which can reduce the risk of disease and improve fruit quality. There are different pruning techniques for different pear tree varieties and training methods, so research the best approach for your specific tree.
How do I fertilize my pear tree?
Fertilize your pear tree in early spring, before the new growth begins. Use a balanced fertilizer that is specifically formulated for fruit trees. Follow the instructions on the fertilizer label for application rates. Avoid over-fertilizing, as this can lead to excessive vegetative growth and reduced fruit production. You can also amend the soil with compost or other organic matter to provide a slow-release source of nutrients.
How do I protect my pear tree from pests and diseases?
Pear trees are susceptible to a variety of pests and diseases, including aphids, pear psylla, codling moths, and fire blight. Monitor your tree regularly for signs of pests or diseases. Use organic pest control methods whenever possible, such as insecticidal soap or horticultural oil. Prune your tree regularly to improve air circulation and sunlight penetration, which can help to prevent disease. If you suspect that your tree has fire blight, prune out the infected branches immediately and disinfect your pruning tools.
My pear tree is not producing fruit. What could be the problem?
There are several reasons why your pear tree may not be producing fruit. It could be due to a lack of pollination, insufficient sunlight, improper pruning, nutrient deficiencies, or pest and disease problems. Ensure that your tree is receiving adequate sunlight and that it is properly pollinated. Some pear varieties require cross-pollination from another pear variety. Prune your tree annually to remove dead, damaged, or diseased branches and to improve air circulation and sunlight penetration. Fertilize your tree in early spring with a balanced fertilizer. Monitor your tree regularly for signs of pests or diseases and take appropriate action. It can also take several years for a newly planted pear tree to begin producing fruit.
Can I grow a pear tree in a container?
Yes, you can grow a pear tree in a container, especially if you choose a dwarf or semi-dwarf variety. Select a large container with good drainage. Use a well-draining potting mix that is specifically formulated for fruit trees. Water your container-grown pear tree regularly and fertilize it in early spring. Container-grown pear trees may need to be repotted every few years as they grow. Container growing is a great way to control the soil conditions and move the tree to optimal sunlight exposure.
How do I know when my pears are ripe?
Pears are best harvested when they are mature but still firm. The color of the pear will change slightly as it ripens, but the best way to tell if a pear is ripe is to gently lift it and twist it. If the pear comes off the tree easily, it is ripe. Pears will continue to ripen after they are harvested. Store them in a cool, dry place until they are ready to eat. You can also ripen pears more quickly by placing them in a paper bag with a banana or apple.
Leave a Comment