

Grow pumpkin squash like a pro, even if you think you have a brown thumb! Have you ever dreamed of carving a jack-o’-lantern from a pumpkin you nurtured from a tiny seed? Or perhaps baking a delicious pumpkin pie with ingredients sourced straight from your backyard? This isn’t just a whimsical fantasy; it’s an achievable reality with the right know-how. For centuries, pumpkins and squashes have held a special place in cultures worldwide, symbolizing harvest, abundance, and the changing seasons. From ancient Native American traditions to modern-day autumnal celebrations, these versatile fruits have nourished and delighted us.
But let’s be honest, the thought of cultivating these sprawling vines can be a little intimidating. That’s where this DIY guide comes in! I’m here to share some simple yet effective home gardening tricks and hacks that will empower you to grow pumpkin squash successfully, regardless of your experience level. We’ll break down the process into manageable steps, covering everything from seed selection and soil preparation to pest control and harvesting.
Why do you need these DIY tricks? Because growing your own pumpkins and squashes is not only incredibly rewarding but also allows you to enjoy fresher, healthier produce while connecting with nature. Plus, imagine the bragging rights when you present a homegrown pumpkin pie at your next gathering! So, grab your gardening gloves, and let’s embark on this exciting journey together. I promise, with a little patience and these handy tips, you’ll be amazed at what you can achieve!
Growing Pumpkins: A Beginner’s Guide to a Bountiful Harvest
Hey there, fellow gardening enthusiasts! Ever dreamt of carving your own giant pumpkin for Halloween or baking a delicious pumpkin pie from scratch? Well, you’ve come to the right place! Growing pumpkins can seem daunting, but trust me, with a little planning and effort, you can absolutely achieve a fantastic harvest. I’m going to walk you through everything you need to know, from choosing the right variety to dealing with pesky pests. Let’s get our hands dirty!
Choosing Your Pumpkin Variety
Before we even think about planting, we need to decide what kind of pumpkin we want to grow. There are so many options, each with its own unique characteristics. Here’s a quick rundown:
* Giant Pumpkins (e.g., ‘Atlantic Giant’): These are the behemoths you see at pumpkin weigh-offs. They require a lot of space, patience, and specialized care. If you’re aiming for a record-breaker, be prepared for a serious commitment!
* Pie Pumpkins (e.g., ‘Sugar Pie’, ‘Baby Pam’): These smaller pumpkins are perfect for baking. They have a sweeter, denser flesh than their larger cousins.
* Ornamental Pumpkins (e.g., ‘Jack Be Little’, ‘Gourds’): These are grown for their unique shapes, colors, and textures. They’re great for fall decorations.
* Jack-o’-Lantern Pumpkins (e.g., ‘Howden’, ‘Connecticut Field’): These are the classic carving pumpkins. They have a good size and shape for creating spooky faces.
Think about what you want to do with your pumpkins and choose a variety that suits your needs. I personally love growing ‘Sugar Pie’ pumpkins for baking and a few ‘Jack Be Little’ pumpkins for decorating.
Preparing Your Pumpkin Patch
Pumpkins are hungry plants, so soil preparation is key. They need plenty of sunlight and well-drained soil that’s rich in organic matter.
* Sunlight: Pumpkins need at least 6-8 hours of direct sunlight per day. Choose a location that gets plenty of sun throughout the growing season.
* Soil: Pumpkins thrive in soil that’s slightly acidic to neutral (pH 6.0-7.0). Amend your soil with compost, aged manure, or other organic matter to improve drainage and fertility.
* Space: Pumpkins need a lot of space to spread out. Giant pumpkins can take up hundreds of square feet! Even smaller varieties need at least 4-6 feet between plants.
* Water: Pumpkins need consistent moisture, especially during fruit development. Make sure your chosen location has access to water.
Planting Your Pumpkin Seeds
There are two ways to plant pumpkins: direct sowing and starting seeds indoors. Direct sowing is the easiest method, but starting seeds indoors can give you a head start, especially in cooler climates.
* Direct Sowing: Wait until the soil has warmed up to at least 60°F (15°C) before direct sowing. This is usually a couple of weeks after the last frost.
1. Prepare the soil by tilling or digging it up and adding compost or other organic matter.
2. Create small mounds of soil, about 1-2 feet in diameter and 6-12 inches high. These mounds will help with drainage and soil warming.
3. Sow 3-5 seeds per mound, about 1 inch deep.
4. Water the mounds gently but thoroughly.
5. Once the seedlings emerge, thin them to the strongest plant per mound.
* Starting Seeds Indoors: Start seeds indoors about 3-4 weeks before the last frost.
1. Use peat pots or biodegradable pots to avoid disturbing the roots when transplanting.
2. Fill the pots with a seed-starting mix.
3. Sow 2-3 seeds per pot, about 1 inch deep.
4. Water the pots gently and keep them in a warm, sunny location.
5. Once the seedlings emerge, thin them to the strongest plant per pot.
6. Harden off the seedlings by gradually exposing them to outdoor conditions for a week before transplanting.
7. Transplant the seedlings to the garden after the last frost, spacing them according to the variety.
Caring for Your Pumpkin Plants
Once your pumpkin plants are established, it’s important to provide them with the care they need to thrive.
* Watering: Water your pumpkin plants deeply and regularly, especially during dry spells. Aim for about 1 inch of water per week. Water at the base of the plants to avoid wetting the foliage, which can lead to fungal diseases.
* Fertilizing: Pumpkins are heavy feeders, so fertilize them regularly with a balanced fertilizer. Apply fertilizer every 2-3 weeks, following the instructions on the package. You can also side-dress your plants with compost or aged manure.
* Weeding: Keep your pumpkin patch free of weeds, which can compete with your plants for nutrients and water. Hand-pull weeds or use a hoe to cultivate the soil. Be careful not to damage the pumpkin roots.
* Pruning: Pruning can help to improve air circulation and reduce the risk of fungal diseases. Remove any yellowing or diseased leaves. You can also prune the vines to encourage fruit development. For giant pumpkins, it’s common to limit the plant to one or two pumpkins to maximize their size.
* Pollination: Pumpkins have separate male and female flowers. The female flowers have a small fruit at the base, while the male flowers do not. Bees are the primary pollinators of pumpkins. If you’re not seeing a lot of bees in your garden, you may need to hand-pollinate the flowers. To hand-pollinate, use a small paintbrush to transfer pollen from the male flower to the female flower.
Dealing with Pests and Diseases
Pumpkins are susceptible to a variety of pests and diseases. Here are some common problems and how to deal with them:
* Squash Bugs: These pests suck the sap from pumpkin leaves, causing them to wilt and die. Hand-pick squash bugs and their eggs from the plants. You can also use insecticidal soap or neem oil to control them.
* Squash Vine Borers: These pests bore into the stems of pumpkin plants, causing them to wilt and die. Wrap the base of the stems with aluminum foil or netting to prevent the borers from entering. You can also inject Bacillus thuringiensis (Bt) into the stems to kill the borers.
* Powdery Mildew: This fungal disease causes a white, powdery coating on the leaves. Improve air circulation by pruning the plants. You can also spray the plants with a fungicide.
* Downy Mildew: This fungal disease causes yellow spots on the leaves. Improve air circulation and avoid wetting the foliage. You can also spray the plants with a fungicide.
Harvesting Your Pumpkins
Pumpkins are usually ready to harvest in the fall, about 90-120 days after planting, depending on the variety.
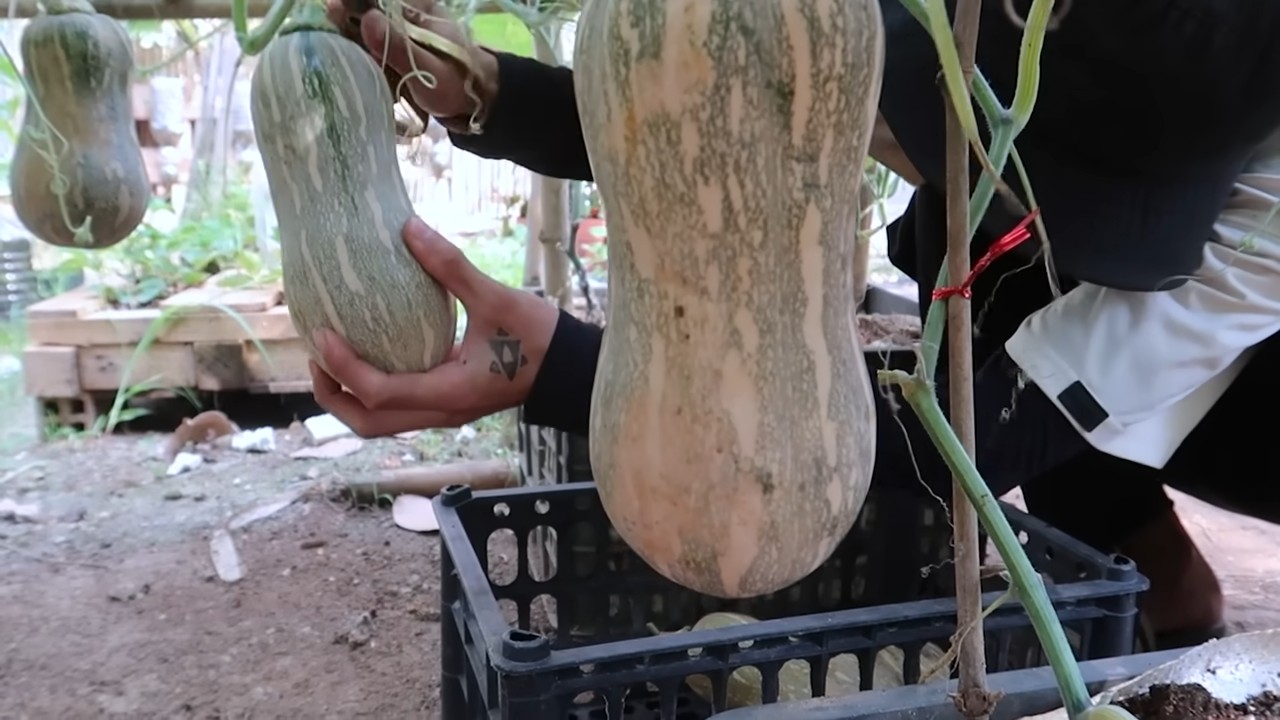
* Check for Maturity: The pumpkin should be a deep, solid color and the rind should be hard. You should not be able to easily pierce the rind with your fingernail. The stem should be dry and brown.
* Harvest Carefully: Use a sharp knife or pruning shears to cut the pumpkin from the vine, leaving about 3-4 inches of stem attached. Do not carry the pumpkin by the stem, as it can break off and cause the pumpkin to rot.
* Curing: Cure your pumpkins in a warm, dry place for about 1-2 weeks. This will help to harden the rind and improve their storage life.
* Storage: Store your cured pumpkins in a cool, dry place, such as a basement or garage. They should last for several months.
Troubleshooting
* No Flowers: If your pumpkin plants are not producing flowers, it could be due to a lack of sunlight, poor soil, or too much nitrogen fertilizer. Make sure your plants are getting enough sunlight and amend the soil with compost or aged manure. Use a balanced fertilizer with a lower nitrogen content.
* Flowers But No Fruit: If your pumpkin plants are producing flowers but no fruit, it could be due to poor pollination. Hand-pollinate the flowers or attract more bees to your garden by planting bee-friendly flowers.
* Rotting Pumpkins: If your pumpkins are rotting on the vine, it could be due to fungal diseases or pests. Improve air circulation by pruning the plants and control pests and diseases with appropriate treatments. Make sure the pumpkins are not sitting directly on the soil, as this can promote rot. Place them on a piece of cardboard or wood.
Enjoying Your Harvest
Now comes the fun part! Carve your pumpkins for Halloween, bake a delicious pumpkin pie, or use them to decorate your home. You can also save the seeds for planting next year.
Growing pumpkins is a rewarding experience that can bring joy to your garden and your table.

Conclusion
So, there you have it! Mastering the art of growing pumpkin squash doesn’t require a green thumb blessed by the gardening gods. It’s about understanding the plant’s needs, providing the right environment, and a little bit of patience. This DIY approach, from seed to harvest, offers a deeply rewarding experience that connects you to the food you eat in a way that store-bought pumpkins simply can’t.
Why is this a must-try? Because beyond the satisfaction of nurturing life from a tiny seed, you gain complete control over the process. You choose the variety, ensuring you get the exact pumpkin squash you desire – whether it’s a giant for carving, a sweet variety for pies, or a uniquely shaped gourd for decoration. You also avoid the pesticides and chemicals often used in commercial farming, guaranteeing a healthier and more natural product for your family. Plus, let’s be honest, there’s a certain magic in watching those vines creep and crawl, eventually bursting forth with vibrant orange globes.
But the beauty of growing pumpkin squash lies in its adaptability. Feel free to experiment! Try different companion planting techniques to deter pests naturally. Consider vertical gardening to save space, training your vines up trellises or fences. Explore heirloom varieties for unique flavors and colors. You could even try succession planting, staggering your planting dates to extend your harvest season.
Don’t be afraid to get your hands dirty and embrace the learning process. Every garden is unique, and what works for one person might not work for another. The key is to observe, adapt, and learn from your experiences.
We wholeheartedly encourage you to embark on this pumpkin-growing adventure. It’s a fantastic project for families, a therapeutic activity for individuals, and a sustainable way to enjoy fresh, delicious produce. And most importantly, it’s a chance to connect with nature and appreciate the simple joys of gardening.
Once you’ve harvested your bounty, we’d love to hear about your experience! Share your photos, tips, and challenges in the comments below. Let’s build a community of pumpkin-growing enthusiasts and learn from each other. What variety did you grow? What challenges did you face, and how did you overcome them? What delicious recipes did you create with your homegrown pumpkin squash? Your insights could inspire and help others on their own pumpkin-growing journey. So, go ahead, plant those seeds, and let the pumpkin magic begin!
Frequently Asked Questions (FAQ)
What is the best time to plant pumpkin squash seeds?
The ideal time to plant pumpkin squash seeds depends on your local climate and the specific variety you’re growing. Generally, you should plant after the last frost when the soil temperature has warmed to at least 60°F (15°C). Most pumpkin varieties require a long growing season, typically 90-120 days, so plan accordingly. In cooler climates, starting seeds indoors 2-3 weeks before the last frost can give you a head start. Check your local extension office or seed packet for specific recommendations for your region.
How much space do pumpkin squash plants need?
Pumpkin squash plants are sprawling vines that require a significant amount of space. Allow at least 4-6 feet between plants and 8-10 feet between rows. If you’re growing a giant variety, you may need even more space. Consider vertical gardening techniques, such as training vines up trellises or fences, to save space in smaller gardens. Proper spacing is crucial for air circulation, which helps prevent fungal diseases.
What kind of soil is best for growing pumpkin squash?
Pumpkin squash thrives in well-drained, fertile soil that is rich in organic matter. Amend your soil with compost, aged manure, or other organic materials before planting to improve drainage and nutrient content. A slightly acidic to neutral soil pH of 6.0-7.0 is ideal. Conduct a soil test to determine your soil’s pH and nutrient levels and amend accordingly.
How often should I water my pumpkin squash plants?
Pumpkin squash plants need consistent moisture, especially during fruit development. Water deeply and regularly, aiming for about 1 inch of water per week. Avoid overhead watering, as this can promote fungal diseases. Instead, water at the base of the plants, using a soaker hose or drip irrigation system. Mulching around the plants can help retain moisture and suppress weeds.
What are some common pests and diseases that affect pumpkin squash?
Common pests that affect pumpkin squash include squash bugs, squash vine borers, aphids, and cucumber beetles. Common diseases include powdery mildew, downy mildew, and blossom-end rot. Regularly inspect your plants for signs of pests or diseases and take action promptly. Organic pest control methods, such as hand-picking pests, using insecticidal soap, or introducing beneficial insects, can be effective. Ensure good air circulation and avoid overhead watering to prevent fungal diseases. Blossom-end rot is often caused by calcium deficiency or inconsistent watering.
How do I know when my pumpkin squash is ripe?
The best way to determine if your pumpkin squash is ripe is to check the color and rind. The pumpkin should be a deep, uniform color, typical of the variety you’re growing. The rind should be hard and resistant to scratching with your fingernail. The stem should be dry and brown. When you tap the pumpkin, it should sound hollow.
Can I eat the pumpkin squash flowers?
Yes, pumpkin squash flowers are edible and can be a delicious addition to your culinary repertoire. They can be stuffed, battered and fried, or added to salads. Harvest the male flowers, which do not produce fruit, to avoid reducing your pumpkin yield. Harvest the flowers in the morning when they are open and fresh.
How do I store my harvested pumpkin squash?
To store your harvested pumpkin squash, choose pumpkins that are free from blemishes and have a hard rind. Cure the pumpkins in a warm, dry place for 1-2 weeks to harden the rind and improve storage life. Store the cured pumpkins in a cool, dry, and well-ventilated place, such as a basement or garage, at a temperature of 50-60°F (10-15°C). Avoid storing pumpkins in direct sunlight or near freezing temperatures. Properly stored pumpkins can last for several months.
What are some good companion plants for pumpkin squash?
Good companion plants for pumpkin squash include marigolds, nasturtiums, basil, oregano, and corn. Marigolds and nasturtiums deter pests, while basil and oregano attract beneficial insects. Corn provides shade and support for the pumpkin vines. Avoid planting pumpkin squash near potatoes or brassicas (cabbage, broccoli, cauliflower), as they can compete for nutrients.
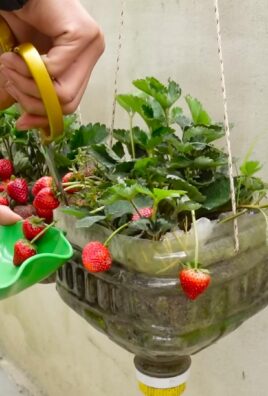
Can I grow pumpkin squash in containers?
Yes, you can grow pumpkin squash in containers, but you’ll need a large container (at least 20 gallons) and a dwarf or bush variety. Choose a container with good drainage and fill it with a well-draining potting mix. Provide regular watering and fertilization. Container-grown pumpkins may not grow as large as those grown in the ground, but you can still enjoy a successful harvest.
Leave a Comment