

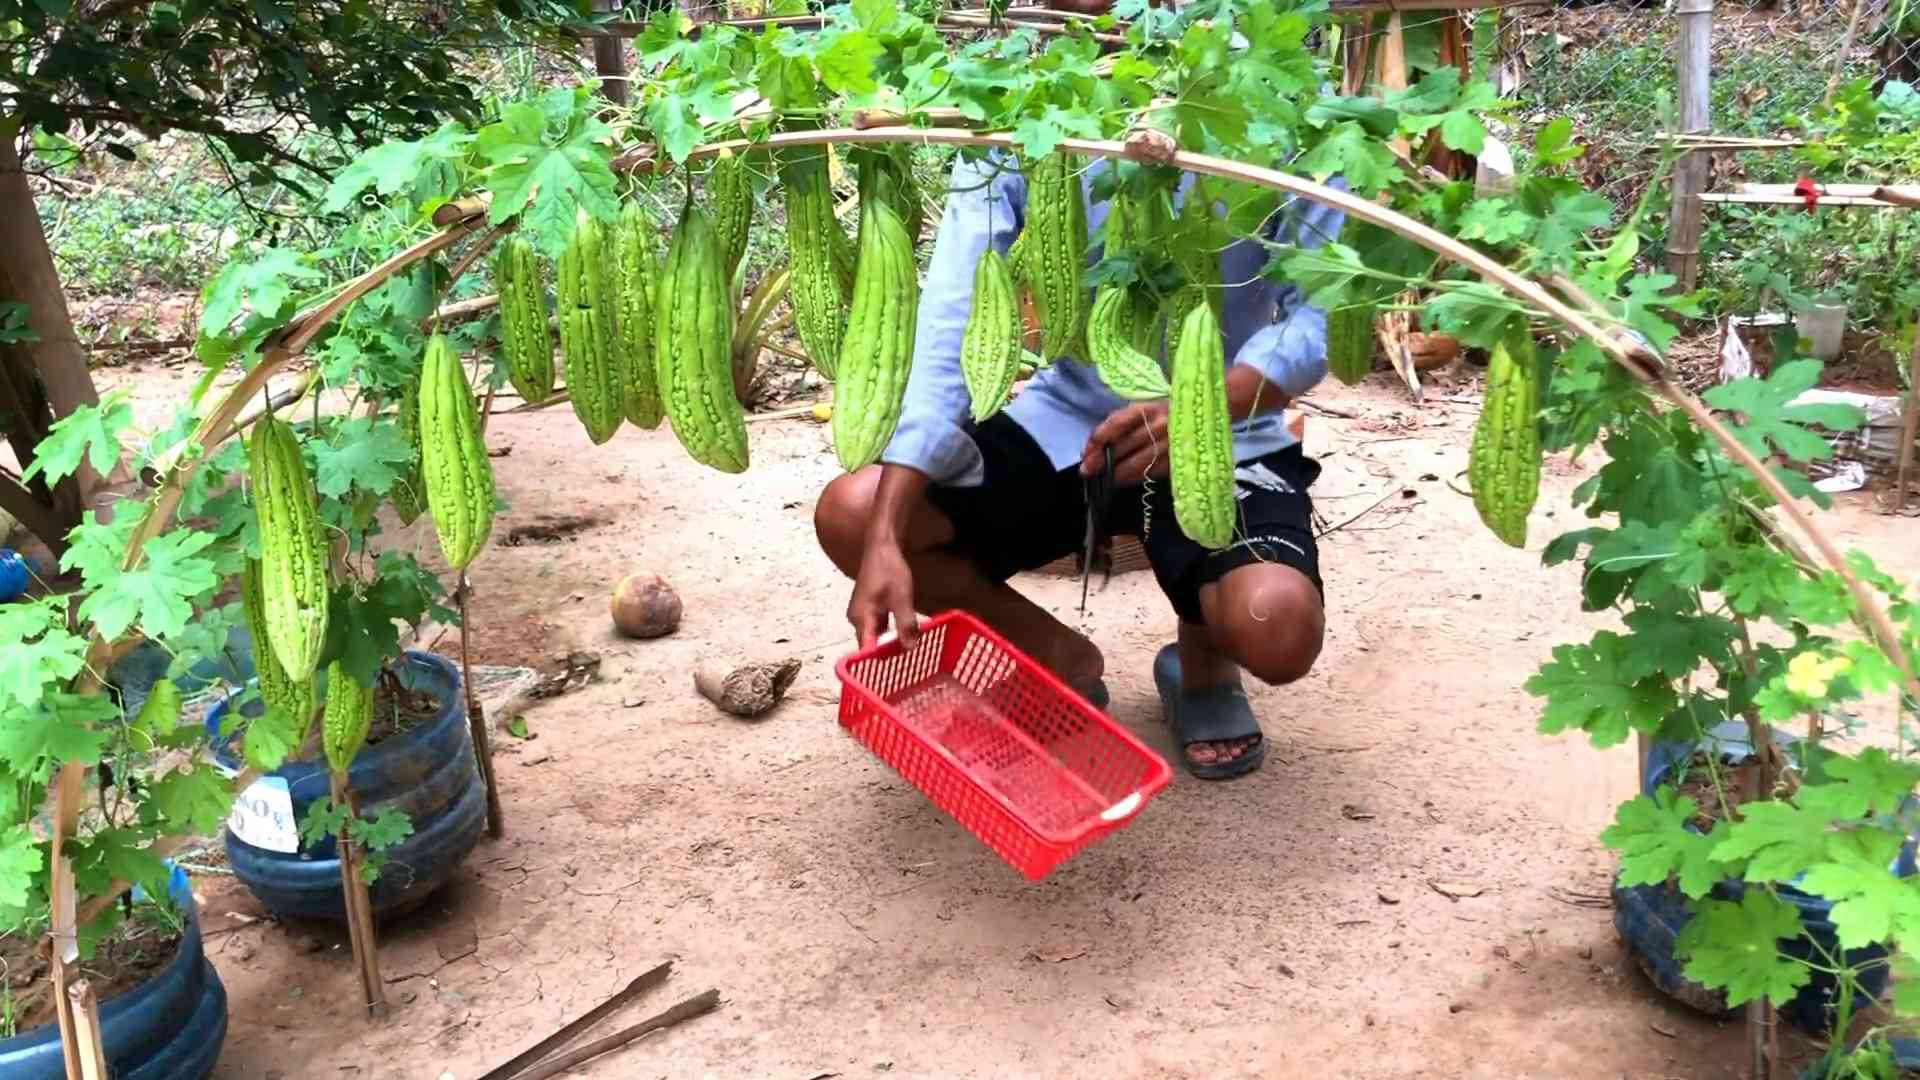
Growing Bitter Melon at Home might seem daunting, but trust me, it’s an incredibly rewarding experience! Have you ever dreamt of strolling into your backyard and harvesting your own vibrant, slightly bitter, yet incredibly healthy gourds? Well, stop dreaming and start doing! This DIY guide is your passport to cultivating this unique vegetable right in your own garden.
Bitter melon, also known as bitter gourd or karela, has a rich history, deeply rooted in Asian and African cultures. For centuries, it’s been prized not only for its distinctive flavor but also for its impressive medicinal properties. From traditional remedies to culinary delights, bitter melon has earned its place as a staple in many households.
But why should you bother growing bitter melon at home? In today’s world, where we’re increasingly conscious of what we eat and where it comes from, having control over your food source is invaluable. Plus, store-bought bitter melon can sometimes be expensive and not always the freshest. With these simple DIY tricks, you can enjoy a constant supply of organic, homegrown bitter melon, knowing exactly what went into its cultivation. I’m excited to share my secrets for successfully growing bitter melon at home, even if you’re a complete beginner. Let’s get our hands dirty and embark on this green adventure together!

Growing Bitter Melon at Home: A Comprehensive DIY Guide
Hey there, fellow gardening enthusiasts! I’m so excited to share my experience with growing bitter melon at home. It might seem intimidating at first, but trust me, with a little patience and the right guidance, you can harvest your own delicious (and healthy!) bitter melons. This guide will walk you through every step, from seed to harvest. Let’s get started!
Choosing the Right Variety and Preparing Your Seeds
Before we dive into the planting process, let’s talk about choosing the right bitter melon variety and prepping those seeds for success.
* Variety Selection: There are several varieties of bitter melon, each with slightly different characteristics. Some are longer and thinner, while others are shorter and rounder. Some are more bitter than others! I personally prefer the Chinese variety, which tends to be less intensely bitter. Do some research and choose a variety that suits your taste and climate.
* Seed Scarification: Bitter melon seeds have a tough outer shell, which can make germination a bit tricky. To help them sprout faster, we need to scarify them. This involves gently nicking or scratching the seed coat.
1. Gather your supplies: You’ll need a small nail file or sandpaper, and a bowl of water.
2. Gently file: Take each seed and gently file or sand down one side of the seed coat. Be careful not to damage the inside of the seed! You just want to thin the outer layer.
3. Soak the seeds: After scarifying, soak the seeds in lukewarm water for 24-48 hours. This will further soften the seed coat and encourage germination.
* Seed Starting (Optional but Recommended): While you can directly sow bitter melon seeds into the ground, I’ve found that starting them indoors gives them a head start, especially in cooler climates.
1. Prepare your seed starting mix: Use a well-draining seed starting mix. You can buy this at your local garden center or make your own by mixing equal parts peat moss, perlite, and vermiculite.
2. Fill your seed starting trays or pots: Fill your chosen containers with the seed starting mix.
3. Plant the seeds: Make a small hole (about 1/2 inch deep) in the soil and place one seed in each hole. Cover the seeds with soil and gently water.
4. Provide warmth and moisture: Keep the soil consistently moist but not soggy. Place the trays or pots in a warm location, ideally around 75-85°F (24-29°C). A heat mat can be helpful.
5. Wait for germination: Germination usually takes 7-14 days. Once the seedlings emerge, provide them with plenty of light. A grow light is ideal, but a sunny windowsill can also work.
Preparing the Garden Bed and Transplanting Seedlings
Now that our seeds are germinating (or if you’re directly sowing), let’s get the garden bed ready. Bitter melon needs plenty of sunshine and well-drained soil.
* Choosing the Right Location: Bitter melon thrives in full sun, meaning at least 6-8 hours of direct sunlight per day. Choose a location in your garden that receives ample sunlight.
* Soil Preparation: Bitter melon prefers well-drained, fertile soil.
1. Clear the area: Remove any weeds, rocks, or debris from the planting area.
2. Amend the soil: Amend the soil with plenty of organic matter, such as compost or well-rotted manure. This will improve drainage, fertility, and water retention. I usually add a generous layer of compost (about 2-3 inches) and work it into the top 6-8 inches of soil.
3. Check the pH: Bitter melon prefers a slightly acidic to neutral soil pH (around 6.0-7.0). You can test your soil pH with a soil testing kit and amend it accordingly.
* Setting Up a Trellis: Bitter melon is a vine, so it needs a trellis or other support structure to climb on. This is crucial for good air circulation and fruit production.
1. Choose your trellis: You can use a variety of trellises, such as a bamboo trellis, a wire fence, or even a sturdy tomato cage. I’ve had success with a simple A-frame trellis made from wooden stakes and chicken wire.
2. Install the trellis: Install the trellis before you transplant the seedlings or sow the seeds. Make sure it’s sturdy enough to support the weight of the mature vines and fruits.
* Transplanting Seedlings (If you started indoors): Once the seedlings have developed a few sets of true leaves and the weather has warmed up (soil temperature above 60°F or 15°C), it’s time to transplant them into the garden.
1. Harden off the seedlings: Before transplanting, you need to harden off the seedlings. This involves gradually exposing them to outdoor conditions over a period of 7-10 days. Start by placing them in a sheltered location for a few hours each day, gradually increasing the amount of time they spend outdoors.
2. Dig the planting holes: Dig holes that are slightly larger than the root balls of the seedlings. Space the holes about 18-24 inches apart.
3. Gently remove the seedlings: Carefully remove the seedlings from their containers, being careful not to damage the roots.
4. Plant the seedlings: Place the seedlings in the holes and backfill with soil. Gently firm the soil around the base of the plants.
5. Water thoroughly: Water the seedlings thoroughly after transplanting.
Caring for Your Bitter Melon Plants
Once your bitter melon plants are in the ground, it’s important to provide them with proper care to ensure healthy growth and abundant fruit production.
* Watering: Bitter melon needs consistent moisture, especially during hot, dry weather. Water deeply and regularly, aiming to keep the soil consistently moist but not waterlogged. I usually water my plants every 2-3 days, depending on the weather.
* Fertilizing: Bitter melon is a heavy feeder, so it benefits from regular fertilization.
1. Initial fertilization: After transplanting, fertilize the plants with a balanced fertilizer (e.g., 10-10-10) according to the package directions.
2. Ongoing fertilization: Continue to fertilize the plants every 2-3 weeks with a fertilizer that is high in phosphorus and potassium. You can use a liquid fertilizer or a slow-release granular fertilizer. I like to use a seaweed emulsion fertilizer, which provides essential nutrients and trace minerals.
* Pruning: Pruning can help to improve air circulation and fruit production.
1. Remove suckers: Remove any suckers (shoots that grow from the base of the plant) to encourage the plant to focus its energy on fruit production.
2. Pinch back the tips: Pinch back the tips of the vines to encourage branching and more fruit production.
* Pest and Disease Control: Bitter melon can be susceptible to certain pests and diseases.
1. Common pests: Common pests include aphids, spider mites, and squash bugs. Inspect your plants regularly for signs of infestation and take action promptly. You can use insecticidal soap, neem oil, or other organic pest control methods.
2. Common diseases: Common diseases include powdery mildew and downy mildew. These diseases can be prevented by providing good air circulation and avoiding overhead watering. If you notice signs of disease, treat the plants with a fungicide.
* Supporting the Vines: As the vines grow, you may need to help them climb the trellis. Gently guide the vines onto the trellis and tie them in place with soft twine or plant ties.
Harvesting Your Bitter Melons
The moment we’ve all been waiting for – harvesting! Knowing when to harvest is key to getting the best flavor and texture.
* When to Harvest: Bitter melons are typically ready to harvest about 2-3 months after planting. The exact timing will depend on the variety and growing conditions.
1. Check the size and color: Harvest the fruits when they are about two-thirds of their mature size and still green. The skin should be firm and smooth.
2. Look for slight yellowing: As the fruits mature, they will start to turn yellow. It’s best to harvest them before they turn completely yellow, as they will become more bitter and the seeds will harden.
* How to Harvest:
1. Use pruning shears or a sharp knife: Cut the fruits from the vine with pruning shears or a sharp knife, leaving a short stem attached.
2. Handle with care: Handle the fruits carefully to avoid bruising or damaging them.
* Post-Harvest Handling:
1.
Conclusion
So, there you have it! Growing bitter melon at home, while it might seem daunting at first, is a deeply rewarding experience that brings fresh, healthy produce right to your table. We’ve walked through the essential steps, from selecting the right seeds and preparing the soil to providing the necessary support and diligently managing pests. But why should you actually dedicate your time and effort to this endeavor?
The answer lies in the unparalleled freshness and control you gain over your food. Store-bought bitter melon often lacks the vibrant flavor and crisp texture of homegrown varieties. Plus, you can be absolutely certain that your homegrown bitter melon is free from harmful pesticides and chemicals, a significant advantage for health-conscious individuals. Beyond the health benefits, there’s a unique satisfaction in nurturing a plant from seed to harvest, witnessing its growth, and ultimately enjoying the fruits (or rather, vegetables!) of your labor.
This isn’t just about growing a vegetable; it’s about connecting with nature, learning new skills, and embracing a more sustainable lifestyle. And let’s be honest, the bragging rights that come with serving a dish made with your own homegrown bitter melon are pretty sweet too!
But the journey doesn’t end here. Feel free to experiment with different varieties of bitter melon. Some are smaller and more compact, ideal for container gardening, while others boast a more intense bitterness. Consider adding companion plants like basil or marigolds to your garden to naturally deter pests and enhance the overall health of your bitter melon vines. You can also explore different trellising methods to maximize space and sunlight exposure. Perhaps you’ll discover a new favorite method for supporting your vines or a unique way to incorporate your harvest into delicious recipes.
Don’t be afraid to get creative! Try pickling your bitter melon, adding it to stir-fries, or even juicing it for a powerful health boost. The possibilities are endless.
Ultimately, the success of your bitter melon growing adventure hinges on your willingness to learn, adapt, and persevere. There will be challenges along the way, but with patience and dedication, you’ll be rewarded with a bountiful harvest of this nutritious and flavorful vegetable.
We wholeheartedly encourage you to give growing bitter melon at home a try. It’s an investment in your health, your well-being, and your connection to the natural world. And most importantly, we want to hear about your experiences! Share your tips, triumphs, and even your challenges in the comments below. Let’s build a community of passionate home gardeners who are dedicated to growing their own food and sharing their knowledge with others. Your insights could be invaluable to someone just starting out on their own bitter melon growing journey. So, grab your seeds, get your hands dirty, and let’s grow together!
Frequently Asked Questions (FAQ)
Q: What is the best time of year to plant bitter melon?
A: Bitter melon thrives in warm weather, so the best time to plant is in late spring or early summer, after the last frost has passed. The soil temperature should be at least 65°F (18°C) for optimal germination. If you live in a region with a short growing season, you can start seeds indoors 4-6 weeks before the last expected frost and transplant them outdoors once the weather warms up.
Q: How much sunlight does bitter melon need?
A: Bitter melon requires at least 6-8 hours of direct sunlight per day to produce a healthy crop. Choose a planting location that receives ample sunlight throughout the day. If you’re growing bitter melon in containers, make sure to place them in a sunny spot. Insufficient sunlight can lead to stunted growth and reduced fruit production.
Q: What type of soil is best for growing bitter melon?
A: Bitter melon prefers well-draining, fertile soil that is rich in organic matter. Amend your soil with compost or well-rotted manure before planting to improve its fertility and drainage. A slightly acidic to neutral soil pH (6.0-7.0) is ideal. Avoid planting in heavy clay soil, as it can retain too much moisture and lead to root rot.
Q: How often should I water my bitter melon plants?
A: Water your bitter melon plants regularly, especially during hot and dry weather. Keep the soil consistently moist, but avoid overwatering, which can lead to root rot. Water deeply at the base of the plants, rather than overhead, to prevent fungal diseases. Mulching around the plants can help retain moisture in the soil and suppress weed growth.
Q: What kind of fertilizer should I use for bitter melon?
A: Bitter melon benefits from regular fertilization throughout the growing season. Use a balanced fertilizer (e.g., 10-10-10) at planting time and then switch to a fertilizer that is higher in phosphorus and potassium during the flowering and fruiting stages. You can also supplement with organic fertilizers like compost tea or fish emulsion. Avoid over-fertilizing, as it can lead to excessive vegetative growth at the expense of fruit production.
Q: How do I control pests and diseases on my bitter melon plants?
A: Bitter melon can be susceptible to various pests and diseases, including aphids, squash bugs, cucumber beetles, and powdery mildew. Inspect your plants regularly for signs of infestation or disease. Use organic pest control methods, such as insecticidal soap or neem oil, to control pests. Ensure good air circulation around the plants to prevent fungal diseases. Remove any infected leaves or fruits promptly to prevent the spread of disease. Companion planting with herbs like basil or marigolds can also help deter pests.
Q: When is bitter melon ready to harvest?
A: Bitter melon is typically ready to harvest 8-12 weeks after planting. The fruits should be firm, green, and slightly immature. The exact size and color will vary depending on the variety. Harvest the fruits before they turn yellow or orange, as they will become more bitter and less palatable. Use a sharp knife or pruners to cut the fruits from the vine, leaving a short stem attached.
Q: How do I reduce the bitterness of bitter melon?
A: Bitter melon is known for its distinctively bitter taste, but there are several ways to reduce its bitterness. Soaking the sliced bitter melon in salted water for 30 minutes before cooking can help draw out some of the bitterness. You can also blanch the bitter melon in boiling water for a few minutes before cooking. Another technique is to remove the seeds and pith (the white, spongy part inside the fruit) before cooking, as these are the most bitter parts.
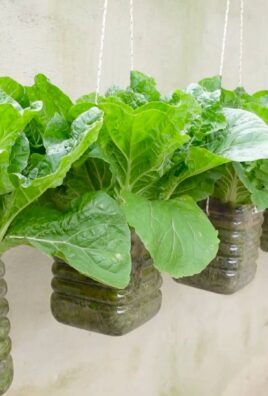
Q: Can I grow bitter melon in containers?
A: Yes, bitter melon can be successfully grown in containers, especially if you choose a compact variety. Use a large container (at least 12 inches in diameter) with good drainage. Fill the container with a well-draining potting mix that is rich in organic matter. Provide a trellis or other support for the vines to climb. Water and fertilize regularly, and make sure the container receives at least 6-8 hours of direct sunlight per day.
Q: Is growing bitter melon at home worth the effort?
A: Absolutely! While it requires some attention and care, growing bitter melon at home offers numerous benefits. You’ll have access to fresh, healthy, and pesticide-free produce. You’ll gain a deeper connection to nature and learn valuable gardening skills. And you’ll enjoy the satisfaction of harvesting your own homegrown vegetables. Plus, the unique flavor and nutritional benefits of bitter melon make it a worthwhile addition to any garden. The ability to control the growing process and ensure the quality of your food makes growing bitter melon at home a truly rewarding experience.

Leave a Comment