

Growing bottle gourd in small spaces can feel like a Herculean task, right? I get it! You dream of fresh, homegrown veggies, but your tiny balcony or patio seems to laugh in the face of your gardening aspirations. But what if I told you that you *can* cultivate these impressive gourds, even without acres of land? This article is your ultimate guide to unlocking the secrets of vertical gardening and clever container techniques, transforming your limited space into a thriving bottle gourd haven.
Bottle gourds, also known as calabash, have a rich history, stretching back thousands of years. Evidence suggests they were among the first cultivated plants, predating even pottery in some cultures! They’ve been used for everything from water containers and musical instruments to, of course, delicious culinary creations. This versatile plant has sustained communities for generations, and now, with a few simple tricks, it can sustain *your* gardening dreams too.
Let’s face it, space is a premium these days. Many of us are living in apartments or smaller homes with limited outdoor areas. But that shouldn’t stop us from enjoying the satisfaction of growing our own food. Growing bottle gourd in small spaces offers a fantastic way to connect with nature, reduce your reliance on store-bought produce, and add a touch of green to your urban landscape. Plus, imagine the bragging rights when you harvest your very own, homegrown bottle gourd! So, let’s dive in and discover the easy-to-follow DIY tricks and hacks that will make your small-space bottle gourd garden a resounding success!
Growing Bottle Gourds Vertically: A Space-Saving DIY Guide
Hey there, fellow gardening enthusiasts! Ever dreamt of harvesting your own bottle gourds but thought you didn’t have the space? Well, think again! I’m here to share my tried-and-true method for growing these amazing vegetables vertically, even in the tiniest of gardens or balconies. Get ready to impress your neighbors with your green thumb and enjoy fresh, homegrown bottle gourds!
What You’ll Need
Before we dive in, let’s gather our supplies. This is crucial for a smooth and enjoyable gardening experience. Trust me, having everything ready beforehand saves a lot of time and frustration!
* Bottle Gourd Seeds: Choose a variety that suits your climate and taste. Local nurseries are your best bet for finding seeds that thrive in your area.
* Large Container (at least 15-20 gallons): A sturdy pot, grow bag, or even a repurposed container will work. Make sure it has drainage holes!
* Well-Draining Potting Mix: This is super important! Bottle gourds need soil that retains moisture but doesn’t get waterlogged. A mix of garden soil, compost, and perlite or vermiculite is ideal.
* Strong Trellis or Support Structure: This is the key to vertical gardening! You can use a bamboo trellis, a metal frame, sturdy netting, or even repurpose an old ladder. The taller and stronger, the better! Bottle gourds get heavy.
* Twine or Plant Ties: For gently guiding the vines and securing them to the trellis.
* Fertilizer: A balanced fertilizer (like 10-10-10) or a fertilizer specifically formulated for vegetables.
* Watering Can or Hose: For regular watering.
* Gardening Gloves: To keep your hands clean and protected.
* Hand Trowel or Shovel: For planting and transplanting.
* Pruning Shears or Scissors: For trimming and shaping the vines.
* Optional: Mulch (straw, wood chips, or shredded leaves) to help retain moisture and suppress weeds.
Phase 1: Seed Starting and Germination
Starting your bottle gourd seeds indoors gives them a head start, especially if you live in a cooler climate. I’ve found this method significantly improves germination rates and overall plant health.
1. Soaking the Seeds: Before planting, soak the bottle gourd seeds in lukewarm water for 24 hours. This helps soften the seed coat and encourages faster germination. I usually put them in a small bowl and leave them on the kitchen counter.
2. Preparing Seedling Trays or Pots: Fill small seedling trays or individual pots (about 3-4 inches in diameter) with a good quality seed starting mix. Moisten the mix thoroughly.
3. Planting the Seeds: Make a small hole (about 1 inch deep) in the center of each pot or cell. Place one or two seeds in each hole and cover them gently with the seed starting mix.
4. Watering and Providing Warmth: Water the seeds gently using a spray bottle or watering can with a fine rose. Keep the soil consistently moist but not soggy. Place the trays or pots in a warm location (around 70-80°F or 21-27°C). A heat mat can be helpful if you live in a colder area.
5. Waiting for Germination: Germination usually takes about 7-14 days. Be patient! Once the seedlings emerge, provide them with plenty of light. A sunny windowsill or a grow light works well.
6. Thinning (if necessary): If you planted two seeds per pot and both germinate, thin out the weaker seedling, leaving only the strongest one.
Phase 2: Preparing the Container and Trellis
This is where the magic happens! Setting up your container and trellis properly is crucial for supporting the heavy vines and fruits of your bottle gourd plant.
1. Choosing the Right Container: Select a large container (at least 15-20 gallons) with good drainage holes. The bigger, the better! Bottle gourds have extensive root systems. I’ve used everything from large plastic tubs to repurposed barrels.
2. Preparing the Potting Mix: Fill the container with a well-draining potting mix. As I mentioned earlier, a mix of garden soil, compost, and perlite or vermiculite works wonders. Make sure the mix is loose and airy.
3. Installing the Trellis: This is the most important part! Position the trellis securely in the container. Make sure it’s strong enough to support the weight of the mature plant and its fruits. You can bury the base of the trellis in the soil or attach it to the container using brackets or zip ties. I’ve found that A-frame trellises or sturdy netting attached to a wall or fence work particularly well.
4. Testing the Stability: Give the trellis a good shake to make sure it’s stable and won’t topple over when the plant gets heavy. Reinforce it if necessary.
Phase 3: Transplanting and Initial Care
Now it’s time to move your seedlings into their new home and give them the care they need to thrive.
1. Hardening Off the Seedlings: Before transplanting, gradually acclimate the seedlings to outdoor conditions. This process, called “hardening off,” helps them adjust to the sun, wind, and temperature changes. Start by placing the seedlings outdoors in a sheltered location for a few hours each day, gradually increasing the time over a week or two.
2. Transplanting the Seedlings: Once the seedlings are hardened off and the weather is warm enough (no danger of frost), it’s time to transplant them into the container. Dig a hole in the center of the container that’s large enough to accommodate the root ball. Gently remove the seedling from its pot or tray and place it in the hole. Backfill with potting mix and water thoroughly.
3. Providing Support: Gently guide the vines towards the trellis and secure them with twine or plant ties. As the plant grows, continue to train the vines to climb the trellis.
4. Watering Regularly: Bottle gourds need consistent moisture, especially during hot weather. Water deeply whenever the top inch of soil feels dry to the touch. Avoid overwatering, which can lead to root rot.
5. Fertilizing: Feed the plant with a balanced fertilizer every 2-3 weeks, following the instructions on the fertilizer package. You can also use a liquid seaweed fertilizer for an extra boost.
Phase 4: Ongoing Care and Maintenance
Growing bottle gourds is an ongoing process. Regular maintenance is key to ensuring a healthy and productive plant.
1. Pruning: Pruning helps to encourage branching and fruit production. Remove any dead or yellowing leaves. You can also prune the tips of the vines to encourage more side shoots.
2. Pest and Disease Control: Keep an eye out for pests like aphids, squash bugs, and vine borers. Treat infestations promptly with insecticidal soap or neem oil. Ensure good air circulation to prevent fungal diseases.
3. Pollination: Bottle gourds produce separate male and female flowers. Pollination is necessary for fruit development. If you’re not seeing any fruits developing, you may need to hand-pollinate the flowers. Use a small paintbrush to transfer pollen from the male flowers to the female flowers. The female flowers have a small, immature fruit at the base.
4. Supporting the Fruits: As the bottle gourds grow larger, they may need additional support to prevent them from breaking off the vine. You can use slings made from fabric or netting to support the fruits.
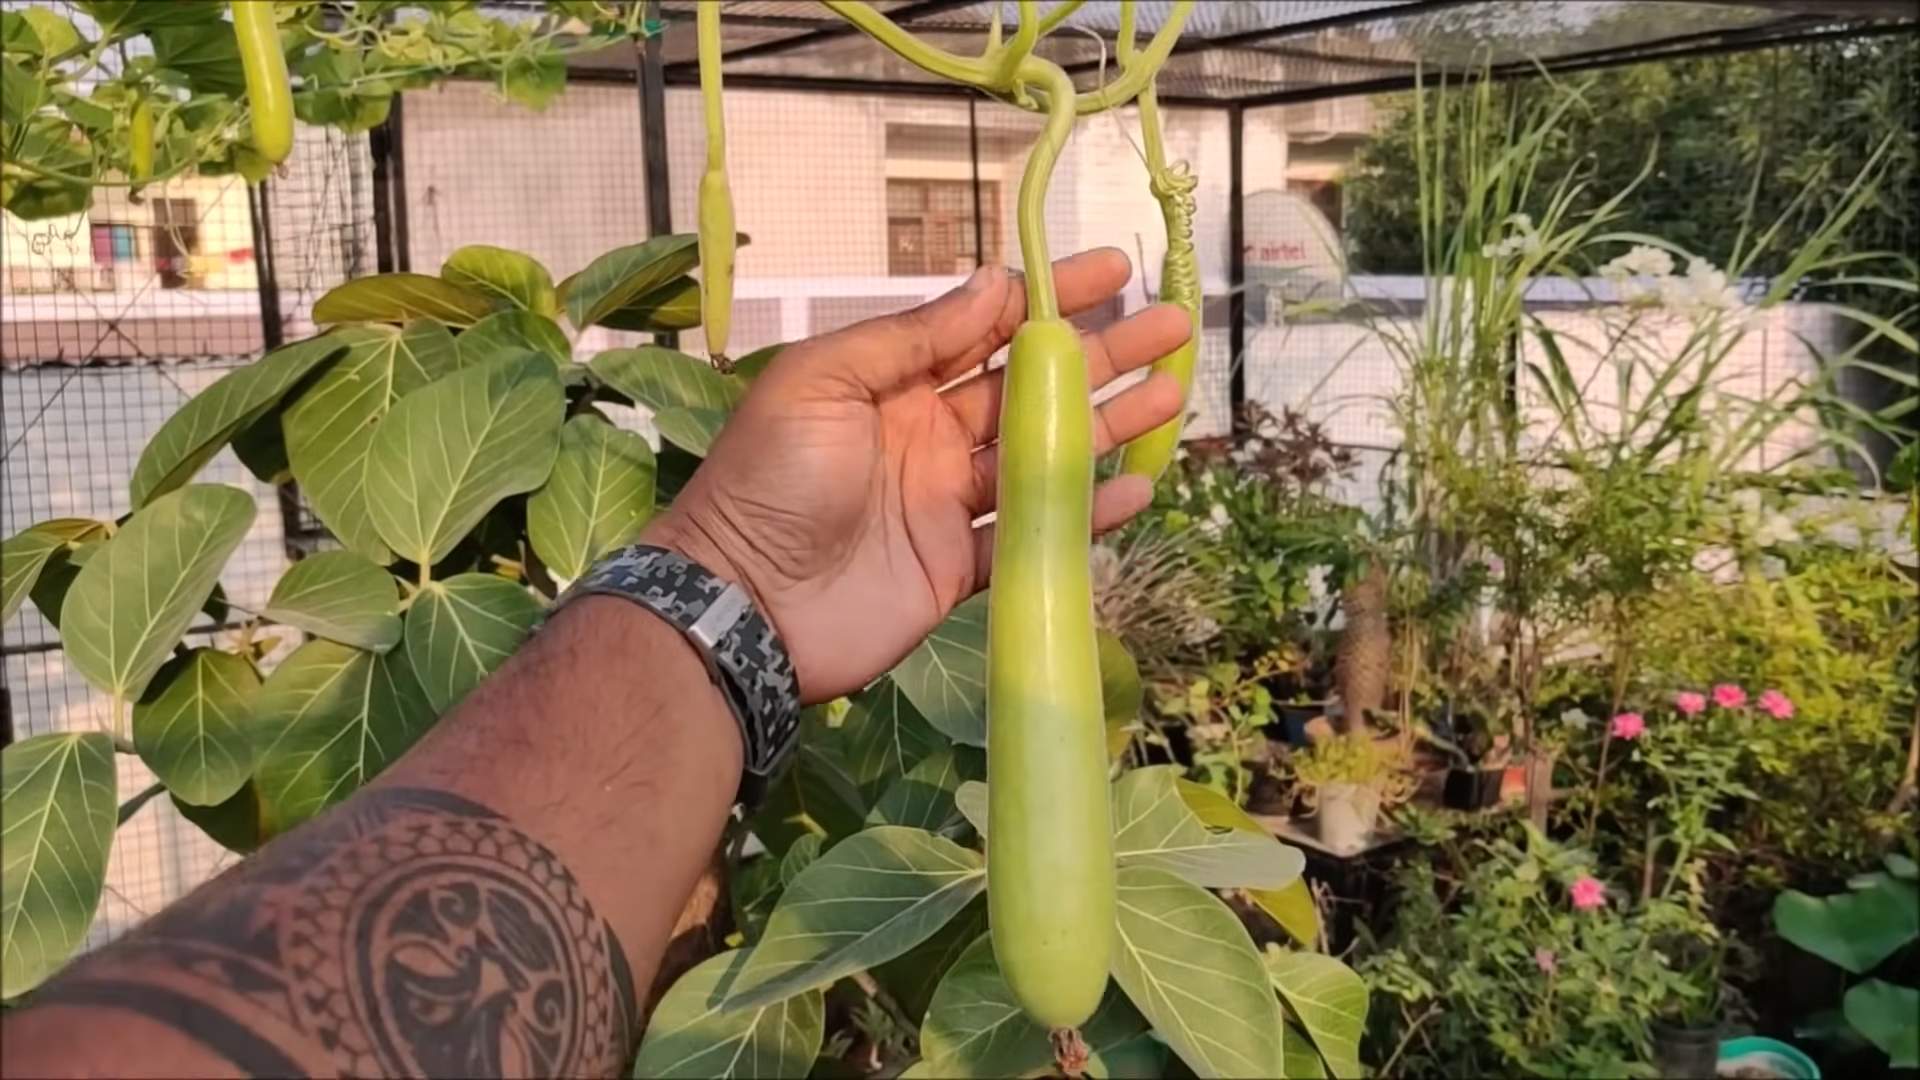
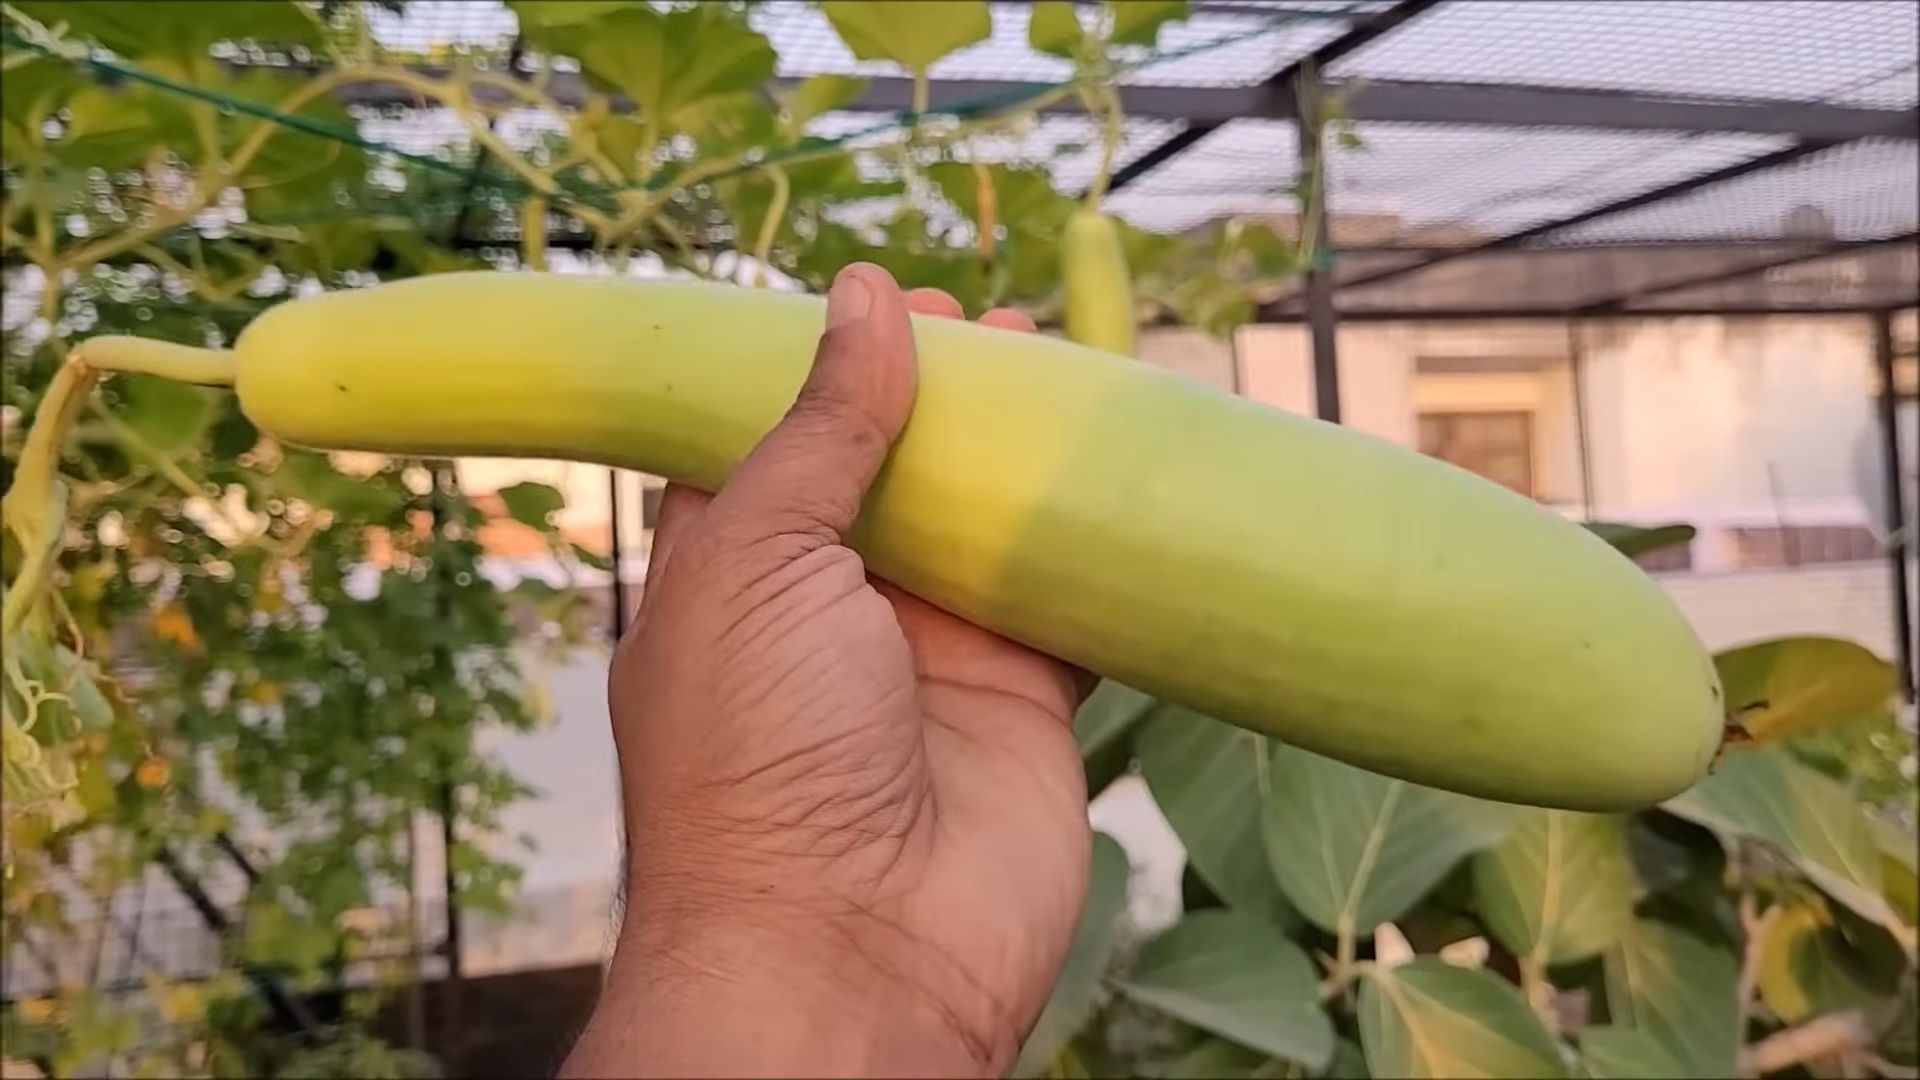
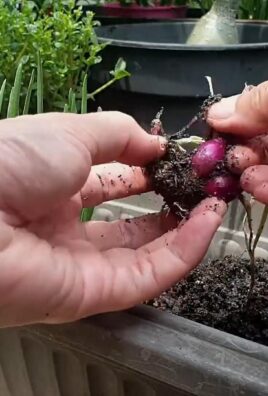
5. Harvesting: Bottle gourds can be harvested when they are young and tender or when they are mature and hard-shelled, depending on your intended use. Young bottle gourds are typically harvested when they are about 12-18 inches long. Mature bottle gourds are harvested when the skin is hard and the seeds rattle inside. Use a sharp knife or pruning shears to cut the bottle gourd from the vine, leaving a short stem attached.
Troubleshooting Tips
Even with the best care, you might encounter some challenges along the way. Here are a few common problems and how to address them:
* Yellowing Leaves: This could be a sign of overwatering, underwatering, nutrient deficiency, or pest infestation. Check the soil moisture, fertilize the plant, and inspect for pests.
* Lack of Fruit Production: This could be due to poor pollination, insufficient sunlight, or nutrient deficiency. Hand-pollinate the flowers, ensure the plant is getting at least 6 hours of sunlight per day, and fertilize regularly.
* Pest Infestation: Treat infestations promptly with insecticidal soap or neem oil. You can also try attracting beneficial insects to your garden, such as ladybugs and lacewings.
* Fungal Diseases: Ensure good air circulation and avoid overhead watering. Treat fungal diseases with a fungicide if necessary.
Conclusion
So, there you have it! Growing bottle gourd, even in the confines of a small space, is not only achievable but also incredibly rewarding. This DIY trick, focusing on vertical gardening techniques and strategic pruning, unlocks the potential of this versatile vegetable for even the most urban of gardeners. We’ve shown you how to maximize yield without sacrificing precious square footage.
Why is this a must-try? Because it empowers you to cultivate fresh, organic produce right at your doorstep, regardless of your living situation. Imagine the satisfaction of harvesting your own bottle gourd, knowing exactly where it came from and how it was grown. Beyond the practical benefits, it’s a therapeutic and engaging hobby that connects you with nature and provides a tangible sense of accomplishment.
But the beauty of this method lies in its adaptability. Feel free to experiment with different trellis designs to suit your aesthetic preferences and available space. Consider using recycled materials for your trellis to further reduce your environmental impact. You can also explore different bottle gourd varieties, from the classic long-necked types to the smaller, rounder cultivars, to find the perfect fit for your culinary needs.
For those looking to enhance the flavor profile of their bottle gourds, consider companion planting. Marigolds can help deter pests, while basil can improve the overall health of your plants. Remember to consistently monitor your plants for any signs of disease or pests and take appropriate action promptly.
Don’t be afraid to get creative with your bottle gourd recipes! From savory curries and stir-fries to refreshing juices and even desserts, the possibilities are endless. Explore different cuisines and experiment with various flavor combinations to discover your own signature bottle gourd dishes.
We wholeheartedly encourage you to give this DIY trick a try. It’s a simple, effective, and sustainable way to enjoy the benefits of homegrown produce, even in the smallest of spaces. We are confident that you’ll be amazed by the results.
Once you’ve embarked on your bottle gourd growing journey, we’d love to hear about your experiences! Share your photos, tips, and challenges in the comments section below. Let’s create a community of bottle gourd enthusiasts and learn from each other’s successes and failures. Together, we can make urban gardening more accessible and rewarding for everyone. So, grab your seeds, build your trellis, and get ready to experience the joy of growing your own bottle gourd!
Frequently Asked Questions (FAQs)
What kind of soil is best for growing bottle gourd in small spaces?
Bottle gourds thrive in well-draining, fertile soil that is rich in organic matter. A good starting point is a mix of equal parts garden soil, compost, and coco coir or peat moss. This combination provides the necessary nutrients, drainage, and water retention for healthy growth. You can also amend your soil with slow-release fertilizer to provide a steady supply of nutrients throughout the growing season. Before planting, it’s always a good idea to test your soil pH. Bottle gourds prefer a slightly acidic to neutral pH, ideally between 6.0 and 7.0. If your soil is too alkaline, you can amend it with sulfur or acidic compost.
How much sunlight does a bottle gourd plant need when grown vertically?
Bottle gourds are sun-loving plants and require at least 6-8 hours of direct sunlight per day to thrive. When growing them vertically, ensure that your trellis or support structure is positioned in a location that receives ample sunlight throughout the day. If you’re growing them on a balcony or patio, consider the direction your space faces and choose a spot that gets the most sun exposure. If you live in a particularly hot climate, some afternoon shade can be beneficial to prevent the leaves from scorching. However, insufficient sunlight can lead to weak growth, reduced flowering, and smaller fruits.
How often should I water my bottle gourd plant in a container?
Watering frequency depends on several factors, including the size of your container, the type of soil you’re using, the weather conditions, and the stage of growth of your plant. As a general rule, water deeply whenever the top inch of soil feels dry to the touch. During hot, dry weather, you may need to water daily, while during cooler, wetter periods, you can water less frequently. Avoid overwatering, as this can lead to root rot. Ensure that your container has adequate drainage holes to prevent water from accumulating at the bottom. A good way to check if your plant needs water is to lift the container. If it feels light, it’s likely time to water.
What type of trellis is best suited for growing bottle gourd in a small space?
The best type of trellis for growing bottle gourd in a small space is one that is sturdy, space-efficient, and provides adequate support for the heavy fruits. Some popular options include:
* **A-frame trellis:** This type of trellis is self-supporting and can be easily constructed from wood or bamboo. It provides ample space for the vines to climb and is relatively stable.
* **Teepee trellis:** Similar to the A-frame trellis, the teepee trellis is also self-supporting and can be made from various materials. It’s a visually appealing option that adds a touch of charm to your garden.
* **Wall-mounted trellis:** If you have a wall or fence available, you can install a wall-mounted trellis made of metal or wood. This option is ideal for maximizing space in small areas.
* **Netting:** Heavy-duty netting stretched between two posts or attached to a frame can also serve as a trellis for bottle gourds.
Regardless of the type of trellis you choose, make sure it’s strong enough to support the weight of the mature fruits.
How do I pollinate bottle gourd flowers if I don’t see any bees?
Bottle gourds have separate male and female flowers. If you’re not seeing any bees or other pollinators visiting your plants, you may need to hand-pollinate the flowers to ensure fruit production. Here’s how to do it:
1. Identify the male and female flowers. Male flowers have a long, slender stem, while female flowers have a small, immature fruit at the base.
2. In the early morning, when the flowers are fully open, use a small paintbrush or cotton swab to collect pollen from the male flower.
3. Gently transfer the pollen to the stigma (the sticky part) of the female flower.
4. Repeat this process for several female flowers to increase your chances of success.
Hand-pollination is most effective when done in the morning, as the pollen is most viable at this time.
How do I prevent pests and diseases from affecting my bottle gourd plants?
Preventing pests and diseases is crucial for successful bottle gourd cultivation. Here are some tips:
* **Choose disease-resistant varieties:** When selecting seeds, opt for varieties that are known to be resistant to common bottle gourd diseases.
* **Practice crop rotation:** Avoid planting bottle gourds in the same spot year after year to prevent the buildup of soilborne diseases.
* **Maintain good air circulation:** Ensure that your plants have adequate spacing to allow for good air circulation, which helps to prevent fungal diseases.
* **Water properly:** Avoid overwatering and water at the base of the plant to prevent the leaves from getting wet, which can promote fungal growth.
* **Monitor for pests:** Regularly inspect your plants for signs of pests, such as aphids, spider mites, and squash bugs.
* **Use organic pest control methods:** If you find pests, use organic pest control methods, such as insecticidal soap, neem oil, or diatomaceous earth.
* **Remove diseased leaves:** If you notice any leaves with signs of disease, remove them promptly to prevent the spread of the infection.
When is the best time to harvest bottle gourds?
The best time to harvest bottle gourds depends on the variety and your intended use. For culinary purposes, harvest the gourds when they are young and tender, typically when they are about one-third to one-half of their mature size. The skin should be smooth and easily punctured with your fingernail. For crafting purposes, allow the gourds to mature fully on the vine until the skin becomes hard and the stem begins to dry out. The gourd should feel light and hollow when tapped.
Can I grow bottle gourd indoors?
While it’s possible to start bottle gourd seeds indoors, it’s generally not recommended to grow them indoors for their entire life cycle. Bottle gourds require a lot of space, sunlight, and pollination, which can be difficult to provide indoors. However, if you have a very sunny and spacious indoor area, you could try growing them in a large container with a sturdy trellis. You’ll need to ensure that they receive at least 6-8 hours of direct sunlight per day and hand-pollinate the flowers to ensure fruit production.
Leave a Comment