

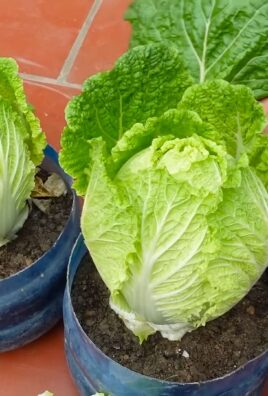
Growing Cabbage in Plastic Bottles: Sounds a little crazy, right? But trust me, this ingenious DIY trick is about to revolutionize your small-space gardening game! Forget sprawling gardens and back-breaking labor; we’re bringing the farm to your balcony, patio, or even windowsill.
For centuries, cabbage has been a staple in diets around the world, from the hearty stews of Eastern Europe to the vibrant slaws of Asia. Its resilience and nutritional value have made it a beloved crop, but traditionally, growing it required ample space. That’s where our plastic bottle hack comes in!
In today’s world, many of us are living in apartments or smaller homes with limited outdoor space. We crave fresh, homegrown produce, but the thought of a traditional garden feels overwhelming. That’s why this DIY method for growing cabbage in plastic bottles is so essential. It allows anyone, regardless of their living situation, to enjoy the satisfaction of harvesting their own delicious, crunchy cabbage. Plus, it’s a fantastic way to recycle those plastic bottles and reduce waste! I’m excited to show you how easy and rewarding it can be. Let’s get started!
Growing Cabbage in Plastic Bottles: A Beginner’s Guide
Hey there, fellow gardening enthusiasts! Ever thought about growing cabbage in plastic bottles? It might sound a little unconventional, but trust me, it’s a fantastic way to save space, recycle, and enjoy fresh, homegrown cabbage, even if you have limited garden space. I’ve been doing this for a while now, and I’m excited to share my secrets with you. Let’s dive in!
What You’ll Need
Before we get started, let’s gather all the necessary materials. This will make the whole process smoother and more enjoyable.
* Plastic Bottles: The bigger, the better! I usually use 2-liter soda bottles or even larger water bottles. Make sure they’re clean and have their labels removed. You’ll need one bottle per cabbage plant.
* Cabbage Seeds or Seedlings: You can start from seeds or buy seedlings from your local nursery. I personally prefer starting from seeds, as it gives me more control over the whole process.
* Potting Mix: A good quality potting mix is essential for healthy cabbage growth. Avoid using garden soil directly, as it can be too heavy and may contain pests or diseases.
* Perlite or Vermiculite: These help improve drainage and aeration in the potting mix.
* Fertilizer: A balanced, slow-release fertilizer will provide your cabbage plants with the nutrients they need to thrive. I like to use a fertilizer specifically formulated for vegetables.
* Watering Can or Hose: For watering your cabbage plants.
* Scissors or a Utility Knife: For cutting the plastic bottles.
* Drill or Nail: For creating drainage holes in the bottles.
* Gloves: To protect your hands.
* Optional: A tray or container to place the bottles in, which will help with watering and prevent messes.
Preparing the Plastic Bottles
This is a crucial step, so pay close attention. We need to transform those plastic bottles into suitable homes for our cabbage plants.
1. Clean the Bottles: Thoroughly wash the plastic bottles with soap and water to remove any residue. Rinse them well and let them dry completely.
2. Cut the Bottles: There are a couple of ways you can cut the bottles, depending on your preference.
* Option 1: Cut the bottle in half horizontally. You’ll be using the bottom half as the container. The top half can be discarded or used for other gardening projects.
* Option 2: Cut a large rectangular opening on one side of the bottle, leaving the top and bottom intact. This creates a sort of “window box” effect. I find this option works well if you want to hang the bottles later.
3. Create Drainage Holes: This is super important! Cabbage plants don’t like sitting in soggy soil. Use a drill or a nail to create several drainage holes in the bottom of the bottle. I usually make about 5-6 holes, evenly spaced.
4. Optional: Add a Layer of Gravel: Before adding the potting mix, you can add a thin layer of gravel or small stones to the bottom of the bottle. This will further improve drainage.
Planting the Cabbage
Now for the fun part – planting our cabbage!
1. Fill the Bottles with Potting Mix: Fill the prepared plastic bottles with potting mix, leaving about an inch of space at the top.
2. Sowing Seeds (if starting from seeds):
* Make a small indentation in the potting mix, about 1/4 inch deep.
* Place 2-3 cabbage seeds in each indentation.
* Gently cover the seeds with potting mix.
* Water gently to moisten the soil.
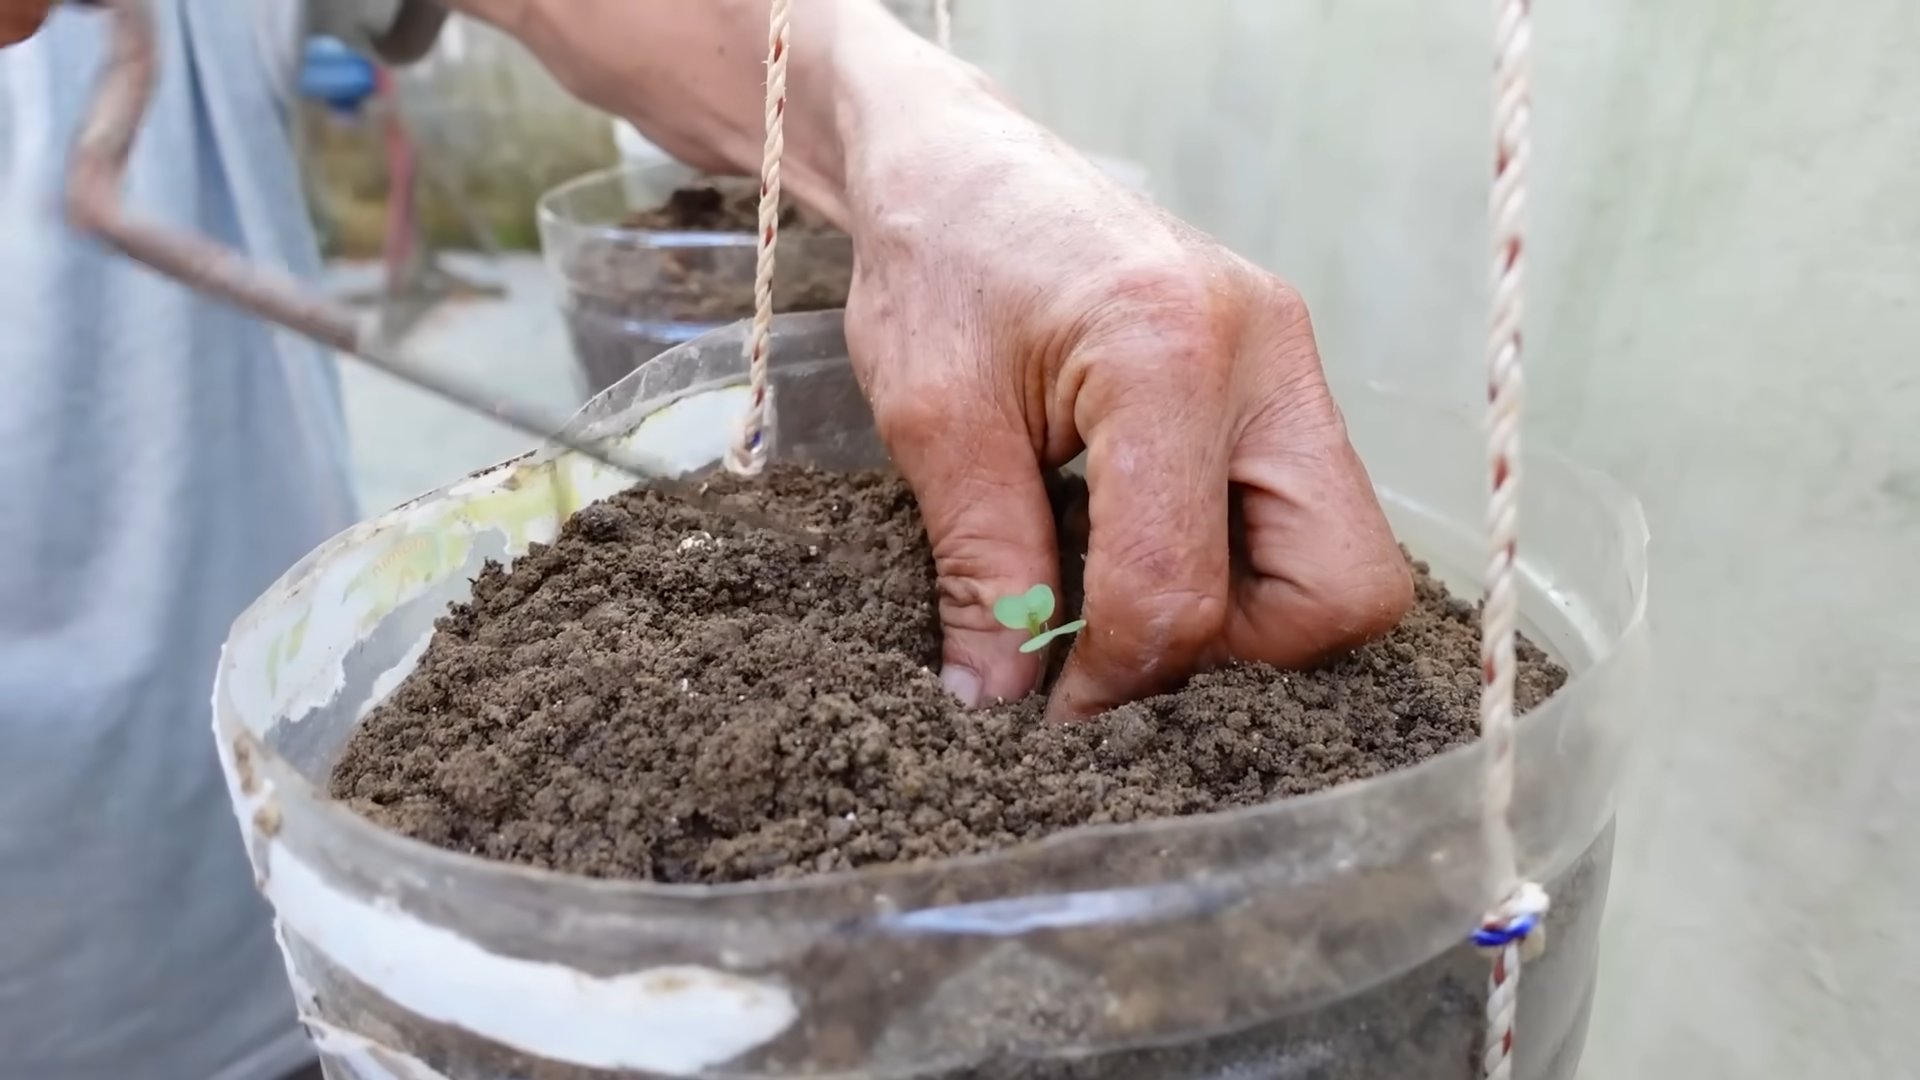
3. Transplanting Seedlings (if using seedlings):
* Carefully remove the seedling from its container.
* Gently loosen the roots.
* Make a hole in the potting mix large enough to accommodate the seedling’s root ball.
* Place the seedling in the hole and gently backfill with potting mix.
* Water gently to moisten the soil.
4. Add Fertilizer: Sprinkle a small amount of slow-release fertilizer on top of the potting mix, following the instructions on the fertilizer package.
5. Label the Bottles: Use a permanent marker to label each bottle with the type of cabbage you’re growing and the date you planted it. This will help you keep track of your plants.
Caring for Your Cabbage Plants
Proper care is essential for healthy cabbage growth. Here’s what you need to do:
1. Watering: Water your cabbage plants regularly, especially during hot and dry weather. The soil should be consistently moist, but not soggy. Check the soil moisture by sticking your finger into the soil. If the top inch feels dry, it’s time to water. I usually water deeply, allowing the water to drain out of the drainage holes.
2. Sunlight: Cabbage plants need at least 6 hours of sunlight per day. Place your bottles in a sunny location, such as a balcony, patio, or windowsill. If you don’t have enough natural sunlight, you can supplement with grow lights.
3. Fertilizing: Cabbage plants are heavy feeders, so they need regular fertilization. Apply a balanced, slow-release fertilizer every 2-3 weeks, following the instructions on the fertilizer package. You can also use a liquid fertilizer, diluted according to the instructions.
4. Pest Control: Keep an eye out for pests, such as aphids, cabbage worms, and slugs. If you notice any pests, take action immediately. You can use organic pest control methods, such as insecticidal soap, neem oil, or hand-picking the pests off the plants. I’ve found that companion planting with herbs like rosemary and thyme can also help deter pests.
5. Weed Control: Remove any weeds that may grow in the bottles. Weeds can compete with your cabbage plants for nutrients and water.
6. Rotating the Bottles: If you’re growing your cabbage plants indoors, rotate the bottles regularly to ensure that all sides of the plant receive equal sunlight. This will prevent the plants from leaning towards the light source.
7. Supporting the Plants: As your cabbage plants grow, they may become top-heavy. You may need to provide support to prevent them from falling over. You can use stakes, trellises, or even just lean the bottles against a wall.
Harvesting Your Cabbage
The moment we’ve all been waiting for – harvesting our homegrown cabbage!
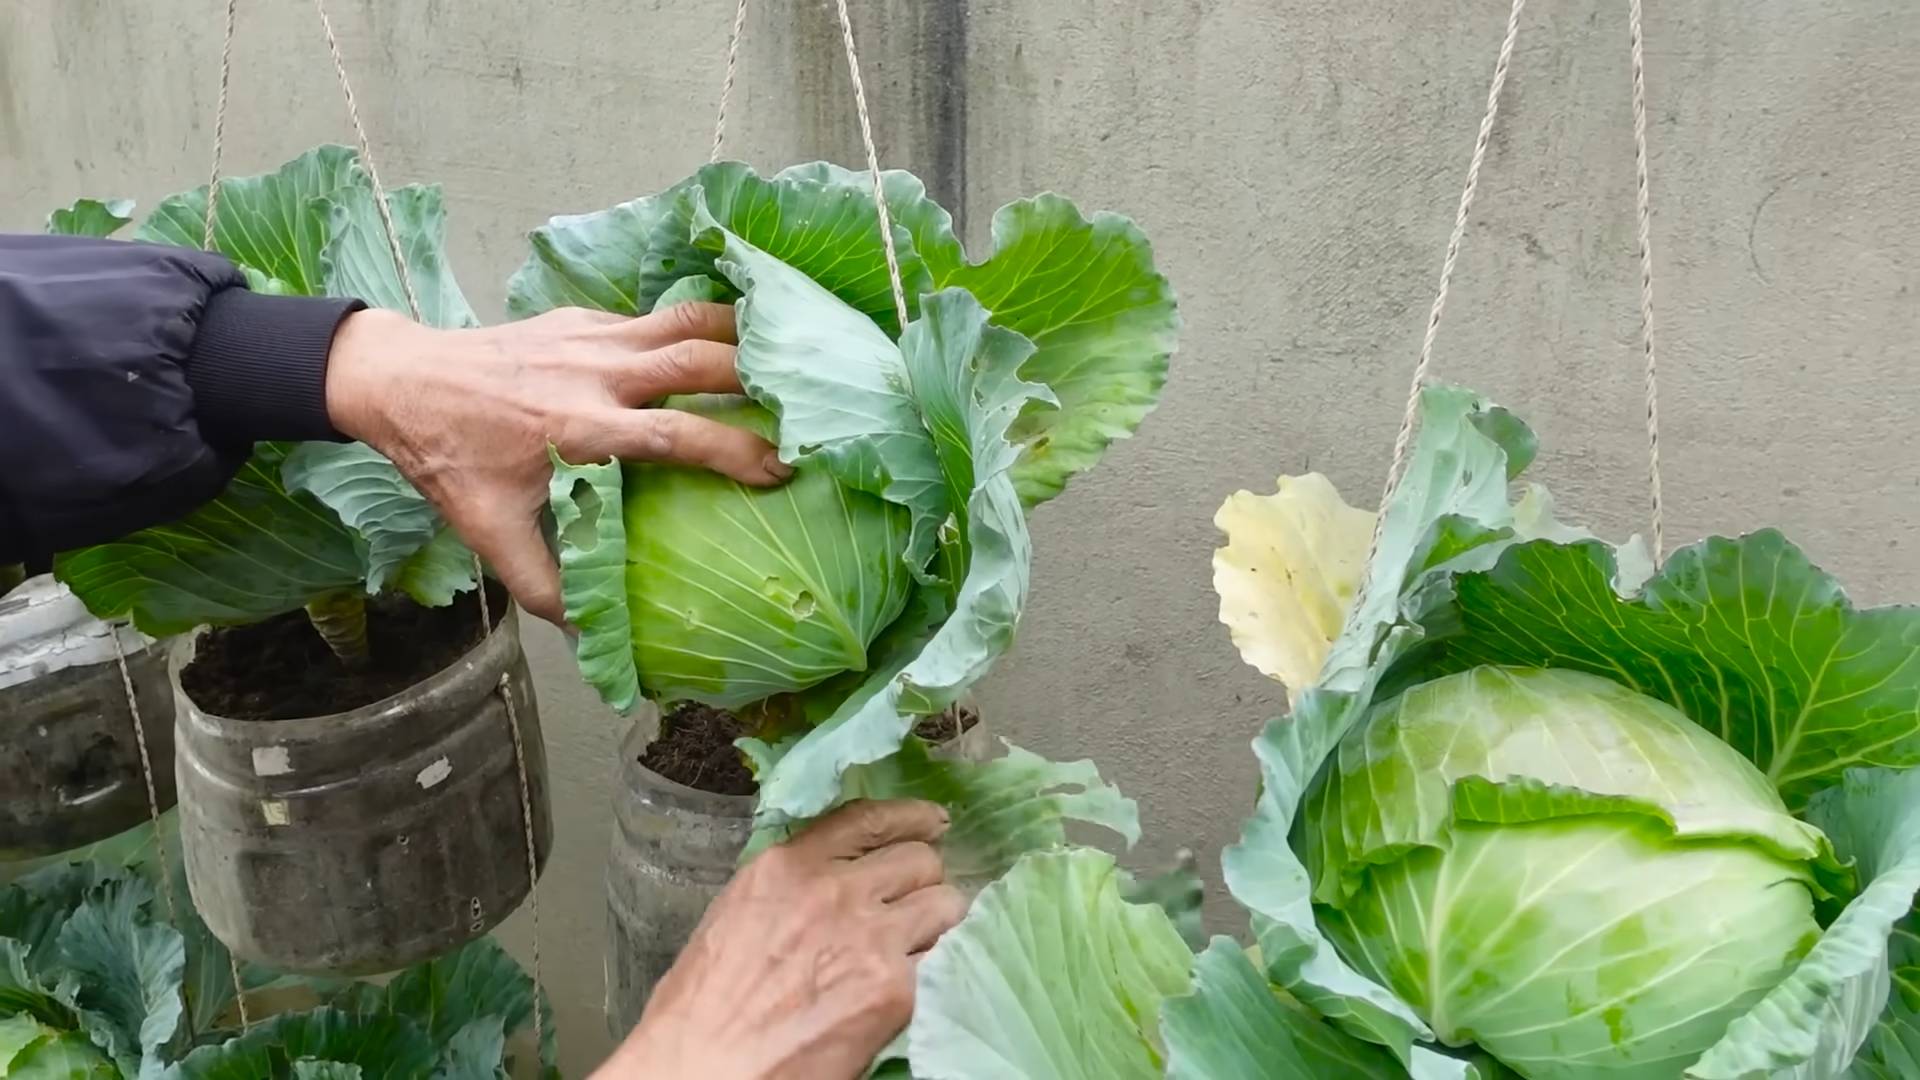
1. Check for Maturity: Cabbage is usually ready to harvest when the head is firm and compact. The size of the head will vary depending on the variety of cabbage you’re growing.
2. Harvesting: Use a sharp knife to cut the cabbage head from the plant, leaving a few outer leaves intact.
3. Storage: Store your harvested cabbage in the refrigerator. It will keep for several weeks.
Troubleshooting
Even with the best care, you may encounter some problems while growing cabbage in plastic bottles. Here are some common issues and how to address them:
* Yellowing Leaves: This could be a sign of overwatering, underwatering, or nutrient deficiency. Check the soil moisture and adjust your watering accordingly. If the soil is consistently moist, you may be overwatering. If the soil is dry, you may be underwatering. If the leaves are yellowing all over, it could be a sign of nutrient deficiency. Apply a balanced fertilizer to address this.
* Stunted Growth: This could be caused by poor soil, lack of sunlight, or pest infestation. Make sure you’re using a good quality potting mix and that your plants are getting enough sunlight. Check for pests and take action if necessary.
* Bolting: Bolting is when the cabbage plant starts to produce flowers prematurely. This is usually caused by stress, such as hot weather or inconsistent watering. To prevent bolting, try to keep your plants cool and well-watered.
* Root Rot: This is caused by overwatering and poor drainage. Make sure your bottles have adequate drainage holes and avoid overwatering. If you suspect root rot, you can try transplanting the plant into fresh potting mix.
Tips and Tricks for Success
Here are a few extra tips and tricks that I’ve learned over the years:
* Choose the Right Variety: Some cabbage varieties are better suited for container gardening than others. Look for compact varieties that don’t get too large.
* Start Early: Start your cabbage seeds indoors 6-8 weeks before the last expected frost. This will give your plants a head start.
* Harden Off Seedlings: Before transplanting your seedlings outdoors, gradually acclimate them to the outdoor conditions. This is called “hardening off.” Start by placing the seedlings outdoors for a few hours each day, gradually increasing the amount of time they spend outdoors.
*
Conclusion
So, there you have it! Growing cabbage in plastic bottles might sound unconventional, but it’s a game-changer for urban gardeners, those with limited space, or anyone looking for a more controlled and efficient way to cultivate this nutritious vegetable. This DIY trick isn’t just about saving space; it’s about creating a microclimate that fosters healthy growth, protecting your precious seedlings from pests and harsh weather, and ultimately, yielding a bountiful harvest of crisp, delicious cabbage.
Think about it: no more battling slugs and snails, no more worrying about soil erosion after a heavy rain, and no more back-breaking weeding sessions. The plastic bottle acts as a mini-greenhouse, retaining moisture and warmth, giving your cabbage plants the perfect environment to thrive. Plus, the portability of the bottles means you can easily move your plants to chase the sun or shelter them from unexpected frosts.
But the beauty of this method lies in its adaptability. Feel free to experiment with different sizes of plastic bottles, depending on the variety of cabbage you’re growing. For smaller varieties like Bok Choy or Napa cabbage, smaller bottles might suffice. For larger heads of green cabbage, opt for larger containers. You can also try painting the bottles white to reflect sunlight and prevent overheating in hotter climates. Consider adding drainage holes at different levels to optimize water flow and prevent root rot.
Don’t be afraid to get creative with your setup! You can arrange the bottles in rows, create vertical gardens by stacking them, or even hang them from a balcony railing. The possibilities are endless!
This method is particularly beneficial for those who struggle with poor soil quality. By using a high-quality potting mix in your plastic bottle containers, you can ensure that your cabbage plants receive the nutrients they need to flourish. You can also easily amend the soil with compost or other organic matter to further enhance its fertility.
We understand that trying new gardening techniques can be daunting, but we urge you to give this DIY trick a try. The rewards are well worth the effort. Imagine the satisfaction of harvesting your own homegrown cabbage, knowing that you nurtured it from seed to table using a simple, sustainable method.
We’re confident that you’ll be amazed by the results. And once you’ve experienced the joy of growing cabbage in plastic bottles, we encourage you to share your experiences with us and the wider gardening community. Post photos of your bottle gardens, share your tips and tricks, and let us know what worked best for you. Together, we can revolutionize the way we grow our food, one plastic bottle at a time. So, grab those empty bottles, get your hands dirty, and start growing your own delicious, homegrown cabbage today! This innovative approach to **growing cabbage** is not only eco-friendly but also incredibly rewarding.
Frequently Asked Questions (FAQ)
What type of plastic bottles are best for growing cabbage?
Ideally, you should use food-grade plastic bottles, such as those that previously contained water, juice, or soda. Avoid using bottles that held chemicals or pesticides, as these could contaminate your plants. The size of the bottle will depend on the variety of cabbage you’re growing. Smaller varieties like Bok Choy or Napa cabbage can thrive in smaller bottles (2-3 liters), while larger varieties like green cabbage or Savoy cabbage will need larger containers (5-10 liters). Make sure the bottles are clean and free of any residue before using them.
How do I prepare the plastic bottles for planting?
First, thoroughly clean the bottles with soap and water to remove any dirt or residue. Then, cut off the top portion of the bottle, leaving enough space for the cabbage plant to grow. Drill drainage holes in the bottom of the bottle to prevent waterlogging. You can also add a layer of gravel or pebbles at the bottom of the bottle to improve drainage. If you live in a hot climate, consider painting the outside of the bottles white to reflect sunlight and prevent the soil from overheating.
What type of soil should I use for growing cabbage in plastic bottles?
Use a high-quality potting mix that is well-draining and rich in organic matter. Avoid using garden soil, as it can be too heavy and may contain pests or diseases. You can also amend the potting mix with compost, aged manure, or other organic materials to improve its fertility. A slightly acidic soil pH (around 6.0 to 6.5) is ideal for cabbage.
How often should I water my cabbage plants in plastic bottles?
Water your cabbage plants regularly, especially during hot and dry weather. The soil should be kept consistently moist, but not waterlogged. Check the soil moisture level by sticking your finger into the soil. If the top inch of soil feels dry, it’s time to water. Avoid watering the foliage, as this can promote fungal diseases. Water early in the morning to allow the foliage to dry before nightfall.
How much sunlight do cabbage plants need?
Cabbage plants need at least 6 hours of sunlight per day to thrive. Choose a location that receives full sun for best results. If you live in a hot climate, provide some afternoon shade to prevent the plants from overheating. The portability of plastic bottles makes it easy to move your plants to chase the sun or shelter them from extreme weather conditions.
How do I fertilize my cabbage plants in plastic bottles?
Cabbage plants are heavy feeders and require regular fertilization. Use a balanced fertilizer (e.g., 10-10-10) or a fertilizer specifically formulated for vegetables. Follow the instructions on the fertilizer package for application rates. You can also use organic fertilizers, such as compost tea or fish emulsion. Fertilize your cabbage plants every 2-3 weeks during the growing season.
How do I protect my cabbage plants from pests and diseases?
Growing cabbage in plastic bottles can help to protect your plants from some pests, such as slugs and snails. However, other pests, such as cabbage worms and aphids, may still be a problem. Inspect your plants regularly for signs of pests or diseases. Handpick any pests that you find, or use an organic insecticide, such as neem oil or insecticidal soap. To prevent diseases, ensure good air circulation around your plants and avoid overwatering.
When is the best time to harvest my cabbage?
Cabbage is typically ready to harvest 60-100 days after planting, depending on the variety. The head should be firm and compact. To harvest, cut the head from the stem with a sharp knife. Leave a few outer leaves on the plant, as these can continue to produce smaller heads.
Can I reuse the plastic bottles for growing other vegetables?
Yes, you can reuse the plastic bottles for growing other vegetables, as long as you clean them thoroughly and ensure that they are free of any contaminants. The bottles are particularly well-suited for growing other leafy greens, such as lettuce, spinach, and kale.
What are the benefits of growing cabbage in plastic bottles compared to traditional gardening methods?
Growing cabbage in plastic bottles offers several advantages over traditional gardening methods, including:
* **Space-saving:** Ideal for urban gardeners or those with limited space.
* **Pest control:** The bottles provide a barrier against slugs, snails, and other ground-dwelling pests.
* **Improved drainage:** The drainage holes in the bottles prevent waterlogging and root rot.
* **Portability:** The bottles can be easily moved to chase the sun or shelter plants from extreme weather.
* **Soil control:** You can use a high-quality potting mix to ensure that your plants receive the nutrients they need.
* **Microclimate:** The bottles create a mini-greenhouse effect, retaining moisture and warmth.
* **Sustainability:** Reusing plastic bottles is an eco-friendly way to reduce waste.
Leave a Comment