

Growing Leeks at Home can seem daunting, but trust me, it’s easier than you think! Imagine stepping outside your back door and snipping fresh, flavorful leeks to add to your favorite soup or stew. Forget those bland, overpriced leeks from the grocery store – with a little know-how, you can cultivate your own delicious supply right in your backyard.
Leeks have a rich history, dating back to ancient Egypt, where they were prized for their culinary and medicinal properties. The Romans, known for their sophisticated cuisine, also embraced leeks, spreading their cultivation throughout Europe. Today, leeks remain a staple in many cuisines, adding a delicate onion-like flavor to dishes around the world.
But why bother with growing leeks at home? Well, for starters, homegrown leeks taste infinitely better than store-bought ones. Plus, you have complete control over the growing process, ensuring that your leeks are free from harmful pesticides and chemicals. And let’s be honest, there’s something incredibly satisfying about harvesting your own food. This DIY guide will provide you with simple, effective tricks and hacks to successfully grow leeks at home, even if you have limited space or gardening experience. I’m excited to share my tips and tricks with you, so let’s get started!
Growing Leeks at Home: A Beginner’s Guide
Hey there, fellow gardening enthusiasts! I’m so excited to share my experience with growing leeks at home. Leeks are such a versatile and delicious vegetable, and honestly, growing them yourself is surprisingly easy and rewarding. Plus, nothing beats the taste of freshly harvested, homegrown leeks! This guide will walk you through every step, from starting seeds to harvesting your own flavorful stalks.
Getting Started: Planning and Preparation
Before we dive into the nitty-gritty, let’s cover some essential planning and preparation. This will set you up for success and ensure your leeks thrive.
* Choosing the Right Variety: There are many leek varieties to choose from, each with its own characteristics. Some mature faster, while others are more cold-hardy. Consider your climate and growing season when selecting a variety. Popular choices include ‘American Flag,’ ‘Giant Musselburgh,’ and ‘King Richard.’ I personally love ‘American Flag’ for its reliability and mild flavor.
* Timing is Key: Leeks have a long growing season, typically requiring 120-150 days from seed to harvest. Start your seeds indoors 8-10 weeks before the last expected frost in your area. This gives them a head start and allows them to mature fully.
* Soil Preparation: Leeks prefer rich, well-drained soil with a pH between 6.0 and 7.0. Amend your garden soil with plenty of compost or well-rotted manure to improve its fertility and drainage. I always add a generous amount of compost to my leek bed – they absolutely love it!
* Sunlight Requirements: Leeks need at least 6 hours of sunlight per day to thrive. Choose a location in your garden that receives plenty of sunshine.
* Gather Your Supplies: Before you start, make sure you have all the necessary supplies on hand. This includes:
* Leek seeds
* Seed starting trays or pots
* Seed starting mix
* Watering can or spray bottle
* Garden trowel
* Compost or well-rotted manure
* Fertilizer (optional)
* Mulch (optional)
Starting Leek Seeds Indoors
Now for the fun part – starting your leek seeds! This is a crucial step in the process, so pay close attention to the details.
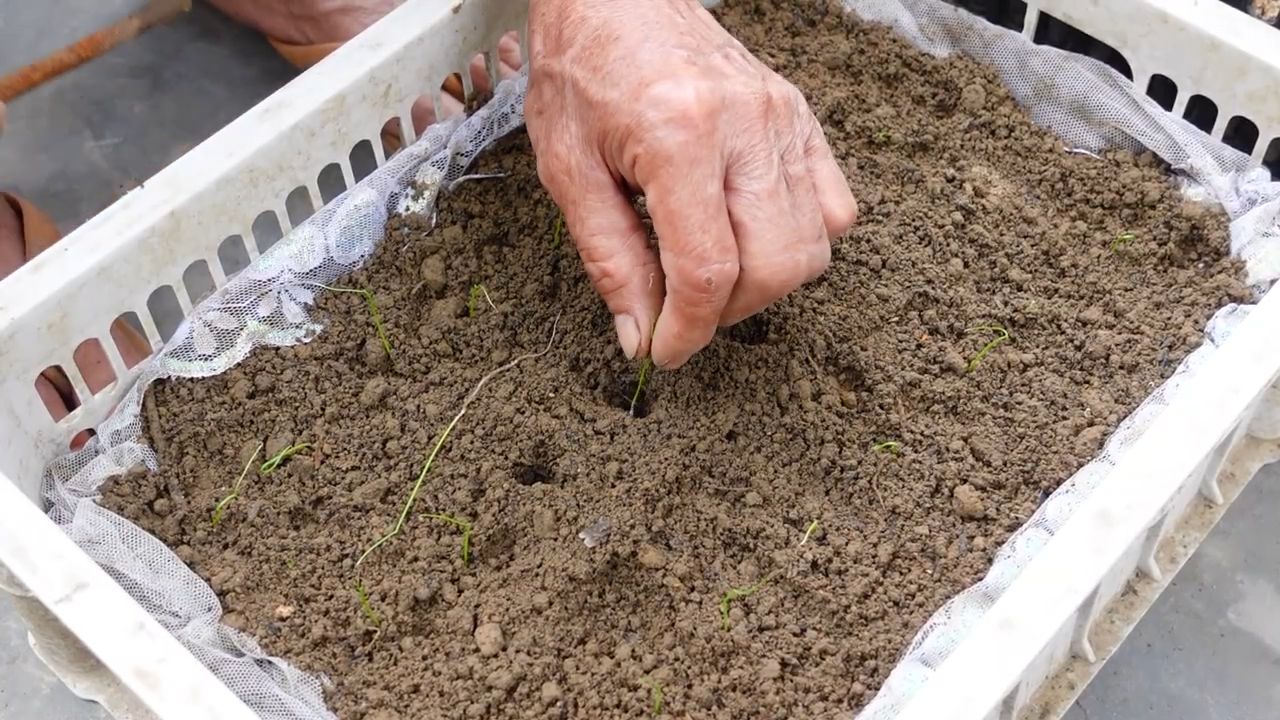
1. Prepare Your Seed Starting Trays: Fill your seed starting trays or pots with a high-quality seed starting mix. Gently firm the soil, but don’t pack it down too tightly.
2. Sow the Seeds: Sow the leek seeds about ¼ inch deep and ½ inch apart. You can sow multiple seeds per cell to increase your chances of germination. I usually sow 2-3 seeds per cell, just to be safe.
3. Water Gently: Water the seeds gently with a watering can or spray bottle. Be careful not to dislodge the seeds. The soil should be moist but not soggy.
4. Provide Warmth and Light: Place the seed starting trays in a warm location, ideally between 65-70°F (18-21°C). You can use a heat mat to provide bottom heat, which will speed up germination. Also, provide adequate light. If you don’t have a sunny windowsill, use grow lights. I use grow lights for about 14-16 hours per day.
5. Keep the Soil Moist: Keep the soil consistently moist, but avoid overwatering. Check the soil moisture daily and water as needed.
6. Thin Seedlings (If Necessary): Once the seedlings emerge and have developed their first true leaves, thin them to one plant per cell. Snip off the weaker seedlings at the soil line with scissors. This will give the remaining seedlings more room to grow.
Transplanting Leek Seedlings Outdoors
Once your leek seedlings have grown to about 6-8 inches tall and the danger of frost has passed, it’s time to transplant them outdoors.
1. Harden Off the Seedlings: Before transplanting, you need to harden off the seedlings. This process gradually acclimates them to outdoor conditions. Start by placing the seedlings outdoors in a sheltered location for a few hours each day, gradually increasing the amount of time they spend outdoors over the course of a week.
2. Prepare the Planting Bed: Prepare your planting bed by loosening the soil and amending it with compost or well-rotted manure.
3. Create Trenches or Holes: There are two main methods for planting leeks: trench planting and hole planting.
* Trench Planting: Dig trenches that are about 6 inches deep and 6 inches wide. Space the trenches about 12 inches apart.
* Hole Planting: Dig individual holes that are about 6 inches deep and 6 inches wide. Space the holes about 6 inches apart within rows, and space the rows about 12 inches apart.
4. Transplant the Seedlings: Carefully remove the seedlings from their trays or pots and gently separate the roots. Place the seedlings in the trenches or holes, spacing them about 6 inches apart.
5. Backfill with Soil: Backfill the trenches or holes with soil, leaving about 2-3 inches of the leek stalks exposed.
6. Water Thoroughly: Water the transplanted seedlings thoroughly.
7. Mulch (Optional): Apply a layer of mulch around the leeks to help retain moisture, suppress weeds, and regulate soil temperature. I like to use straw or shredded leaves as mulch.
Caring for Your Leeks
Now that your leeks are planted, it’s important to provide them with the care they need to thrive.
* Watering: Leeks need consistent moisture, especially during dry periods. Water them deeply once or twice a week, or more often if the soil dries out quickly.
* Fertilizing: Leeks are heavy feeders, so they benefit from regular fertilization. Apply a balanced fertilizer every 2-3 weeks, following the instructions on the package. I like to use a liquid fertilizer diluted in water.
* Weeding: Keep the planting bed free of weeds, as weeds can compete with leeks for nutrients and water. Hand-pull weeds regularly or use a hoe to cultivate the soil.
* Hilling: Hilling is the process of gradually mounding soil around the leek stalks as they grow. This encourages the development of long, white shanks, which are the most desirable part of the leek. Start hilling when the leeks are about 8-10 inches tall, and continue hilling every few weeks until harvest.
* Pest and Disease Control: Leeks are generally resistant to pests and diseases, but they can be susceptible to onion thrips, leek moths, and white rot. Monitor your plants regularly for signs of infestation or disease, and take appropriate action if necessary. Organic pest control methods, such as insecticidal soap or neem oil, can be effective.
Harvesting Your Leeks
After all your hard work, it’s finally time to harvest your leeks!
1. Harvest Time: Leeks are typically ready to harvest 120-150 days after sowing. You can harvest them at any size, but they are usually best when they are about 1-2 inches in diameter.
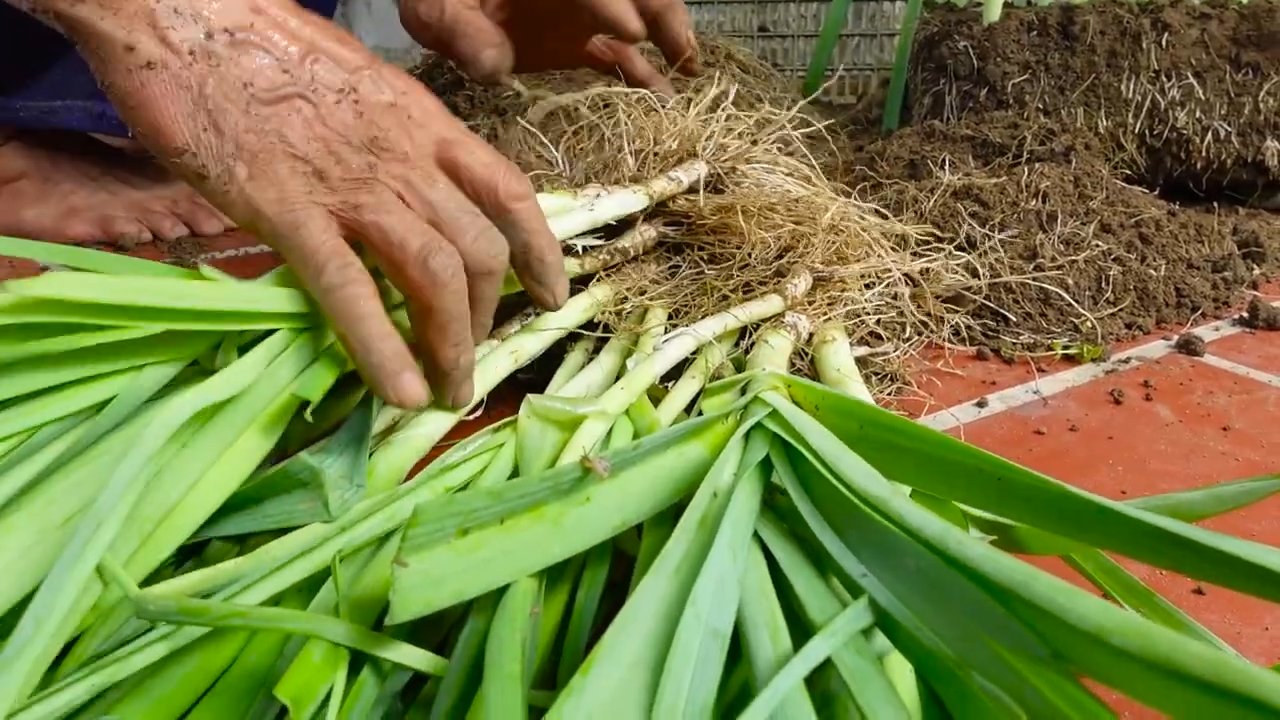
2. Harvesting Method: To harvest leeks, use a garden fork or trowel to loosen the soil around the base of the plant. Gently pull the leek from the ground.
3. Cleaning and Storing: After harvesting, remove any excess soil from the leeks and trim the roots. You can store leeks in the refrigerator for up to 2 weeks. Wrap them loosely in plastic wrap or place them in a plastic bag.
Troubleshooting Common Leek Growing Problems
Even with the best planning and care, you may encounter some problems while growing leeks. Here are some common issues and how to address them:
* Poor Germination: If your leek seeds aren’t germinating well, make sure the soil is warm enough and that you’re providing adequate light. You can also try soaking the seeds in water for 24 hours before sowing to improve germination rates.
* Slow Growth: If your leeks are growing slowly, make sure they’re getting enough sunlight, water, and fertilizer. Also, check the soil pH to ensure it’s within the optimal range.
* Yellowing Leaves: Yellowing leaves can be a sign of nutrient deficiency, overwatering, or disease. Check the soil moisture and nutrient levels, and treat any diseases as necessary.
* Pest Infestations: If you notice signs of pest infestation, such as damaged leaves or the presence of insects, take action to control the pests. Organic pest control methods are often effective.
Growing leeks at home is a rewarding experience that allows you to enjoy fresh, flavorful vegetables straight from your garden. With a little planning, preparation, and care, you can successfully
Conclusion
So, there you have it! Growing leeks at home, while it might seem daunting at first, is surprisingly achievable and incredibly rewarding. We’ve walked you through the process, from seed to harvest, highlighting the key steps and offering tips to ensure your success. But why should you bother? Why dedicate precious garden space to these alliums?
The answer is simple: freshness, flavor, and control. Store-bought leeks, while convenient, often lack the vibrant flavor and crisp texture of homegrown varieties. Plus, you have no control over the pesticides or herbicides used in their cultivation. By growing your own, you’re guaranteeing a supply of fresh, flavorful leeks that are free from harmful chemicals. You’re also reducing your carbon footprint by eliminating the transportation involved in getting them from farm to store.
Beyond the practical benefits, there’s a certain satisfaction that comes from nurturing a plant from seed to table. Watching those tiny seedlings grow into robust leeks is a testament to your gardening skills and a source of immense pride. And the taste? Oh, the taste! Homegrown leeks possess a delicate sweetness and subtle oniony flavor that elevates any dish.
But the beauty of growing leeks at home lies in its adaptability. Feel free to experiment with different varieties. ‘Musselburgh’ is a classic choice known for its hardiness, while ‘Bandit’ offers a milder flavor. Consider succession planting to ensure a continuous harvest throughout the growing season. Plant a batch of seeds every few weeks, and you’ll always have fresh leeks on hand.
Don’t be afraid to get creative with your leek recipes, too. They’re incredibly versatile and can be used in soups, stews, quiches, gratins, and even grilled as a side dish. Try adding them to your favorite potato soup for a richer, more complex flavor. Or sauté them with butter and garlic for a simple yet elegant accompaniment to grilled fish or chicken.
Growing leeks at home is more than just a gardening project; it’s an investment in your health, your taste buds, and your connection to nature. It’s a chance to experience the joy of growing your own food and savoring the unique flavors of homegrown produce.
So, what are you waiting for? Grab some seeds, prepare your soil, and embark on your leek-growing adventure today! We’re confident that you’ll be amazed by the results. And once you’ve harvested your first crop, we encourage you to share your experiences with us. Tell us about your successes, your challenges, and your favorite leek recipes. Let’s create a community of leek-loving gardeners who are passionate about growing their own food. Share your photos and stories on social media using #HomegrownLeeks and inspire others to join the fun. Happy gardening!
Frequently Asked Questions (FAQ)
What is the best time of year to start growing leeks from seed?
The ideal time to start growing leeks from seed depends on your climate. In general, you should aim to start seeds indoors about 8-10 weeks before the last expected frost. This typically means starting seeds in late winter or early spring. If you live in a warmer climate with mild winters, you can start seeds in late summer or early fall for a winter harvest. Check your local frost dates to determine the best time to start your seeds.
How much sunlight do leeks need?
Leeks thrive in full sun, which means they need at least 6-8 hours of direct sunlight per day. If you’re growing leeks indoors, make sure to provide them with adequate light using grow lights. When transplanting them outdoors, choose a location that receives plenty of sunlight throughout the day. Insufficient sunlight can result in leggy, weak plants.
What type of soil is best for growing leeks?
Leeks prefer well-drained, fertile soil that is rich in organic matter. Before planting, amend your soil with compost or well-rotted manure to improve its fertility and drainage. Leeks also prefer a slightly acidic to neutral soil pH, ideally between 6.0 and 7.0. You can test your soil pH using a soil testing kit and adjust it accordingly.
How often should I water my leeks?
Leeks need consistent moisture to thrive, especially during hot, dry weather. Water your leeks deeply and regularly, aiming to keep the soil consistently moist but not waterlogged. Avoid overhead watering, as this can increase the risk of fungal diseases. Instead, water at the base of the plants. Mulching around your leeks can help retain moisture and suppress weeds.
How do I blanch leeks to get a longer white stem?
Blanching leeks is a technique used to create a longer, whiter stem, which is considered more desirable by some. There are several ways to blanch leeks. One method is to gradually hill up soil around the stems as they grow, burying the lower portion of the plant. Another method is to use cardboard tubes or plastic pipes to cover the stems, excluding light. Start blanching when the leeks are about 6-8 inches tall and continue until harvest.
What are some common pests and diseases that affect leeks?
Leeks can be susceptible to several pests and diseases, including onion thrips, leek moths, and white rot. Onion thrips are tiny insects that suck sap from the leaves, causing them to become distorted and silvery. Leek moths are caterpillars that bore into the stems and leaves, causing significant damage. White rot is a fungal disease that affects the roots and bulbs, causing them to rot. To prevent pests and diseases, practice good garden hygiene, rotate your crops, and use organic pest control methods.
When are leeks ready to harvest?
Leeks are typically ready to harvest when they are about 1-2 inches in diameter and 6-8 inches tall. You can harvest them at any size, depending on your preference. To harvest, gently loosen the soil around the base of the plant and pull it up. If the soil is dry, water it well before harvesting to make it easier to pull the leeks.
Can I store leeks after harvesting?
Yes, you can store leeks after harvesting. To store them, trim off the roots and most of the green tops, leaving about 2 inches of green. Wrap the leeks in damp paper towels and store them in a plastic bag in the refrigerator. They should last for several weeks. You can also freeze leeks for longer storage. To freeze them, blanch them in boiling water for 2-3 minutes, then cool them in ice water. Drain them well and store them in freezer bags.
What are some creative ways to use homegrown leeks in cooking?
Homegrown leeks are incredibly versatile and can be used in a wide variety of dishes. They’re delicious in soups, stews, quiches, gratins, and omelets. You can also sauté them with butter and garlic as a side dish, grill them for a smoky flavor, or use them as a topping for pizzas and flatbreads. Try adding them to your favorite potato soup for a richer, more complex flavor. The possibilities are endless!
Can I grow leeks in containers?
Yes, you can grow leeks in containers, especially if you have limited garden space. Choose a large container that is at least 12 inches deep and wide. Fill it with well-drained potting mix and plant your leek seedlings. Make sure to provide them with plenty of sunlight and water regularly. Container-grown leeks may require more frequent fertilization than those grown in the ground.

Leave a Comment