

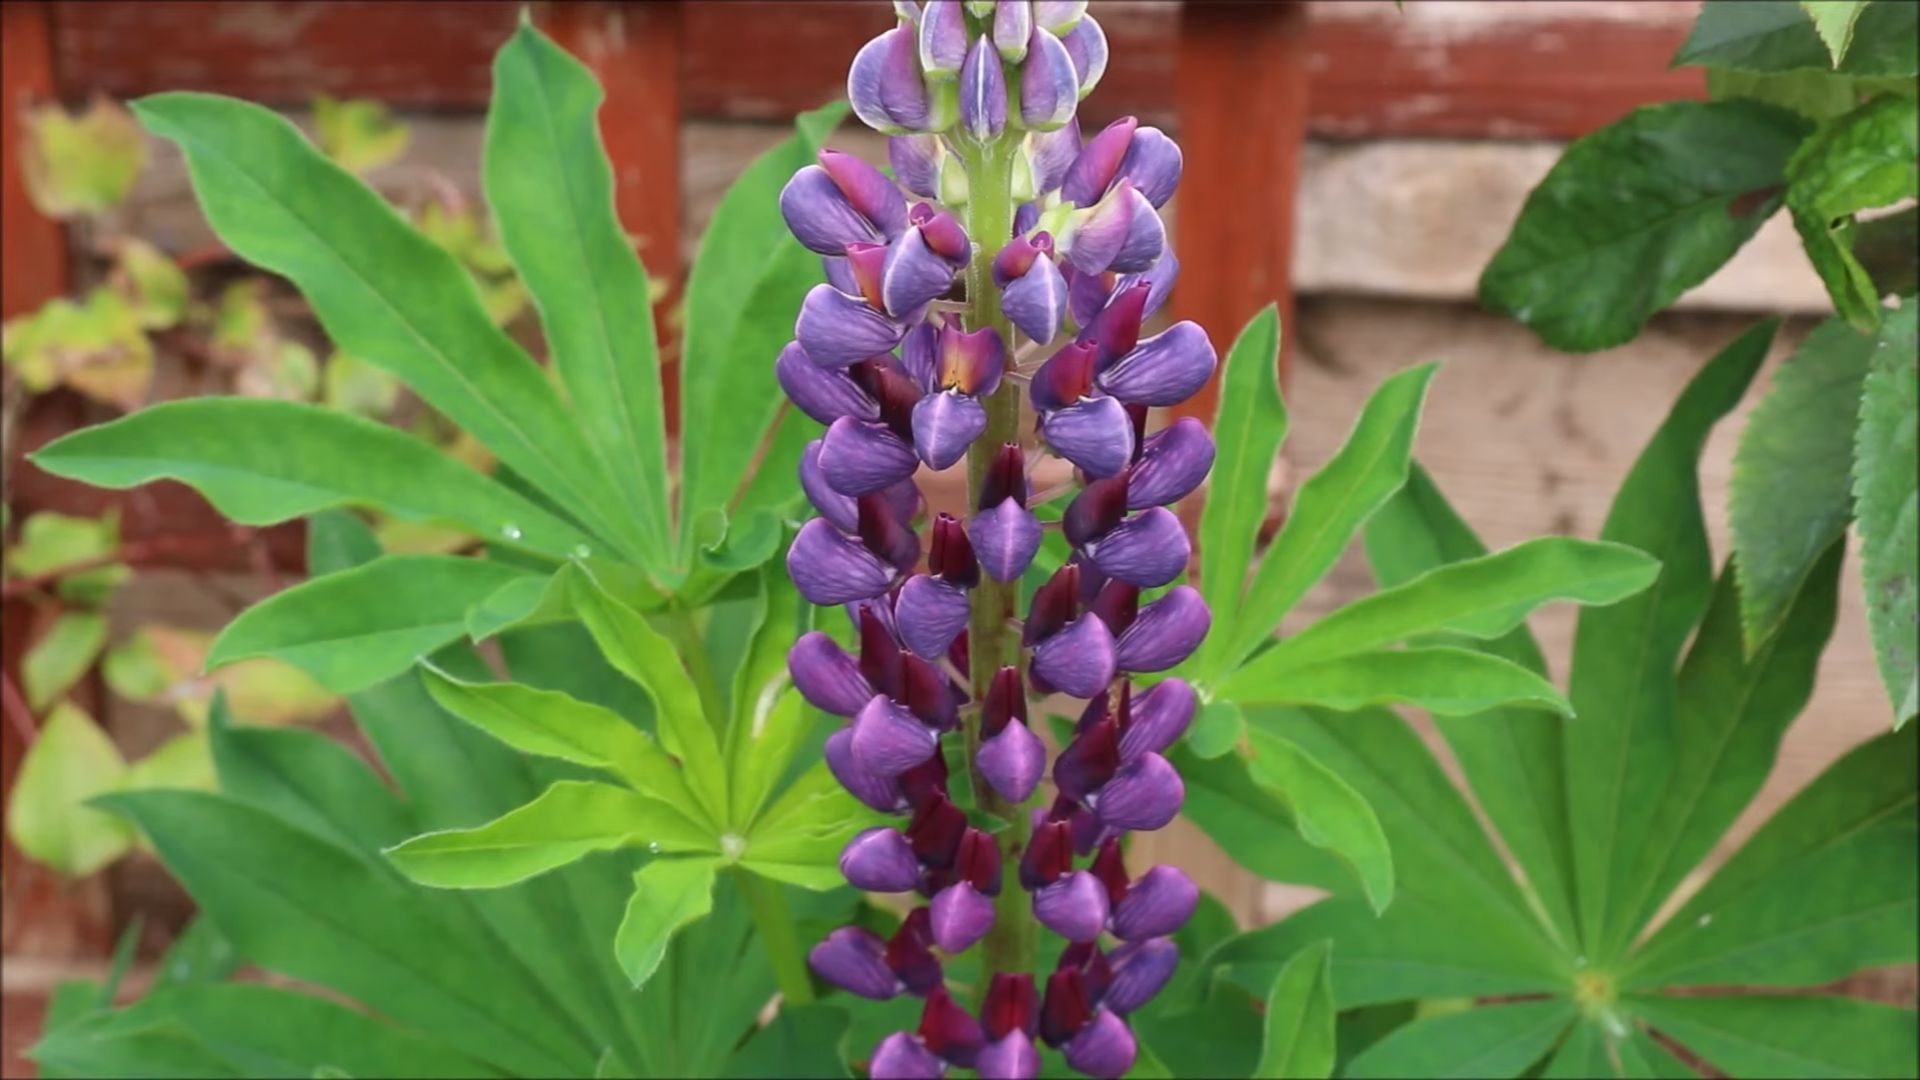
Growing Lupins From Seed might seem daunting, but trust me, it’s a rewarding journey that will fill your garden with vibrant, towering blooms! Have you ever dreamt of a cottage garden overflowing with color? Lupins, with their majestic spires, are the perfect way to bring that dream to life. But instead of buying expensive established plants, let’s unlock the secrets to propagating these beauties ourselves, saving money and experiencing the pure joy of nurturing life from a tiny seed.
Lupins have a rich history, dating back to ancient times when they were cultivated as a food source. While modern varieties are primarily ornamental, their legacy of providing sustenance and beauty continues. For centuries, gardeners have admired their striking presence, and now, you too can easily add them to your landscape.
Why should you bother with growing Lupins from seed? Well, for starters, it’s incredibly cost-effective! Buying mature lupin plants can be pricey, but a packet of seeds is a fraction of the cost. More importantly, it’s an incredibly satisfying experience. There’s something truly magical about watching a tiny seed sprout and grow into a magnificent flower. Plus, you’ll have a wider selection of varieties to choose from when starting from seed. So, let’s dive in and discover the simple yet effective DIY tricks and hacks that will guarantee your success in growing these stunning flowers from seed!
Growing Lupins From Seed: A Comprehensive DIY Guide
Hey there, fellow gardening enthusiasts! I’m so excited to share my tried-and-true method for growing lupins from seed. These beauties, with their towering spires of vibrant blooms, are a real showstopper in any garden. And trust me, starting them from seed is easier than you might think! I’ve broken down the process into manageable steps, so you can enjoy a garden bursting with lupin color.
Section 1: Preparing for Lupin Success
Before we even think about planting, let’s get organized. Proper preparation is key to successful germination and healthy lupin growth.
Gathering Your Supplies
First things first, you’ll need to gather your supplies. Here’s what I recommend:
* Lupin Seeds: Choose a variety you love! There are so many colors and heights available. Make sure they are from a reputable source and relatively fresh for best germination rates.
* Seed Starting Trays or Small Pots: I prefer seed starting trays with individual cells, but small pots work just as well.
* Seed Starting Mix: This is crucial! Don’t use regular garden soil. Seed starting mix is light, airy, and sterile, which is exactly what your lupin seeds need.
* Watering Can with a Gentle Rose: You want to water gently to avoid disturbing the seeds.
* Spray Bottle: For misting the soil to keep it consistently moist.
* Heat Mat (Optional): Lupins germinate best with slightly warmer soil temperatures. A heat mat can help, especially if you’re starting seeds indoors in a cooler climate.
* Grow Lights (Optional): If you’re starting seeds indoors, grow lights will provide the necessary light for healthy seedling development.
* Small Labels and a Permanent Marker: To keep track of which varieties you’ve planted. Trust me, you’ll thank yourself later!
* Small Bowl or Container: For soaking the seeds.
* Fine Sandpaper or Nail File: For scarifying the seeds.
Understanding Lupin Seed Germination
Lupin seeds have a tough outer coating, which can sometimes make it difficult for them to germinate. That’s why we’re going to give them a little head start with a process called scarification. Scarification involves gently weakening the seed coat to allow water to penetrate and trigger germination.
Section 2: Scarifying and Soaking Your Lupin Seeds
This is a crucial step, so pay close attention!
1. Scarifying the Seeds:
* Take each lupin seed individually and gently rub it with fine sandpaper or a nail file. The goal is to lightly scratch the seed coat, not to grind it away completely. I usually focus on one small area of the seed.
* Be careful not to damage the inner part of the seed. A few light strokes are usually enough.
* You can also use a sharp knife to carefully nick the seed coat, but I find sandpaper to be safer and more controlled.
2. Soaking the Seeds:
* Place the scarified seeds in a small bowl or container.
* Cover them with lukewarm water.
* Let them soak for 12-24 hours. This will help to further soften the seed coat and encourage germination.
* You’ll likely notice that some of the seeds will swell up during soaking. This is a good sign! It means they’re absorbing water and getting ready to sprout.
Section 3: Sowing Your Lupin Seeds
Now for the fun part – planting!
1. Prepare Your Seed Starting Trays or Pots:
* Fill your seed starting trays or pots with seed starting mix.
* Gently tap the trays or pots to settle the mix.
* Moisten the mix thoroughly with your watering can or spray bottle. You want it to be damp, but not soggy.
2. Sowing the Seeds:
* Make a small hole in the center of each cell or pot, about 1/4 to 1/2 inch deep.
* Place one or two soaked lupin seeds in each hole. I usually plant two, just in case one doesn’t germinate.
* Gently cover the seeds with seed starting mix.
* Lightly pat down the soil surface.
3. Watering and Labeling:
* Water the seeds gently with your watering can or spray bottle.
* Label each tray or pot with the variety of lupin you’ve planted and the date.
Section 4: Providing the Ideal Growing Conditions
Lupins need the right environment to thrive.
1. Temperature:
* Lupins germinate best at temperatures between 60-70°F (15-21°C).
* If you’re using a heat mat, place your seed starting trays or pots on the mat.
* If you’re not using a heat mat, find a warm spot in your home, away from drafts.
2. Light:
* Lupins need plenty of light to grow strong and healthy.
* If you’re starting seeds indoors, place them under grow lights. Keep the lights on for 14-16 hours per day.
* If you’re starting seeds outdoors, choose a location that receives at least 6 hours of sunlight per day.
3. Moisture:
* Keep the seed starting mix consistently moist, but not soggy.
* Check the moisture level daily and water as needed.
* Use a spray bottle to mist the soil surface if it starts to dry out.
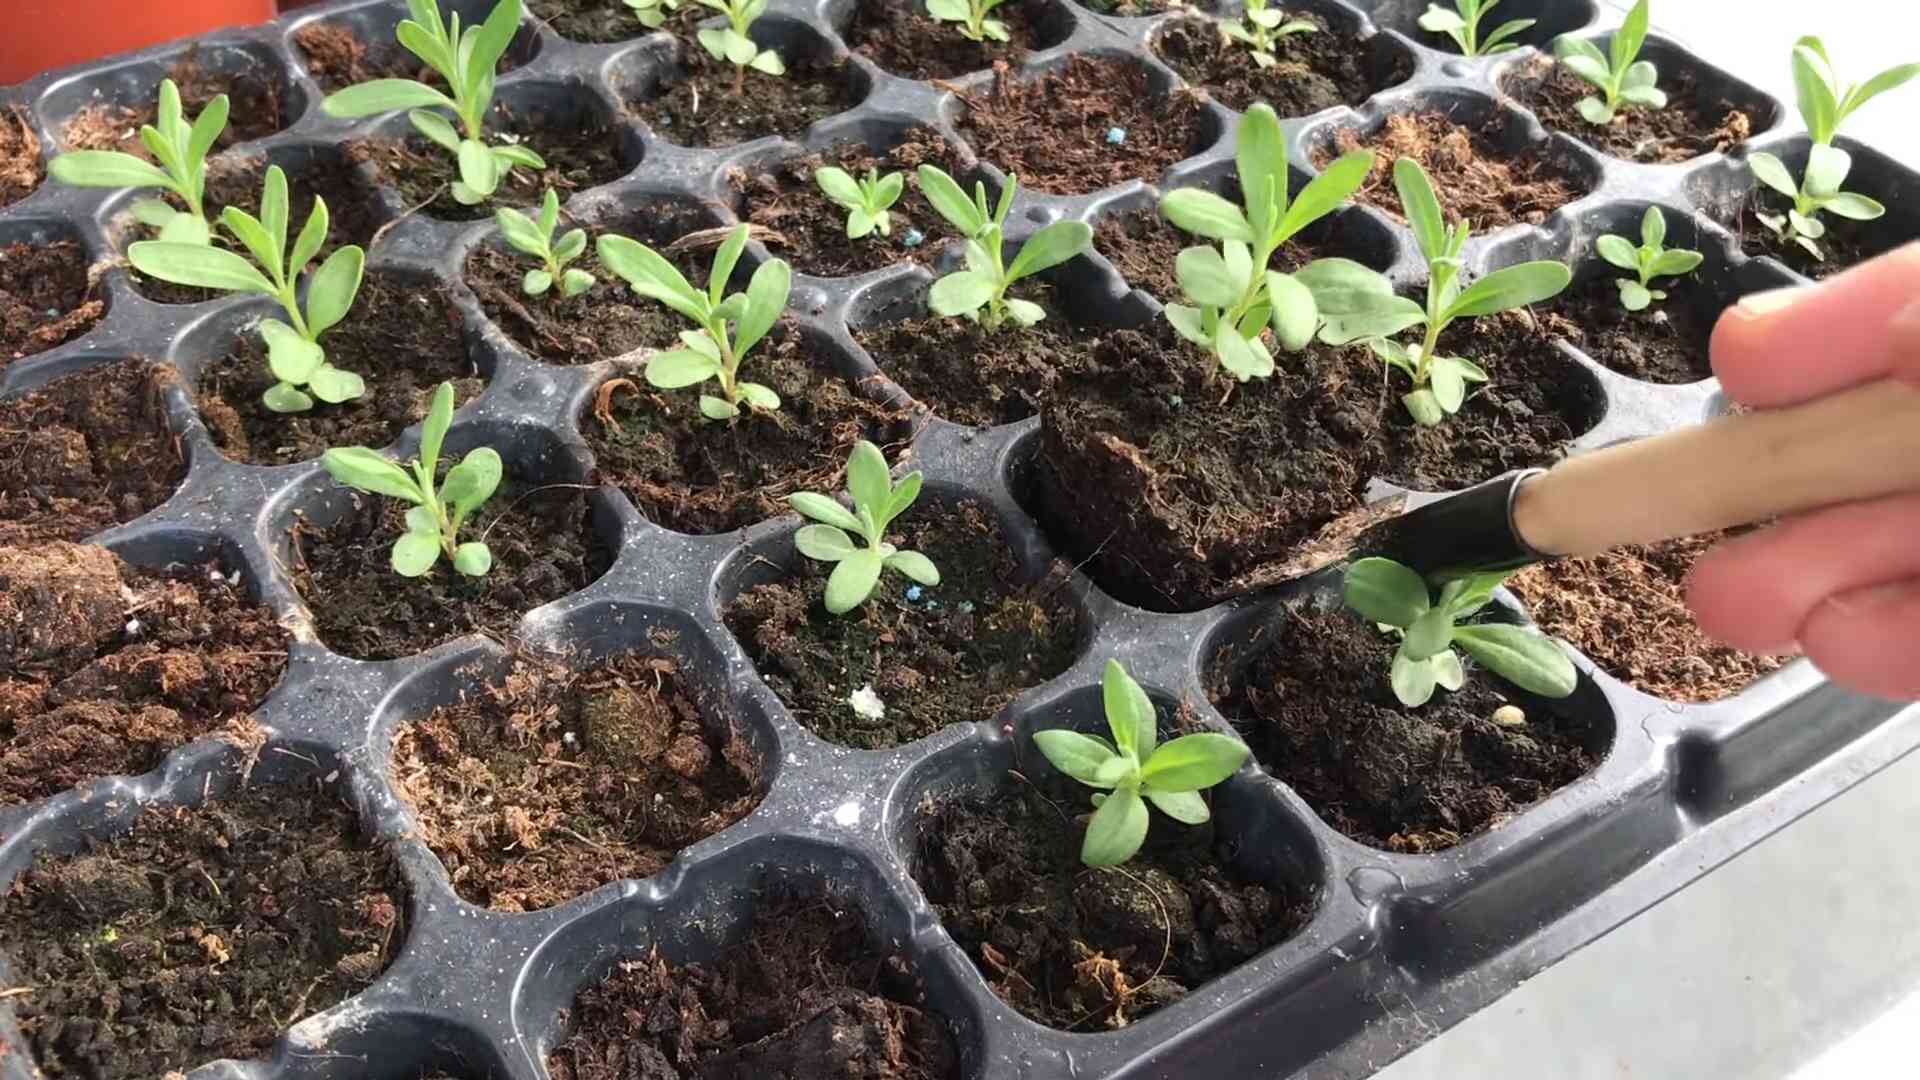
Section 5: Caring for Your Lupin Seedlings
Once your lupin seeds have germinated, it’s time to provide them with the care they need to grow into strong, healthy plants.
1. Thinning:
* If you planted two seeds in each cell or pot and both have germinated, you’ll need to thin them out.
* Choose the strongest seedling and gently snip off the weaker one at the soil line.
* Don’t try to pull the weaker seedling out, as this could damage the roots of the stronger one.
2. Watering:
* Continue to water your lupin seedlings regularly, keeping the soil consistently moist.
* Avoid overwatering, as this can lead to root rot.
3. Fertilizing:
* Once your lupin seedlings have developed their first set of true leaves (the leaves that look like miniature versions of the adult leaves), you can start fertilizing them with a diluted liquid fertilizer.
* Follow the instructions on the fertilizer package.
* I usually fertilize my seedlings every two weeks.
4. Hardening Off:
* Before transplanting your lupin seedlings outdoors, you’ll need to harden them off. This process gradually acclimates them to the outdoor environment.
* Start by placing your seedlings outdoors in a sheltered location for a few hours each day.
* Gradually increase the amount of time they spend outdoors each day, until they can tolerate a full day of sun and wind.
* This process usually takes about a week or two.
Section 6: Transplanting Your Lupin Seedlings
Now that your lupin seedlings are strong and healthy, it’s time to transplant them into your garden.
1. Choosing a Location:
* Lupins prefer a sunny location with well-drained soil.
* They can tolerate partial shade, but they won’t bloom as profusely.
* Avoid planting them in areas with heavy clay soil or standing water.
2. Preparing the Soil:
* Before transplanting, amend the soil with compost or other organic matter. This will improve drainage and provide your lupins with the nutrients they need to thrive.
* Dig a hole that is slightly larger than the root ball of your seedling.
3. Transplanting:
* Gently remove the lupin seedling from its cell or pot.
* Loosen the roots slightly.
* Place the seedling in the hole and backfill with soil.
* Gently pat down the soil around the base of the plant.
4. Watering:
* Water the transplanted lupin seedlings thoroughly.
5. Spacing:
* Space your lupin seedlings about 1-2 feet apart, depending on the variety. Check the seed packet for specific spacing recommendations.
Section 7: Ongoing Care for Your Lupins
Once your lupins are established in your garden, they’re relatively low-maintenance.
1. Watering:
* Water your lupins regularly, especially during dry periods.
* Avoid overwatering, as this can lead to root rot.
2. Fertil
Conclusion
So, there you have it! Growing lupins from seed isn’t just a cost-effective way to fill your garden with these stunning spires of color; it’s a deeply rewarding experience. From carefully selecting your seeds to nurturing those tiny seedlings, each step connects you more intimately with the natural world. And let’s be honest, there’s a certain pride that comes with knowing you cultivated those magnificent blooms from scratch.
This DIY trick is a must-try for several reasons. First, it gives you complete control over the varieties you grow. Tired of the limited selection at your local garden center? Sourcing seeds online opens up a world of possibilities, from the classic Russell hybrids to the more unusual and heirloom varieties. Imagine a garden bursting with lupins in every shade imaginable, a true testament to your horticultural prowess.
Second, growing lupins from seed allows you to tailor the growing conditions to your specific climate and soil. You can choose varieties that are known to thrive in your region and amend your soil accordingly, ensuring a healthier and more vigorous plant. This is particularly important if you live in an area with challenging growing conditions.
Third, and perhaps most importantly, it’s simply more economical. Buying established lupin plants can be expensive, especially if you’re looking to create a mass planting. Growing from seed allows you to achieve the same stunning effect at a fraction of the cost. Think of all the other gardening goodies you can buy with the money you save!
Looking for variations? Consider experimenting with different sowing times to extend your lupin blooming season. You could also try direct sowing in areas with mild winters, although starting indoors generally yields better results. Another fun variation is to create a lupin meadow by scattering seeds in a designated area and letting them naturalize. Just be sure to choose a location with well-drained soil and plenty of sunlight.
Don’t be afraid to get creative with your lupin planting schemes. They look fantastic in cottage gardens, mixed borders, and even containers. Pair them with other flowering perennials like delphiniums, foxgloves, and poppies for a truly breathtaking display.
We wholeheartedly encourage you to give this DIY trick a try. It’s easier than you might think, and the rewards are well worth the effort. Once you’ve experienced the joy of growing your own lupins from seed, you’ll never look at a packet of seeds the same way again.
And finally, we’d love to hear about your experiences! Share your photos, tips, and triumphs in the comments below. Let’s create a community of lupin lovers and inspire others to embark on this rewarding gardening adventure. Happy growing! Let us know if you have any questions about **growing lupins from seed**.
Frequently Asked Questions (FAQ)
Q: When is the best time to sow lupin seeds?
A: The ideal time to sow lupin seeds depends on your climate. In general, you can sow them indoors in early spring (February-March) for transplanting outdoors after the last frost. Alternatively, you can sow them directly outdoors in late spring (April-May) or early autumn (September-October) in milder climates. Autumn sowing often results in earlier blooms the following year.
Q: Do I need to soak lupin seeds before sowing?
A: Yes, soaking lupin seeds before sowing is highly recommended. Lupin seeds have a hard outer coating that can inhibit germination. Soaking them in warm water for 12-24 hours helps to soften the coat and improve germination rates. You can also gently scarify the seeds by rubbing them with sandpaper or nicking them with a knife to further aid germination. Be careful not to damage the inner seed.
Q: What type of soil is best for growing lupins from seed?
A: Lupins prefer well-drained, slightly acidic to neutral soil. They don’t thrive in heavy clay soils or soils that are prone to waterlogging. Amend your soil with compost or other organic matter to improve drainage and fertility. If your soil is alkaline, you can add sulfur to lower the pH.
Q: How deep should I sow lupin seeds?
A: Sow lupin seeds about 1/2 inch (1.25 cm) deep. Whether you’re sowing indoors or outdoors, make sure the seeds are covered with soil and gently watered.
Q: How long does it take for lupin seeds to germinate?
A: Lupin seeds typically germinate within 14-21 days, depending on the temperature and moisture levels. Keep the soil consistently moist but not waterlogged during this time.
Q: How much sunlight do lupins need?
A: Lupins need at least six hours of sunlight per day to thrive. They can tolerate some afternoon shade, especially in hot climates, but they will produce fewer blooms if they don’t get enough sun.
Q: How often should I water lupins?
A: Water lupins regularly, especially during dry periods. They prefer consistently moist soil, but avoid overwatering, which can lead to root rot. Water deeply and less frequently, rather than shallowly and often.
Q: Do lupins need fertilizer?
A: Lupins are relatively low-maintenance plants and don’t require heavy fertilization. However, you can apply a balanced fertilizer in early spring to promote healthy growth and flowering. Avoid fertilizers that are high in nitrogen, as this can encourage leafy growth at the expense of blooms.
Q: How do I prevent lupins from flopping over?
A: Lupins can sometimes flop over, especially after heavy rain or wind. To prevent this, provide support with stakes or plant them in a sheltered location. You can also pinch back the growing tips of young plants to encourage bushier growth.
Q: Are lupins susceptible to any pests or diseases?
A: Lupins can be susceptible to aphids, slugs, and snails. Regularly inspect your plants for signs of infestation and take appropriate action. They can also be affected by powdery mildew, especially in humid conditions. Improve air circulation around your plants and avoid overhead watering to prevent this disease.
Q: Can I save seeds from my lupins?
A: Yes, you can save seeds from your lupins. Allow the seed pods to dry on the plant, then harvest them before they shatter. Store the seeds in a cool, dry place until you’re ready to sow them. Keep in mind that hybrid lupins may not come true from seed, meaning the offspring may not look exactly like the parent plant.
Q: Are lupins poisonous?
A: Yes, all parts of the lupin plant are poisonous if ingested. Keep them away from children and pets. Wear gloves when handling lupins to avoid skin irritation.
Q: My lupins are not flowering. What could be the reason?
A: There are several reasons why your lupins might not be flowering. They may not be getting enough sunlight, the soil may be too poor, or they may be overcrowded. Make sure they are planted in a sunny location with well-drained soil and thin them out if necessary. Also, ensure they are not being over-fertilized with nitrogen.
Q: Can I grow lupins in containers?
A: Yes, you can grow lupins in containers, but choose a large container with good drainage. Use a well-draining potting mix and water regularly. Container-grown lupins may need more frequent fertilization than those grown in the ground.
Q: How do I encourage more blooms on my lupins?
A: Deadheading spent flowers will encourage more blooms on your lupins. Simply cut off the faded flower spikes at the base of the plant. This will prevent the plant from putting energy into seed production and encourage it to produce more flowers.
Leave a Comment