

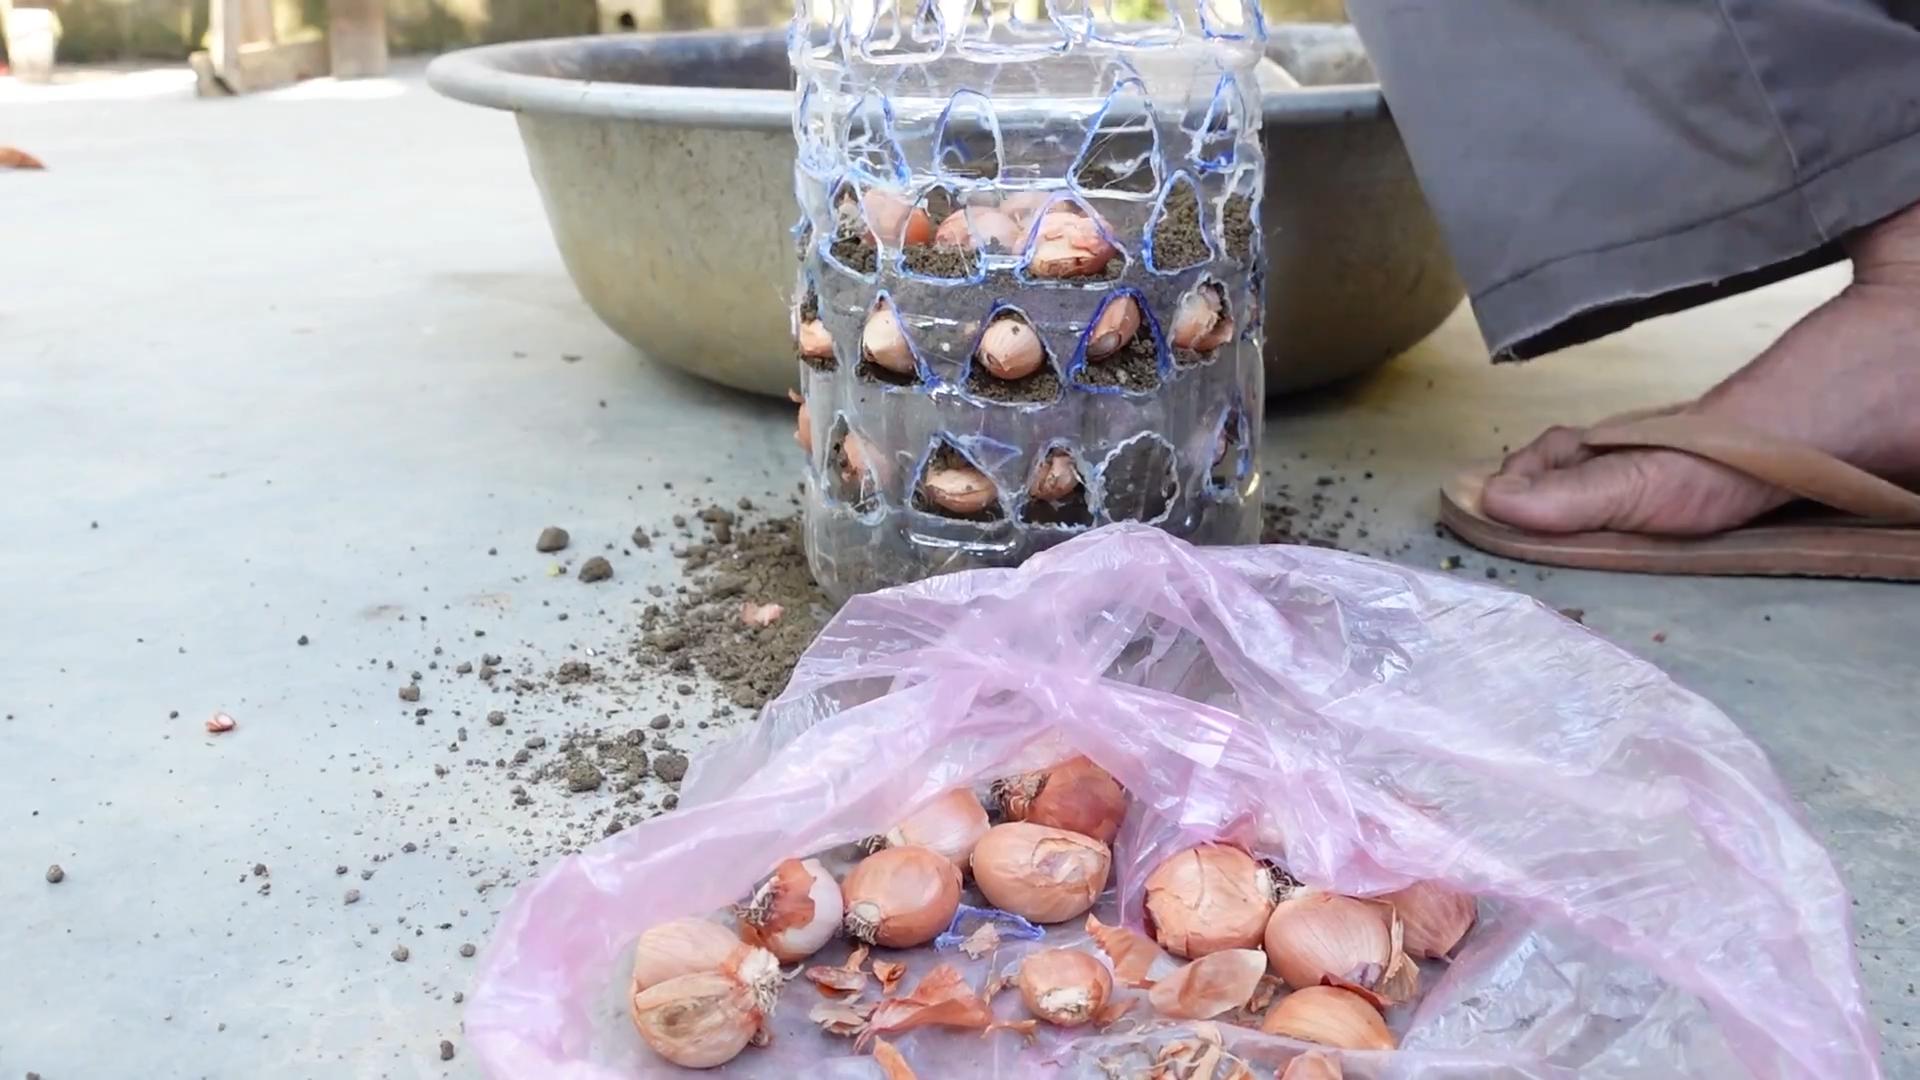
Growing Onions in Plastic Bottles: Sounds a little crazy, right? But trust me, this ingenious DIY trick is about to revolutionize your home gardening game! Forget sprawling garden beds and back-breaking weeding; we’re taking onion cultivation vertical, sustainable, and seriously space-saving.
For centuries, onions have been a staple in cuisines worldwide, their pungent flavor adding depth to countless dishes. From ancient Egypt, where they were revered and even used as offerings, to modern-day kitchens, onions have held a place of honor. But what if I told you that you could easily grow your own supply, even if you live in a tiny apartment with no garden?
That’s where this DIY hack comes in. Let’s face it, space is a premium these days, and not everyone has the luxury of a sprawling garden. Plus, traditional gardening can be time-consuming and physically demanding. But with this method of growing onions in plastic bottles, you can bypass all those hurdles. Imagine fresh, flavorful onions readily available for your culinary creations, grown right on your balcony or windowsill. It’s not just about convenience; it’s about sustainability, reducing waste by repurposing plastic bottles, and connecting with nature in a meaningful way. So, grab those empty bottles, and let’s get started on this exciting gardening adventure together!

Growing Onions in Plastic Bottles: A Beginner’s Guide
Hey there, fellow gardening enthusiasts! Ever thought about turning those empty plastic bottles into mini onion farms? It’s a fantastic way to recycle, save space, and enjoy fresh, homegrown onions. I’ve been doing this for a while now, and I’m excited to share my secrets with you. Let’s dive in!
What You’ll Need
Before we get started, let’s gather our supplies. This is a pretty low-cost project, which is always a win in my book!
* Plastic Bottles: The size depends on the type of onion you want to grow. For green onions (scallions), smaller bottles (like 2-liter soda bottles) work great. For bulb onions, you’ll need larger ones (like gallon-sized water jugs). Make sure they’re clean!
* Potting Soil: Good quality potting soil is essential for healthy onion growth. Avoid using garden soil directly, as it can be too dense and may contain pests or diseases.
* Onion Sets or Seeds: You can use onion sets (small, immature onions) for a quicker harvest, or start from seeds if you’re patient. I personally prefer sets because they’re easier to handle.
* Scissors or a Utility Knife: For cutting the plastic bottles. Be careful!
* Drill or Nail (Optional): For creating drainage holes.
* Watering Can or Spray Bottle: For watering your onions.
* Gloves (Optional): To keep your hands clean.
* Small Stones or Gravel (Optional): To improve drainage.
Preparing the Plastic Bottles
This is where we transform those bottles into onion-growing containers. It’s a simple process, but take your time and be careful with the cutting tools.
1. Clean the Bottles: Thoroughly wash the plastic bottles with soap and water to remove any residue. Rinse them well and let them dry completely. This helps prevent mold and other issues.
2. Cut the Bottles:
* For Green Onions (Scallions): Cut off the top third of the bottle. You can discard the top or save it to use as a mini-greenhouse cover later on.
* For Bulb Onions: Cut the bottle in half. You’ll be using the bottom half as your container.
3. Create Drainage Holes: This is crucial for preventing waterlogging, which can rot the onion roots.
* Use a drill or a nail (heated with a lighter, if using a nail) to create several drainage holes in the bottom of the bottle. I usually make about 4-6 holes, depending on the size of the bottle.
* If you’re using a nail, be extremely careful not to burn yourself.
4. Add Drainage Layer (Optional): Place a layer of small stones or gravel at the bottom of the bottle. This will further improve drainage and prevent the soil from clogging the drainage holes.
Planting the Onions
Now for the fun part – planting the onions! This is where you’ll start to see your mini-farm come to life.
1. Fill with Potting Soil: Fill the prepared plastic bottle with potting soil, leaving about an inch of space at the top. Gently pat down the soil to remove any air pockets.
2. Plant the Onion Sets or Seeds:
* Onion Sets: Make small holes in the soil, about 1-2 inches deep and 2-3 inches apart. Place an onion set in each hole, with the root end facing down. Cover the sets with soil, leaving the tip of the onion exposed.
* Onion Seeds: Sprinkle the seeds evenly over the surface of the soil. Cover them with a thin layer of soil (about ¼ inch). Gently water the soil to help the seeds settle.
3. Water Thoroughly: Water the soil gently but thoroughly until water drains out of the drainage holes. This ensures that the soil is evenly moist.
Caring for Your Onions
Consistent care is key to growing healthy and delicious onions. Here’s what you need to do:
1. Sunlight: Onions need plenty of sunlight – at least 6-8 hours per day. Place your plastic bottle containers in a sunny location, such as a windowsill, balcony, or patio. If you don’t have enough natural light, you can supplement with a grow light.
2. Watering: Water your onions regularly, keeping the soil consistently moist but not waterlogged. Check the soil moisture by sticking your finger into the soil. If the top inch feels dry, it’s time to water. Avoid overwatering, as this can lead to root rot.
3. Fertilizing: Onions are heavy feeders, so they benefit from regular fertilization. Use a balanced liquid fertilizer (like a 10-10-10) diluted to half strength. Fertilize every 2-3 weeks during the growing season.
4. Weeding: Keep the containers free of weeds, as they can compete with the onions for nutrients and water. Gently pull out any weeds that appear.
5. Pest Control: Keep an eye out for pests, such as aphids or onion maggots. If you notice any pests, you can try spraying the onions with insecticidal soap or neem oil.
6. Rotation: Rotate the bottles regularly to ensure even sunlight exposure on all sides of the plants. This will promote even growth.
Harvesting Your Onions
The best part! Knowing when to harvest is crucial for getting the best flavor and texture.
1. Green Onions (Scallions): You can start harvesting green onions when they are about 6-8 inches tall. Simply snip off the green tops with scissors, leaving about an inch of the base intact. The onions will continue to grow, and you can harvest them multiple times.
2. Bulb Onions: Bulb onions are ready to harvest when the tops start to turn yellow and fall over. This usually takes about 3-4 months from planting sets. Gently pull the onions out of the soil. Let them dry in a sunny, well-ventilated place for a week or two before storing them.
Troubleshooting
Even with the best care, you might encounter some challenges. Here are a few common problems and how to fix them:
* Yellowing Leaves: This could be a sign of overwatering, underwatering, or nutrient deficiency. Check the soil moisture and adjust your watering accordingly. Fertilize with a balanced fertilizer if necessary.
* Slow Growth: This could be due to insufficient sunlight, poor soil, or lack of nutrients. Make sure your onions are getting enough sunlight and fertilize regularly.
* Root Rot: This is caused by overwatering and poor drainage. Make sure your containers have adequate drainage holes and avoid overwatering. If you suspect root rot, you can try transplanting the onions into fresh soil.
* Pests: Inspect your onions regularly for pests. If you find any, treat them with insecticidal soap or neem oil.
Tips and Tricks for Success
Here are a few extra tips to help you grow the best onions possible:
* Choose the Right Variety: Select onion varieties that are well-suited to your climate and growing conditions.
* Start with Healthy Sets or Seeds: Use high-quality onion sets or seeds from a reputable source.
* Improve Drainage: Add a layer of gravel or small stones to the bottom of the containers to improve drainage.
* Use a Good Quality Potting Mix: Avoid using garden soil directly, as it can be too dense and may contain pests or diseases.
* Water Regularly: Keep the soil consistently moist but not waterlogged.
* Fertilize Regularly: Onions are heavy feeders, so they benefit from regular fertilization.
* Protect from Pests: Keep an eye out for pests and treat them promptly.
* Harvest at the Right Time: Harvest green onions when they are about 6-8 inches tall and bulb onions when the tops start to turn yellow and fall over.
* Succession Planting: Plant new onions every few weeks to ensure a continuous harvest.
Creative Container Ideas
Don’t limit yourself to just plain plastic bottles! Get creative with your containers.
* Paint the Bottles: Decorate the bottles with paint to make them more visually appealing.
* Use Different Sizes: Experiment with different sizes of bottles to grow different types of onions.
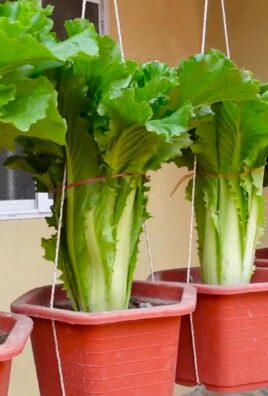
* Create a Vertical Garden: Hang the bottles on a wall or fence to create a vertical onion garden.
* Combine with Other Herbs: Plant other herbs, such as parsley or chives, in the same container as your onions.
Why Grow Onions in Plastic Bottles?
Besides being a fun and eco-friendly project, growing onions in plastic bottles offers several advantages:
* Space-Saving: Perfect for small spaces like apartments, balconies, or patios
Conclusion
So, there you have it! Growing onions in plastic bottles isn’t just a quirky gardening experiment; it’s a genuinely effective method for maximizing space, minimizing waste, and enjoying a bountiful harvest of fresh, flavorful onions, even if you’re short on garden real estate. This DIY trick transforms discarded plastic bottles from environmental liabilities into valuable assets in your gardening arsenal.
Think about it: no more struggling with overcrowded garden beds, no more battling weeds stealing precious nutrients, and no more worrying about soil erosion washing away your hard work. The controlled environment of a plastic bottle provides optimal conditions for onion growth, allowing you to nurture each plant individually and tailor its care to its specific needs. Plus, the vertical nature of this method makes it ideal for balconies, patios, or even sunny windowsills, bringing the joy of gardening to urban dwellers and apartment residents alike.
But the benefits don’t stop there. Growing onions in plastic bottles also offers a unique opportunity to experiment with different varieties and growing techniques. Try planting red onions, yellow onions, or even shallots in separate bottles to compare their growth rates and flavor profiles. Experiment with different soil mixtures to find the perfect blend for your local climate and onion variety. You can even add companion plants like marigolds or basil to the bottles to deter pests and enhance the flavor of your onions.
This method is particularly beneficial for those new to gardening. The smaller scale and controlled environment make it easier to monitor plant health and address any issues that may arise. It’s a fantastic way to learn the basics of onion cultivation without the overwhelming commitment of a large garden plot.
And let’s not forget the satisfaction of knowing that you’re contributing to a more sustainable lifestyle. By repurposing plastic bottles, you’re reducing waste, conserving resources, and creating a beautiful and productive garden in the process. It’s a win-win situation for you and the environment.
We strongly encourage you to give this DIY trick a try. Gather your plastic bottles, prepare your soil, and get ready to embark on a rewarding gardening adventure. Whether you’re a seasoned gardener or a complete beginner, growing onions in plastic bottles is a fun, easy, and effective way to enjoy the taste of homegrown goodness.
Don’t be afraid to get creative and adapt the method to suit your own needs and preferences. Share your experiences, tips, and photos with us and other gardening enthusiasts. Let’s build a community of bottle-gardeners and inspire others to embrace sustainable and innovative gardening practices. We are confident that you will find that growing onions in plastic bottles is a rewarding and productive experience. Happy gardening!
Frequently Asked Questions (FAQ)
What type of plastic bottles are best for growing onions?
Ideally, you should use sturdy, opaque plastic bottles that are at least 2 liters in size. Opaque bottles help prevent algae growth, which can compete with the onions for nutrients. Soda bottles, water bottles, and juice bottles all work well. Make sure to thoroughly clean the bottles before using them to remove any residue that could harm your plants. Avoid using bottles that have contained harsh chemicals or pesticides.
How do I prepare the plastic bottles for planting?
First, thoroughly clean the bottles with soap and water to remove any residue. Then, cut off the top portion of the bottle, leaving enough space for the onion bulbs to grow. You can cut the bottle in half or even just remove the very top, depending on the size of the bottle and the size of the onion bulbs you plan to plant. Make sure to create drainage holes in the bottom of the bottle to prevent waterlogging. You can use a drill, a nail, or even a hot skewer to create these holes.
What type of soil should I use for growing onions in plastic bottles?
A well-draining potting mix is essential for growing healthy onions in plastic bottles. You can use a commercially available potting mix or create your own by combining equal parts of garden soil, compost, and perlite or vermiculite. The compost will provide nutrients, while the perlite or vermiculite will improve drainage and aeration. Avoid using heavy clay soil, as it can become waterlogged and suffocate the onion roots.
How many onion bulbs can I plant in one plastic bottle?
The number of onion bulbs you can plant in one bottle depends on the size of the bottle and the size of the bulbs. As a general rule, you should allow at least 4-6 inches of space between each bulb. For a 2-liter bottle, you can typically plant 2-3 onion bulbs. Overcrowding can lead to stunted growth and increased susceptibility to diseases.
How often should I water my onions grown in plastic bottles?
Water your onions regularly, especially during dry periods. The soil should be consistently moist but not waterlogged. Check the soil moisture by sticking your finger into the soil. If the top inch feels dry, it’s time to water. Water deeply, allowing the water to drain out of the drainage holes at the bottom of the bottle. Avoid watering the foliage, as this can encourage fungal diseases.
What kind of sunlight do onions need when grown in plastic bottles?
Onions need at least 6-8 hours of direct sunlight per day to thrive. Place your plastic bottle gardens in a sunny location, such as a south-facing balcony or patio. If you don’t have access to enough sunlight, you can supplement with artificial grow lights.
Do I need to fertilize my onions grown in plastic bottles?
Yes, onions are heavy feeders and benefit from regular fertilization. Use a balanced fertilizer, such as 10-10-10, every 2-3 weeks. You can also use organic fertilizers, such as compost tea or fish emulsion. Follow the instructions on the fertilizer package carefully to avoid over-fertilizing, which can damage the plants.
How long does it take for onions to mature when grown in plastic bottles?
The time it takes for onions to mature depends on the variety and the growing conditions. Generally, it takes about 90-120 days from planting to harvest. You’ll know your onions are ready to harvest when the tops start to turn yellow and fall over.
How do I harvest onions grown in plastic bottles?
Once the tops have fallen over, gently pull the onions out of the bottles. Brush off any excess soil and allow the onions to cure in a warm, dry place for 1-2 weeks. Curing helps to dry out the outer layers of the onion, which improves its storage life.
What are some common problems I might encounter when growing onions in plastic bottles?
Some common problems include pests, diseases, and nutrient deficiencies. Pests such as aphids and thrips can be controlled with insecticidal soap or neem oil. Diseases such as fungal infections can be prevented by providing good air circulation and avoiding overwatering. Nutrient deficiencies can be addressed by fertilizing regularly with a balanced fertilizer.
Can I grow other vegetables in plastic bottles using the same method?
Yes, you can grow a variety of other vegetables in plastic bottles, including herbs, lettuce, spinach, and even tomatoes and peppers (using larger bottles). The key is to choose vegetables that are well-suited to container gardening and to provide them with the appropriate growing conditions.
How can I prevent the plastic bottles from tipping over?
To prevent the plastic bottles from tipping over, you can place them in a stable container, such as a crate or a large pot. You can also weigh them down by adding rocks or gravel to the bottom of the bottles. Another option is to create a support structure using stakes or trellises.
Leave a Comment