

Growing Pointed Cabbage at Home can seem daunting, but trust me, it’s more rewarding than you might think! Have you ever dreamt of strolling through your own backyard, snipping a perfectly formed, vibrant green pointed cabbage for tonight’s dinner? Imagine the satisfaction of knowing exactly where your food comes from and that it’s bursting with freshness and flavor. This isn’t just a pipe dream; it’s an achievable reality with a few simple tricks and a little DIY spirit!
Cabbage, in general, has a rich history, dating back thousands of years. From ancient Rome, where it was considered a medicinal plant, to medieval Europe, where it was a staple food, cabbage has nourished civilizations. Pointed cabbage, with its sweeter, more delicate flavor compared to its rounder cousins, is a delightful variation that deserves a place in your garden.
But why bother with the effort of growing your own? Well, store-bought vegetables often lack the vibrant taste and nutritional value of homegrown produce. Plus, let’s be honest, who wants to pay inflated prices for something you can easily cultivate yourself? This DIY guide will equip you with the knowledge and techniques to successfully growing pointed cabbage at home, even if you’re a complete beginner. We’ll cover everything from seed selection to pest control, ensuring you have a bountiful harvest. Get ready to roll up your sleeves and transform your garden into a pointed cabbage paradise!
Growing Your Own Pointed Cabbage: A Beginner’s Guide
Hey there, fellow gardening enthusiasts! Ever thought about growing your own pointed cabbage? It’s easier than you might think, and the taste of homegrown veggies is just unbeatable. I’m going to walk you through the whole process, from seed to harvest, so you can enjoy fresh, delicious pointed cabbage straight from your garden.
Choosing the Right Variety and Starting Seeds
First things first, let’s talk about choosing the right variety. There are a few different types of pointed cabbage, each with its own unique characteristics. Some popular choices include ‘Hispi’, ‘Caraflex’, and ‘Sweet Point’. I personally love ‘Hispi’ for its early maturity and sweet flavor.
Now, you have two options: you can either buy seedlings from a garden center or start your own from seeds. I prefer starting from seeds because it gives me more control over the process and it’s generally more cost-effective.
Here’s how to start your pointed cabbage seeds:
1. Gather Your Supplies: You’ll need:
* Pointed cabbage seeds
* Seed starting trays or small pots
* Seed starting mix (a light, well-draining mix is best)
* A spray bottle filled with water
* A warm, sunny location or a grow light
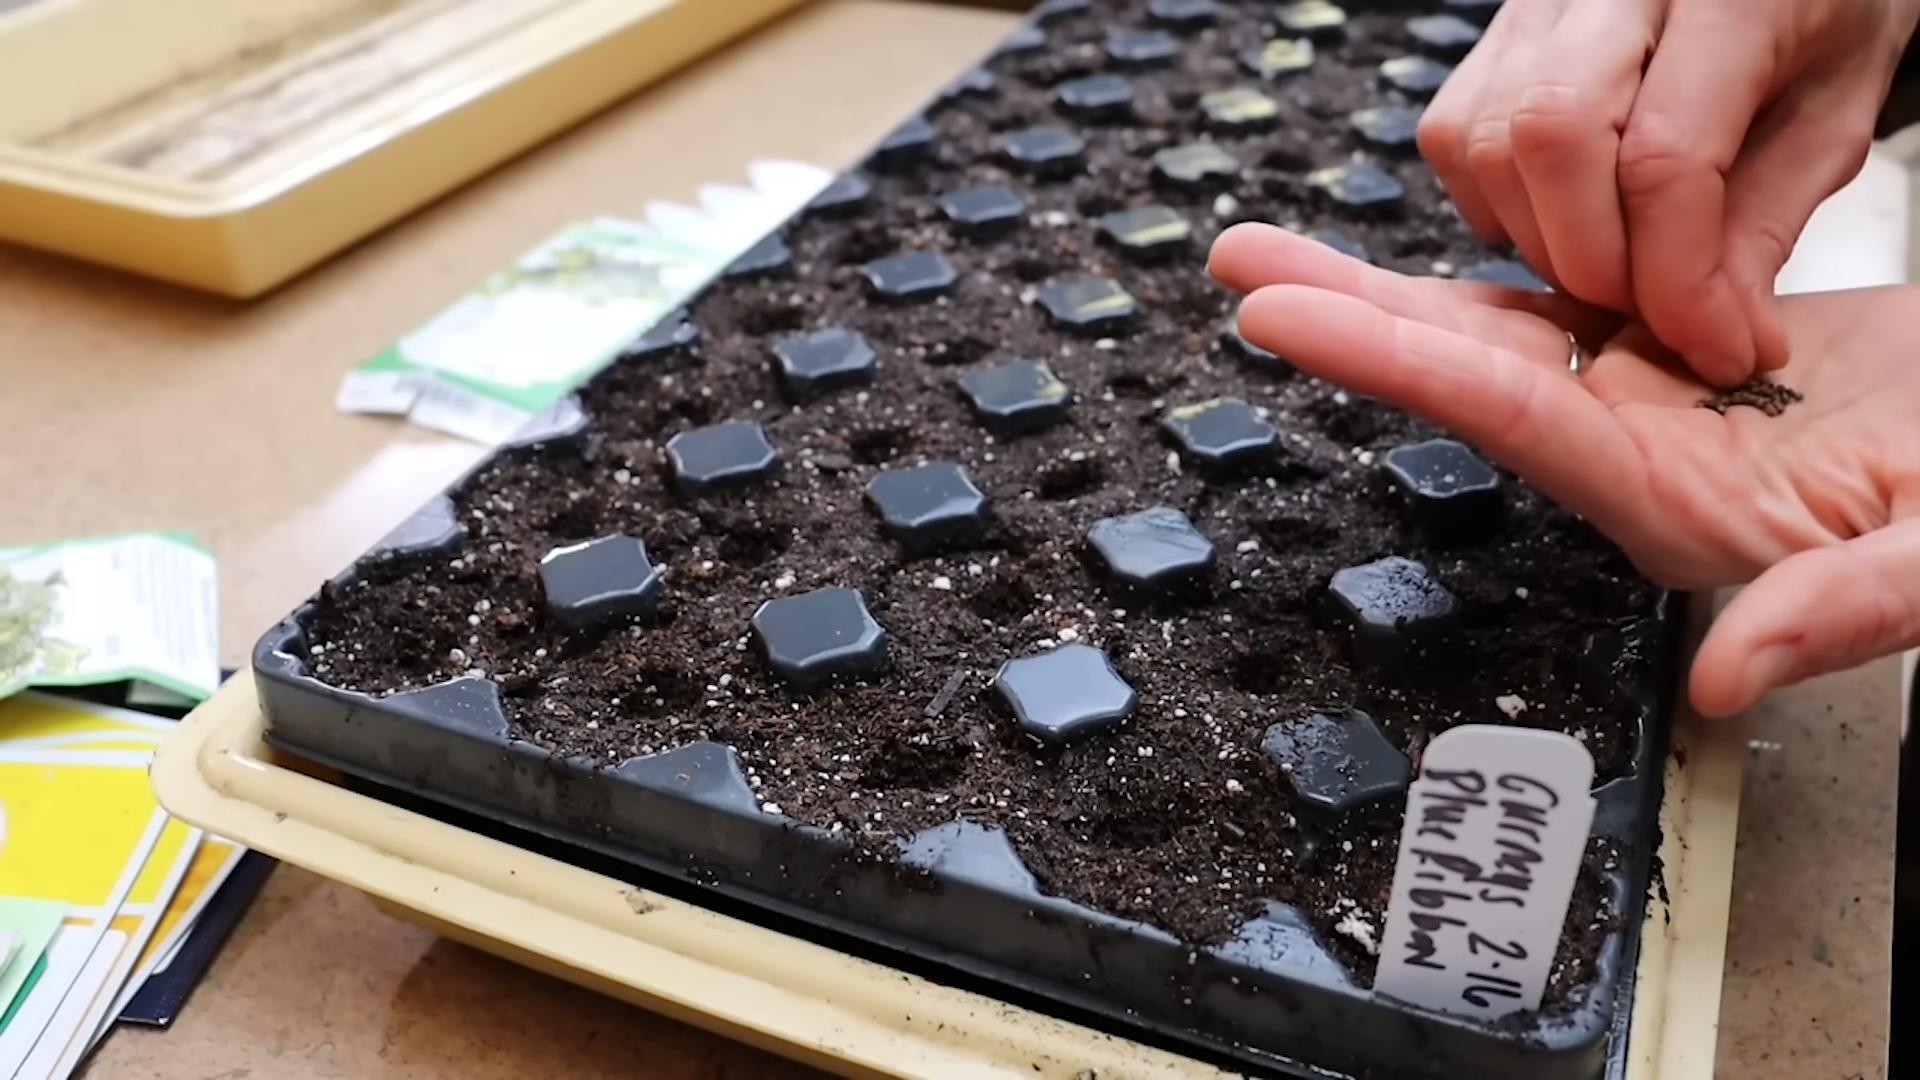
2. Sow the Seeds: Fill your seed starting trays or pots with the seed starting mix. Gently press the soil down to create a firm surface. Sow 2-3 seeds per cell or pot, about 1/4 inch deep.
3. Water Gently: Use the spray bottle to gently moisten the soil. Avoid overwatering, as this can lead to damping off, a fungal disease that can kill seedlings.
4. Provide Warmth and Light: Place the trays or pots in a warm, sunny location or under a grow light. The ideal temperature for germination is around 65-75°F (18-24°C). If you’re using a grow light, keep it on for about 14-16 hours per day.
5. Keep the Soil Moist: Check the soil moisture daily and water as needed to keep it consistently moist but not soggy.
6. Thin the Seedlings: Once the seedlings have developed their first true leaves (the leaves that appear after the initial seed leaves), thin them to one seedling per cell or pot. Choose the strongest, healthiest-looking seedling and gently snip off the others at the soil line.
Preparing the Garden Bed
While your seedlings are growing, it’s time to prepare the garden bed. Pointed cabbage prefers a sunny location with well-drained soil.
1. Choose a Sunny Spot: Select a location in your garden that receives at least 6 hours of sunlight per day.
2. Prepare the Soil: Clear the area of any weeds, rocks, and debris. Dig the soil to a depth of about 12 inches and amend it with compost or well-rotted manure. This will improve drainage, fertility, and soil structure. I usually add a generous amount of compost – the more the merrier!
3. Check the Soil pH: Pointed cabbage prefers a soil pH of 6.0-7.5. You can test your soil pH using a soil testing kit or by sending a sample to your local agricultural extension office. If your soil is too acidic, you can add lime to raise the pH. If it’s too alkaline, you can add sulfur to lower the pH.
4. Create Raised Beds (Optional): If your soil is heavy or poorly drained, consider creating raised beds. Raised beds improve drainage and allow the soil to warm up faster in the spring.
Transplanting the Seedlings
Once your seedlings have developed several sets of true leaves and are about 4-6 inches tall, they’re ready to be transplanted into the garden. This usually takes about 4-6 weeks after sowing the seeds.
1. Harden Off the Seedlings: Before transplanting, you’ll need to harden off the seedlings. This process gradually acclimates them to outdoor conditions. Start by placing the seedlings outdoors in a sheltered location for a few hours each day, gradually increasing the amount of time they spend outdoors over the course of a week.
2. Choose a Cloudy Day: Transplant the seedlings on a cloudy day or in the late afternoon to minimize stress.
3. Dig Holes: Dig holes in the prepared garden bed, spacing them about 12-18 inches apart. The holes should be deep enough to accommodate the root balls of the seedlings.
4. Carefully Remove the Seedlings: Gently remove the seedlings from their trays or pots, being careful not to damage the roots.
5. Plant the Seedlings: Place the seedlings in the holes and backfill with soil. Gently firm the soil around the base of the plants.
6. Water Thoroughly: Water the seedlings thoroughly after transplanting.
7. Add Mulch: Apply a layer of mulch around the plants to help retain moisture, suppress weeds, and regulate soil temperature. I like to use straw or shredded leaves.
Caring for Your Pointed Cabbage
Now that your pointed cabbage is in the ground, it’s time to provide the care it needs to thrive.
1. Water Regularly: Pointed cabbage needs consistent moisture, especially during hot, dry weather. Water deeply whenever the top inch of soil feels dry.
2. Fertilize: Fertilize your pointed cabbage every 2-3 weeks with a balanced fertilizer. Follow the instructions on the fertilizer package. I often use a liquid seaweed fertilizer for an extra boost.
3. Weed Regularly: Keep the garden bed free of weeds, as they can compete with the cabbage for nutrients and water.
4. Protect from Pests: Pointed cabbage is susceptible to several pests, including cabbage worms, aphids, and flea beetles.
* Cabbage Worms: These green caterpillars can quickly devour the leaves of your cabbage plants. Handpick them off the plants or use a biological insecticide like Bacillus thuringiensis (Bt).
* Aphids: These small, sap-sucking insects can weaken the plants. Spray them off with a strong stream of water or use insecticidal soap.
* Flea Beetles: These tiny beetles can create small holes in the leaves. Cover the plants with row covers to prevent flea beetles from reaching them.
5. Watch Out for Diseases: Cabbage can also be affected by diseases such as clubroot and black rot.
* Clubroot: This soilborne disease causes the roots to swell and become distorted. Prevent clubroot by ensuring good soil drainage and maintaining a soil pH of 7.0 or higher.
* Black Rot: This bacterial disease causes yellowing and browning of the leaves. Prevent black rot by using disease-free seeds and practicing crop rotation.
Harvesting Your Pointed Cabbage
Pointed cabbage is typically ready to harvest about 60-80 days after transplanting, depending on the variety.
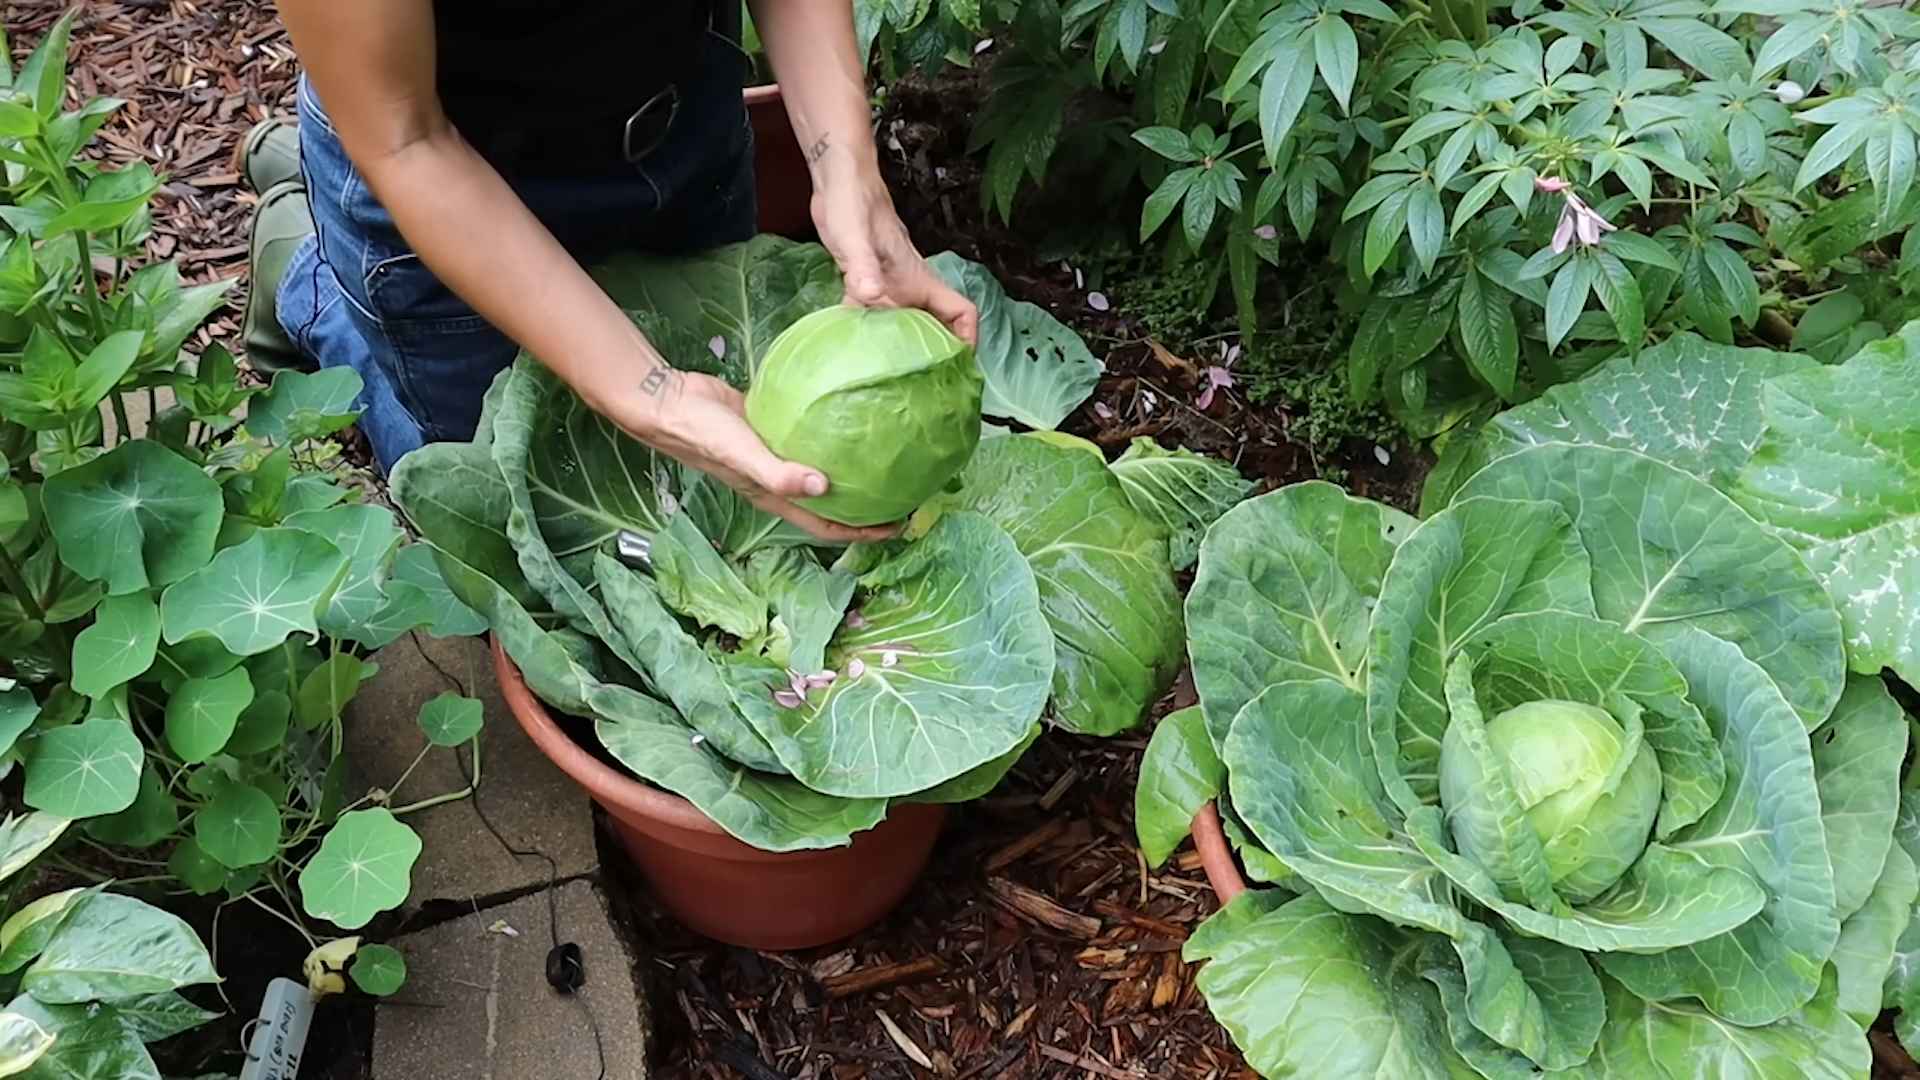
1. Check for Firmness: The cabbage heads should be firm and compact.
2. Harvest When Ready: Use a sharp knife to cut the cabbage head from the stem, leaving a few outer leaves attached.
3. Store Properly: Store harvested cabbage in the refrigerator for up to 2 weeks.
Troubleshooting
Even with the best care, you might encounter some problems while growing pointed cabbage. Here are a few common issues and how to address them:
* Heads Not Forming: If your cabbage plants are not forming heads, it could be due to a lack of nutrients, water, or sunlight. Make sure the plants are getting enough of all three.
* Bolting: Bolting is when the cabbage plants start to flower prematurely. This can be caused by stress, such as hot weather or lack of water. Try to provide consistent moisture and shade during hot periods.
* Splitting Heads: Splitting heads can occur when the cabbage plants receive too much water after a dry spell. Water regularly and consistently to prevent this.
Enjoying Your Homegrown Pointed Cabbage
Now that you’ve harvested your pointed cabbage, it’s time to enjoy the fruits (or vegetables!) of your labor. Pointed cabbage is delicious raw in salads, coleslaws, or slaws. It can also be cooked in a variety of ways, such as steaming, stir-frying, or roasting. I personally love it lightly sauteed with garlic and a little butter.
Growing your own pointed cabbage is a rewarding experience. With a little bit of effort, you can enjoy fresh, delicious, and healthy vegetables straight from your garden. Happy gardening!
Conclusion
So, there you have it! Growing your own pointed cabbage at home isn’t just a gardening project; it’s an investment in fresh, flavorful, and potentially organic produce right at your fingertips. We’ve walked through the steps, from selecting the right seeds to harvesting your beautiful, conical creations. But why is this DIY trick a must-try?
Firstly, the taste difference is undeniable. Store-bought cabbage, even the freshest varieties, simply can’t compete with the vibrant, slightly sweeter flavor of homegrown pointed cabbage. Imagine the crisp, clean taste in your slaws, stir-fries, or even grilled as a unique side dish. You control the growing environment, ensuring optimal conditions for flavor development.
Secondly, you gain complete control over the growing process. No more wondering about pesticides or herbicides. You can choose organic methods, nourishing your plants with natural fertilizers and protecting them with companion planting techniques. This means healthier food for you and your family, and a reduced impact on the environment.
Thirdly, growing pointed cabbage is incredibly rewarding. There’s a unique satisfaction in nurturing a tiny seed into a thriving plant that provides you with food. It’s a connection to nature, a learning experience, and a source of pride all rolled into one.
But the fun doesn’t stop there! Feel free to experiment with different varieties of pointed cabbage. Some are sweeter, some are more compact, and some have slightly different textures. Try growing ‘Hispi’ for its early maturity or ‘Caraflex’ for its exceptional sweetness.
Consider companion planting to enhance your cabbage’s growth and deter pests. Marigolds, nasturtiums, and dill are excellent choices. You can also try intercropping with fast-growing vegetables like radishes or lettuce to maximize your garden space.
Don’t be afraid to get creative with your harvest! Pointed cabbage is incredibly versatile. Shred it for salads, braise it with bacon and onions, ferment it into sauerkraut, or even grill it for a smoky flavor. The possibilities are endless!
We wholeheartedly encourage you to give this DIY trick a try. It’s easier than you might think, and the rewards are well worth the effort. Not only will you have access to delicious, homegrown pointed cabbage, but you’ll also gain a deeper appreciation for the process of growing your own food.
And most importantly, we want to hear about your experiences! Share your photos, tips, and challenges in the comments below. Let’s build a community of pointed cabbage enthusiasts and learn from each other. What varieties did you try? What growing techniques worked best for you? What delicious dishes did you create? Your insights will help other gardeners succeed and inspire even more people to embrace the joy of growing their own food. So, grab your seeds, get your hands dirty, and let’s grow some amazing pointed cabbage together!
Frequently Asked Questions (FAQ)
What is the best time of year to plant pointed cabbage?
The best time to plant pointed cabbage depends on your climate. In general, pointed cabbage is a cool-season crop, so it thrives in spring and fall. For a spring harvest, start seeds indoors 6-8 weeks before the last expected frost. Transplant seedlings outdoors after the danger of frost has passed. For a fall harvest, sow seeds directly into the garden in mid-summer, about 10-12 weeks before the first expected frost. Consider your local climate and growing season when determining the optimal planting time.
How much sunlight does pointed cabbage need?
Pointed cabbage requires at least 6 hours of direct sunlight per day to thrive. Choose a sunny location in your garden where your plants will receive ample sunlight throughout the day. If you live in a particularly hot climate, some afternoon shade may be beneficial to prevent the leaves from scorching.
What type of soil is best for growing pointed cabbage?
Pointed cabbage prefers well-drained, fertile soil that is rich in organic matter. The ideal soil pH is between 6.0 and 7.0. Before planting, amend your soil with compost or well-rotted manure to improve its fertility and drainage. You can also add a slow-release fertilizer to provide essential nutrients for healthy growth.
How often should I water my pointed cabbage plants?
Water your pointed cabbage plants regularly, especially during dry periods. Aim to keep the soil consistently moist but not waterlogged. Water deeply at the base of the plants, avoiding wetting the leaves, which can increase the risk of fungal diseases. Mulching around the plants can help retain moisture in the soil and suppress weed growth.
What are some common pests and diseases that affect pointed cabbage?
Pointed cabbage can be susceptible to various pests and diseases, including cabbage worms, aphids, flea beetles, clubroot, and black rot. Regularly inspect your plants for signs of infestation or disease. Use organic pest control methods, such as handpicking pests, using insecticidal soap, or introducing beneficial insects like ladybugs. To prevent diseases, practice crop rotation, ensure good air circulation, and avoid overhead watering.
How do I know when my pointed cabbage is ready to harvest?
Pointed cabbage is typically ready to harvest when the head is firm and compact. The exact size and shape of the head will vary depending on the variety. Gently squeeze the head to check for firmness. If it feels solid and dense, it’s likely ready to harvest. Use a sharp knife to cut the head from the plant, leaving a few outer leaves intact.
Can I grow pointed cabbage in containers?
Yes, you can grow pointed cabbage in containers, but you’ll need to choose a large container that is at least 12 inches in diameter and depth. Use a well-draining potting mix and provide regular watering and fertilization. Container-grown cabbage may require more frequent watering than those grown in the ground.
How can I store pointed cabbage after harvesting?
Pointed cabbage can be stored in the refrigerator for several weeks. Wrap the head tightly in plastic wrap or place it in a plastic bag to prevent it from drying out. You can also store pointed cabbage in a cool, dark, and humid place, such as a root cellar.
What are some creative ways to use pointed cabbage in cooking?
Pointed cabbage is a versatile vegetable that can be used in a variety of dishes. It can be shredded for salads, stir-fried with other vegetables, braised with meat, or fermented into sauerkraut. You can also grill or roast pointed cabbage for a unique and flavorful side dish. Its slightly sweeter flavor makes it a delicious addition to slaws and other cold salads. Don’t be afraid to experiment and try new recipes!
Is pointed cabbage more nutritious than regular cabbage?
While both pointed and regular cabbage are nutritious, pointed cabbage often boasts a slightly higher concentration of certain vitamins and minerals due to its faster growth and potentially denser head. Both are excellent sources of Vitamin C, Vitamin K, and fiber. The best way to ensure maximum nutrient content is to grow your own and harvest it fresh!


Leave a Comment