

Growing pumpkins and squash can be incredibly rewarding, filling your garden with vibrant colors and providing delicious ingredients for autumn feasts. Have you ever dreamed of carving your own giant pumpkin for Halloween or baking a homemade squash pie with ingredients you grew yourself? This year, that dream can become a reality!
For centuries, pumpkins and squash have been integral to various cultures. Native American communities, for example, revered these plants as part of the “Three Sisters” – corn, beans, and squash – a sustainable and symbiotic agricultural system. These crops provided nourishment and played a vital role in their traditions. Today, the joy of cultivating these plants continues to connect us to the earth and our heritage.
But let’s be honest, sometimes growing pumpkins and squash can feel a little daunting. Pests, diseases, and the sheer size of these plants can present challenges. That’s where these DIY tricks and hacks come in! I’m going to share some simple, yet effective, techniques that will help you overcome common obstacles and maximize your harvest. Whether you’re a seasoned gardener or just starting out, these tips will empower you to nurture healthy, thriving pumpkin and squash plants. Get ready to roll up your sleeves and transform your garden into a pumpkin and squash paradise!
Growing Pumpkins and Squash: A Comprehensive DIY Guide
Hey there, fellow gardening enthusiasts! I’m so excited to share my tried-and-true methods for growing plump, vibrant pumpkins and delicious squash right in your own backyard. It’s easier than you might think, and the satisfaction of harvesting your own homegrown gourds is truly unbeatable. Let’s dive in!
Choosing Your Varieties
Before we get our hands dirty, let’s talk about variety. Pumpkins and squash come in a dazzling array of shapes, sizes, and flavors. Choosing the right ones for your space and taste is crucial.
* **Pumpkins:**
* **Jack O’Lantern:** The classic carving pumpkin. Great for Halloween decorations.
* **Sugar Pie:** Smaller, sweeter, and perfect for pies and baking.
* **Jarrahdale:** A beautiful blue-grey pumpkin with a sweet, nutty flavor.
* **Atlantic Giant:** If you’re feeling ambitious, try growing a massive prize-winning pumpkin!
* **Squash:**
* **Butternut Squash:** A winter squash with a sweet, nutty flavor. Excellent for roasting and soups.
* **Acorn Squash:** Small, acorn-shaped squash with a mild, slightly sweet flavor.
* **Spaghetti Squash:** When cooked, the flesh separates into spaghetti-like strands. A healthy pasta alternative!
* **Zucchini:** A summer squash that’s incredibly versatile. Great for grilling, baking, and stir-fries.
* **Yellow Squash:** Similar to zucchini, but with a yellow skin.
Consider your climate, available space, and culinary preferences when making your selections.
Preparing the Soil
Pumpkins and squash are heavy feeders, meaning they need nutrient-rich soil to thrive. Proper soil preparation is key to a bountiful harvest.
* **Sunlight:** Choose a location that receives at least 6-8 hours of direct sunlight per day.
* **Soil Type:** Pumpkins and squash prefer well-drained soil that is rich in organic matter.
* **Soil Testing:** Ideally, test your soil’s pH level. Pumpkins and squash prefer a pH between 6.0 and 7.0. You can purchase a soil testing kit at most garden centers.
* **Amending the Soil:**
* **Compost:** Add plenty of compost to your soil. Compost improves drainage, aeration, and provides essential nutrients. I usually add a thick layer, about 2-3 inches, and work it into the top 6-8 inches of soil.
* **Manure:** Well-rotted manure is another excellent soil amendment. Be sure it’s well-rotted to avoid burning the plants.
* **Fertilizer:** Incorporate a slow-release fertilizer formulated for vegetables. Follow the instructions on the fertilizer package. A balanced fertilizer like 10-10-10 works well.
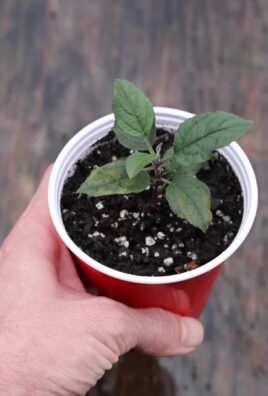
Planting Your Seeds or Seedlings
You can start pumpkins and squash from seeds directly in the garden or start them indoors a few weeks before the last frost. I prefer starting them indoors to get a head start.
* **Starting Seeds Indoors:**
1. **Timing:** Start seeds indoors about 3-4 weeks before the last expected frost.
2. **Containers:** Use peat pots or biodegradable pots. This will minimize root disturbance when transplanting.
3. **Soil:** Use a seed-starting mix.
4. **Planting:** Plant 2-3 seeds per pot, about 1 inch deep.
5. **Watering:** Keep the soil consistently moist but not waterlogged.
6. **Light:** Provide plenty of light. A sunny windowsill or grow lights will work.
7. **Thinning:** Once the seedlings emerge, thin to one strong seedling per pot.
* **Direct Sowing:**
1. **Timing:** Wait until the soil has warmed up to at least 60°F (15°C).
2. **Mound Building:** Create small mounds of soil, about 1-2 feet in diameter and 6-8 inches high. This improves drainage and warms the soil.
3. **Planting:** Plant 3-4 seeds per mound, about 1 inch deep.
4. **Spacing:** Space mounds according to the variety you’re growing. Larger pumpkins need more space than smaller squash varieties. Check the seed packet for specific recommendations.
5. **Watering:** Water thoroughly after planting.
6. **Thinning:** Once the seedlings emerge, thin to 1-2 strong seedlings per mound.
* **Transplanting Seedlings:**
1. **Hardening Off:** Before transplanting, gradually acclimate the seedlings to outdoor conditions. This is called “hardening off.” Start by placing the seedlings outdoors in a sheltered location for a few hours each day, gradually increasing the time over a week.
2. **Planting:** Dig a hole slightly larger than the root ball. Gently remove the seedling from the pot and place it in the hole. Backfill with soil and water thoroughly.
3. **Spacing:** Space seedlings according to the variety you’re growing.
Watering and Fertilizing
Pumpkins and squash need consistent watering, especially during hot, dry weather.
* **Watering:**
* Water deeply and regularly, especially when the plants are flowering and fruiting. Aim for about 1 inch of water per week.
* Water at the base of the plants to avoid wetting the foliage, which can lead to fungal diseases.
* Use a soaker hose or drip irrigation to deliver water directly to the roots.
* **Fertilizing:**
* Side-dress plants with a balanced fertilizer every 3-4 weeks.
* You can also use a liquid fertilizer, such as fish emulsion or seaweed extract, every 2 weeks.
* When the plants start to flower, switch to a fertilizer that is higher in phosphorus and potassium to promote fruit development.
Controlling Pests and Diseases
Pumpkins and squash can be susceptible to various pests and diseases. Here’s how to keep them at bay:
* **Common Pests:**
* **Squash Bugs:** These pests suck the sap from the plants, causing them to wilt and die. Handpick them off the plants or use insecticidal soap.
* **Squash Vine Borers:** These pests bore into the stems of the plants, causing them to wilt and die. Wrap the stems with aluminum foil or row covers to prevent them from laying eggs. You can also inject *Bacillus thuringiensis* (Bt) into the stems to kill the larvae.
* **Cucumber Beetles:** These pests feed on the leaves and flowers of the plants. Use row covers to protect the plants or spray with insecticidal soap.
* **Aphids:** These pests suck the sap from the plants. Spray with insecticidal soap or release ladybugs to control them.
* **Common Diseases:**
* **Powdery Mildew:** This fungal disease causes a white, powdery coating on the leaves. Improve air circulation by spacing plants properly and water at the base of the plants. You can also spray with a fungicide.
* **Downy Mildew:** This fungal disease causes yellow spots on the leaves. Improve air circulation and avoid overhead watering. You can also spray with a fungicide.
* **Blossom End Rot:** This condition causes the blossom end of the fruit to rot. It’s usually caused by calcium deficiency or inconsistent watering. Ensure the soil is well-drained and water consistently. You can also add calcium to the soil.
Regularly inspect your plants for signs of pests and diseases. Early detection and treatment are key to preventing serious problems.
Pollination
Pumpkins and squash have separate male and female flowers. Pollination is necessary for fruit to develop.
* **Natural Pollination:** Bees and other pollinators usually take care of pollination. Attract pollinators to your garden by planting flowers that they love, such as sunflowers, zinnias, and lavender.
* **Hand Pollination:** If you’re not seeing enough pollination, you can hand-pollinate the flowers.
1. Identify the male and female flowers. Male flowers have a long, slender stem, while female flowers have a small fruit at the base.
2. Use a small paintbrush to collect pollen from the male flower.
3. Transfer the pollen to the stigma of the female flower.
4. Hand-pollinate in the morning, when the flowers are open.
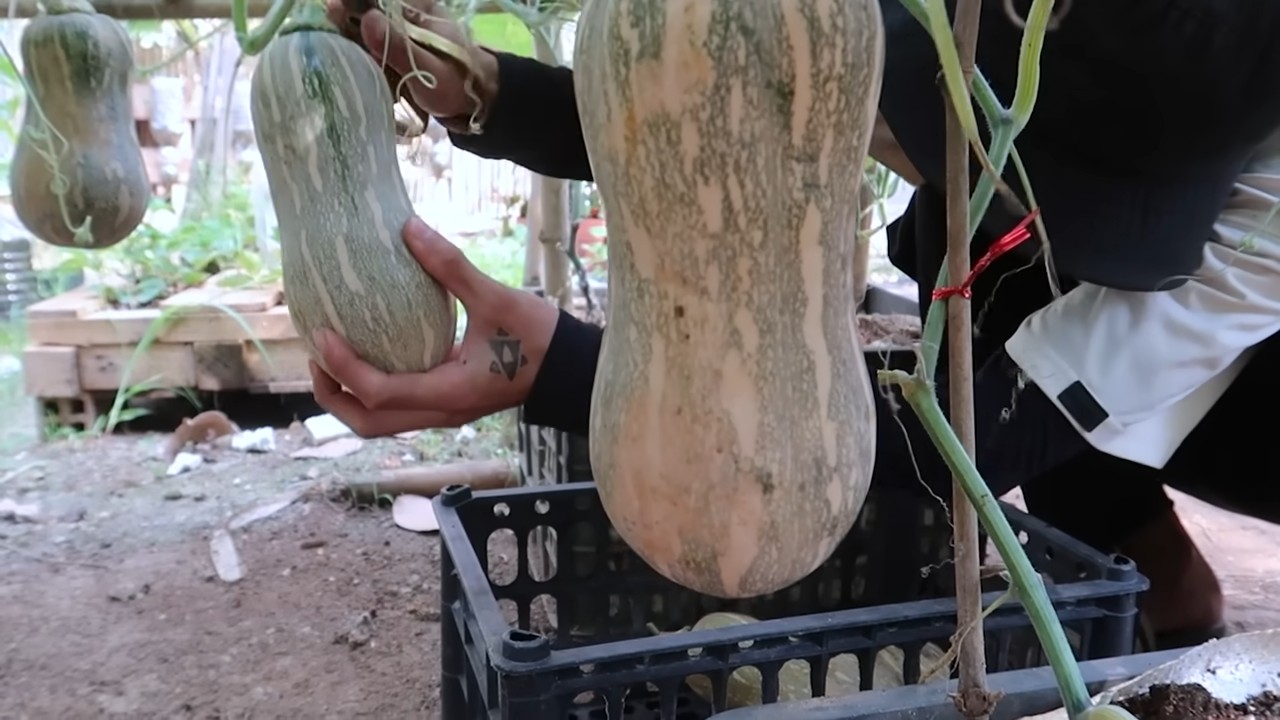
Harvesting
Knowing when to harvest your pumpkins and squash is crucial for optimal flavor and storage.
* **Pumpkins:**
* Harvest pumpkins when the skin is hard and resistant to scratching.
* The stem should be dry and brown.
* Cut the pumpkin from the vine, leaving a few inches of stem attached.
* Cure pumpkins in a warm, dry place for 1-2 weeks to harden the skin and improve storage.
* **Winter Squash (Butternut, Acorn,

Conclusion
So, there you have it! Mastering the art of growing pumpkins and squash doesn’t have to be a daunting task. By implementing these simple yet effective DIY tricks, you’re not just planting seeds; you’re cultivating a thriving garden brimming with vibrant, delicious produce. We’ve covered everything from soil preparation and companion planting to pest control and proper harvesting techniques. Remember, the key to success lies in understanding the specific needs of your chosen varieties and adapting these techniques to your unique growing environment.
Why is this a must-try? Because it empowers you to take control of your food source, reduces your reliance on store-bought produce (often laden with pesticides), and connects you with the natural world in a deeply satisfying way. Imagine the pride you’ll feel when you serve a homemade pumpkin pie made with pumpkins you nurtured from tiny seedlings! Or the satisfaction of roasting a butternut squash soup using squash grown right in your backyard. These are experiences that money simply can’t buy.
But the benefits extend beyond just the culinary. Growing your own pumpkins and squash is a fantastic way to get exercise, reduce stress, and even educate children about the importance of sustainable agriculture. It’s a hobby that can be enjoyed by the whole family, fostering a sense of teamwork and shared accomplishment.
Don’t be afraid to experiment! Try different varieties of pumpkins and squash to discover your favorites. Consider interplanting them with beneficial herbs like basil or marigolds to deter pests and attract pollinators. Explore different composting methods to enrich your soil naturally. The possibilities are endless!
And speaking of variations, consider these ideas to take your pumpkin and squash growing to the next level:
* Vertical Growing: If you’re short on space, try growing vining varieties of squash on a trellis or fence. This not only saves space but also improves air circulation, reducing the risk of fungal diseases.
* Succession Planting: Plant seeds every few weeks to ensure a continuous harvest throughout the growing season. This is especially useful for squash, which tends to produce heavily for a short period.
* Heirloom Varieties: Explore the world of heirloom pumpkins and squash. These varieties often have unique flavors, colors, and textures that you won’t find in commercially grown produce. Plus, they’re a great way to preserve genetic diversity.
* Pumpkin Patch Fun: If you have the space, create your own mini pumpkin patch! This is a fantastic way to entertain kids and create lasting memories.
We’re confident that with a little effort and these DIY tricks, you’ll be well on your way to harvesting a bountiful crop of pumpkins and squash. So, grab your gardening gloves, get your hands dirty, and prepare to be amazed by the magic of nature.
We encourage you to try these techniques and share your experiences with us! Let us know what worked for you, what challenges you faced, and any tips you discovered along the way. Your feedback will help us refine these methods and empower other gardeners to succeed. Share your photos and stories on our social media channels using #HomeGrownHarvest and #PumpkinSquashSuccess. We can’t wait to see what you create! Remember, successful **growing pumpkins and squash** is within your reach.
FAQ
What are the best varieties of pumpkins and squash to grow for beginners?
For beginners, some of the easiest and most rewarding varieties to grow include:
* Pumpkins: ‘Jack Be Little’ (small, ornamental), ‘Sugar Pie’ (great for pies), and ‘Connecticut Field’ (classic carving pumpkin).
* Squash: ‘Zucchini’ (prolific and versatile), ‘Butternut’ (sweet and nutty flavor), and ‘Acorn’ (easy to roast).
These varieties are generally disease-resistant, relatively quick to mature, and forgiving of minor mistakes. They also offer a good balance of flavor, texture, and ease of use in the kitchen. When selecting varieties, consider your local climate and growing conditions. Check with your local nursery or extension office for recommendations specific to your area.
How often should I water my pumpkin and squash plants?
Pumpkins and squash need consistent moisture, especially during fruit development. Aim to water deeply and regularly, providing about 1-2 inches of water per week. Water at the base of the plants to avoid wetting the foliage, which can lead to fungal diseases. Check the soil moisture regularly by sticking your finger about an inch into the soil. If it feels dry, it’s time to water. Avoid overwatering, as this can lead to root rot. Mulching around the plants can help retain moisture and suppress weeds. During periods of drought or extreme heat, you may need to water more frequently.
What are some common pests and diseases that affect pumpkins and squash, and how can I control them?
Common pests include squash bugs, squash vine borers, aphids, and cucumber beetles. Common diseases include powdery mildew, downy mildew, and blossom-end rot. Here are some control methods:
* Squash Bugs: Handpick them off plants, use insecticidal soap, or apply neem oil.
* Squash Vine Borers: Wrap stems with aluminum foil or row covers to prevent egg-laying. Inject Bacillus thuringiensis (Bt) into the stems to kill larvae.
* Aphids: Spray with insecticidal soap or neem oil. Introduce beneficial insects like ladybugs.
* Cucumber Beetles: Use row covers, handpick them off plants, or apply neem oil.
* Powdery Mildew: Improve air circulation, water at the base of plants, and apply a fungicide if necessary.
* Downy Mildew: Improve air circulation, avoid overhead watering, and apply a fungicide if necessary.
* Blossom-End Rot: Ensure consistent watering and calcium levels in the soil.
Regularly inspect your plants for signs of pests and diseases. Early detection and treatment are crucial for preventing serious problems.
How do I know when my pumpkins and squash are ripe and ready to harvest?
The best way to determine ripeness is by observing the color and texture of the fruit.
* Pumpkins: The skin should be hard and resistant to scratching. The stem should be dry and brown. The color should be deep and uniform.
* Squash: The skin should be hard and dull. The stem should be dry and brown. The color should be characteristic of the variety.
For winter squash, like butternut and acorn, allow the fruit to cure in a warm, dry place for a week or two after harvesting. This will improve their flavor and storage life.
Can I save seeds from my pumpkins and squash to plant next year?
Yes, you can save seeds from your pumpkins and squash, but there are a few things to keep in mind. If you grew hybrid varieties, the seeds may not produce plants that are true to type. Heirloom varieties are more likely to produce plants that are similar to the parent plant. To save seeds, scoop them out of the ripe fruit, rinse them thoroughly, and spread them out to dry on a paper towel. Once they are completely dry, store them in an airtight container in a cool, dark place.
What kind of fertilizer should I use for my pumpkin and squash plants?
Pumpkins and squash are heavy feeders and benefit from regular fertilization. Use a balanced fertilizer with equal amounts of nitrogen, phosphorus, and potassium (e.g., 10-10-10) at planting time. Side-dress with a nitrogen-rich fertilizer (e.g., ammonium nitrate) when the plants begin to vine and again when the fruits begin to develop. You can also use organic fertilizers like compost, manure, or bone meal. Avoid over-fertilizing, as this can lead to excessive foliage growth and reduced fruit production.
How can I attract pollinators to my pumpkin and squash plants?
Pollinators are essential for pumpkin and squash production. To attract them, plant flowers that are attractive to bees, butterflies, and other pollinators near your pumpkin and squash plants. Some good choices include sunflowers, zinnias, marigolds, and lavender. Avoid using pesticides that can harm pollinators. Provide a source of water for pollinators, such as a shallow dish filled with water and pebbles. You can also create a bee-friendly habitat by providing nesting sites for bees.
Leave a Comment