

Hem jeans without cutting? Yes, you read that right! I know, I know, the thought of altering denim can be daunting, especially when scissors are involved. But what if I told you there’s a way to shorten your favorite jeans without sacrificing their original hem or risking a fashion faux pas?
For generations, resourceful individuals have sought clever ways to mend and modify clothing, extending the life of their garments and expressing their personal style. This no-cut hemming technique taps into that rich history of ingenuity, offering a modern solution to a common problem. Think of it as a sartorial secret passed down through the ages, now available to you!
Let’s face it, finding jeans that fit perfectly off the rack is like searching for a unicorn. They’re either too long, too short, or just…off. Instead of relegating those almost-perfect jeans to the back of your closet or enduring the expense of professional tailoring, this DIY trick empowers you to take control. You’ll save money, preserve the original look of your jeans, and gain a valuable new skill. Plus, mastering this hem jeans without cutting method means you can adjust your jeans as needed, adapting to different shoe heights and styles. Ready to ditch the frustration and embrace a perfectly hemmed pair of jeans? Let’s get started!
DIY: Hem Your Jeans Without Cutting – A No-Sew Solution!
Hey there, fellow denim lovers! Ever bought a pair of jeans that fit perfectly everywhere except the length? Or maybe you just want to rock a different look with your favorite pair without committing to a permanent chop? Well, I’ve got you covered! Today, I’m going to show you how to hem your jeans *without cutting them*. That’s right, no scissors required! This method is perfect for preserving the original hem, allowing you to easily revert back to the original length later, and it’s a lifesaver if you’re hesitant to permanently alter your beloved denim.
This no-sew hemming technique relies on a clever combination of folding, ironing, and fabric glue (or hemming tape). It’s surprisingly easy, even if you’re not a seasoned DIYer. So, grab your jeans, an iron, some fabric glue (or hemming tape), and let’s get started!
What You’ll Need:
* Your jeans (obviously!)
* An iron and ironing board
* Fabric glue (I recommend a washable and permanent kind, just in case!) *or* Hemming tape (double-sided, fusible)
* Measuring tape or ruler
* Pins (optional, but helpful)
* Scissors (only if using hemming tape)
* A damp cloth (for ironing)
Preparing Your Jeans
Before we dive into the actual hemming, let’s get our jeans prepped and ready. This step is crucial for ensuring a clean and professional-looking result.
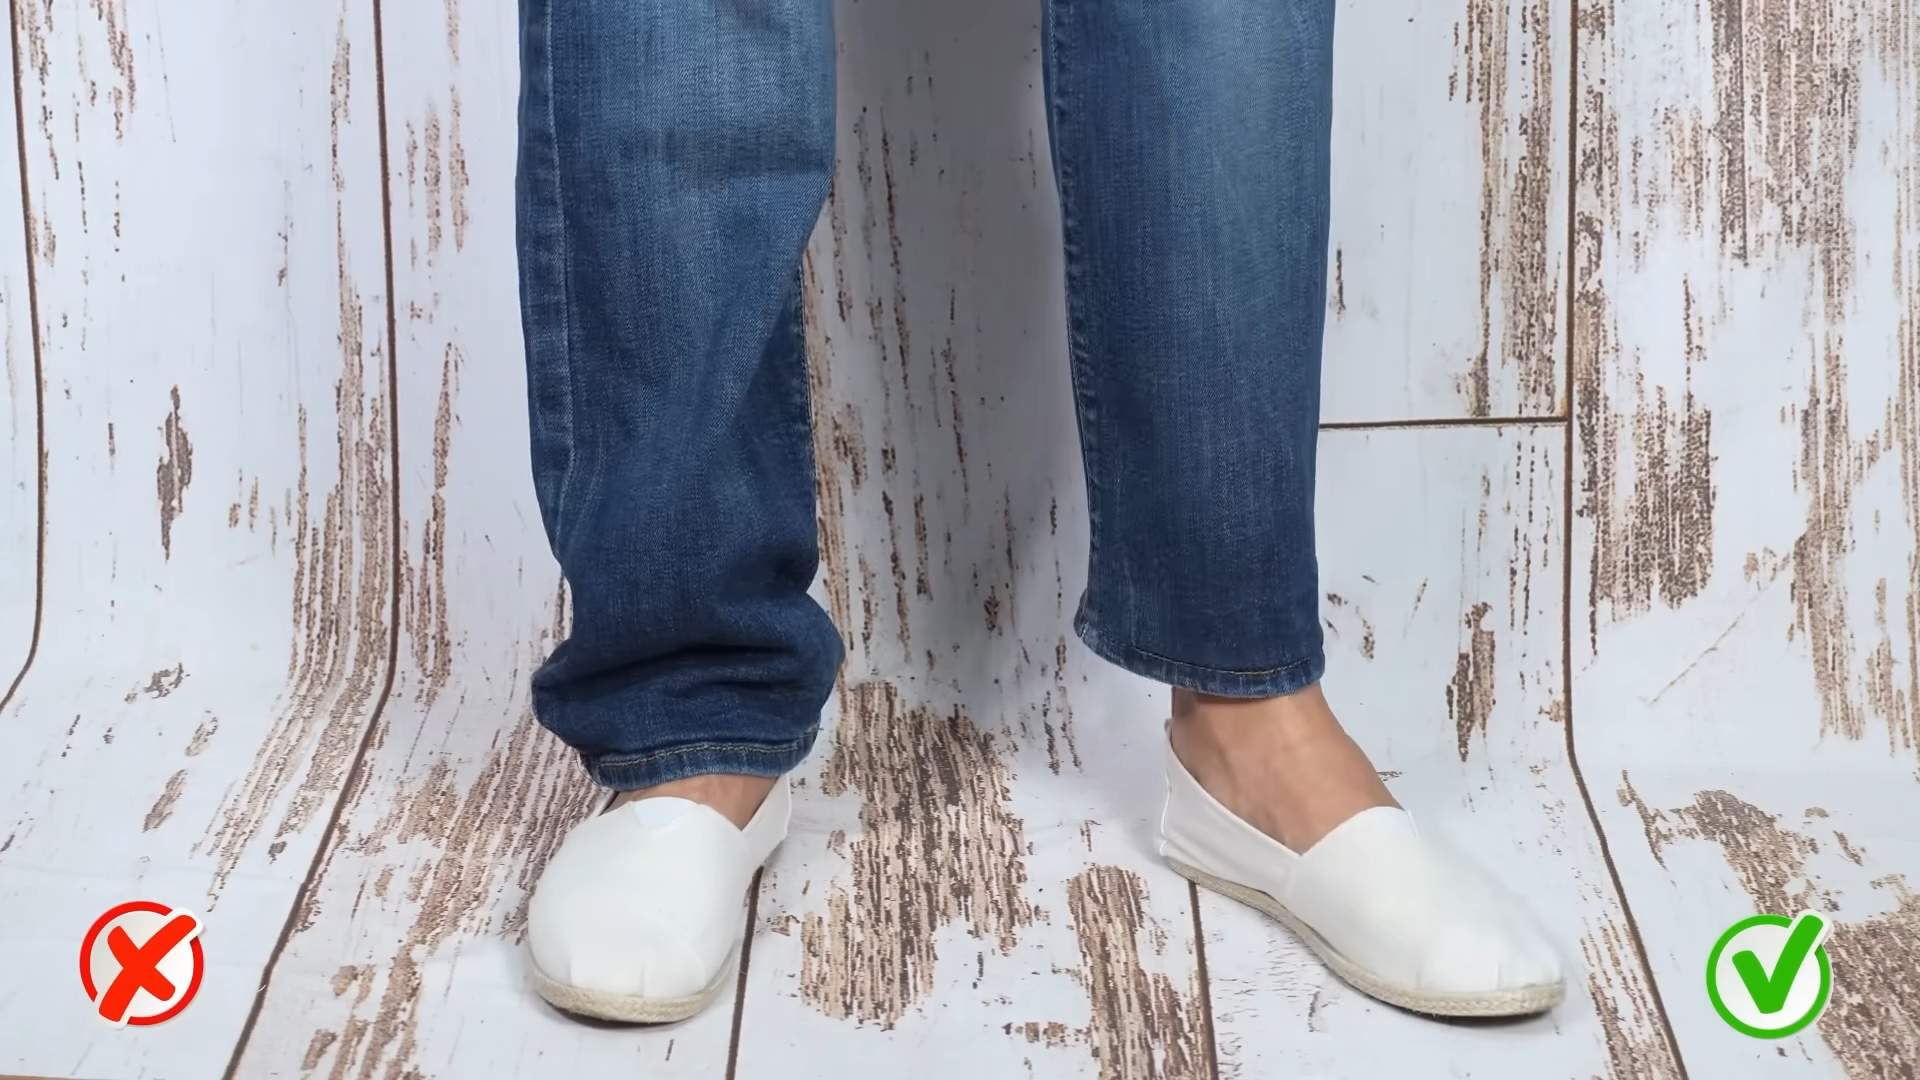
1. Try on your jeans with the shoes you plan to wear them with. This is super important! You need to determine the exact length you want your jeans to be. Have a friend help you if needed, or stand in front of a mirror.
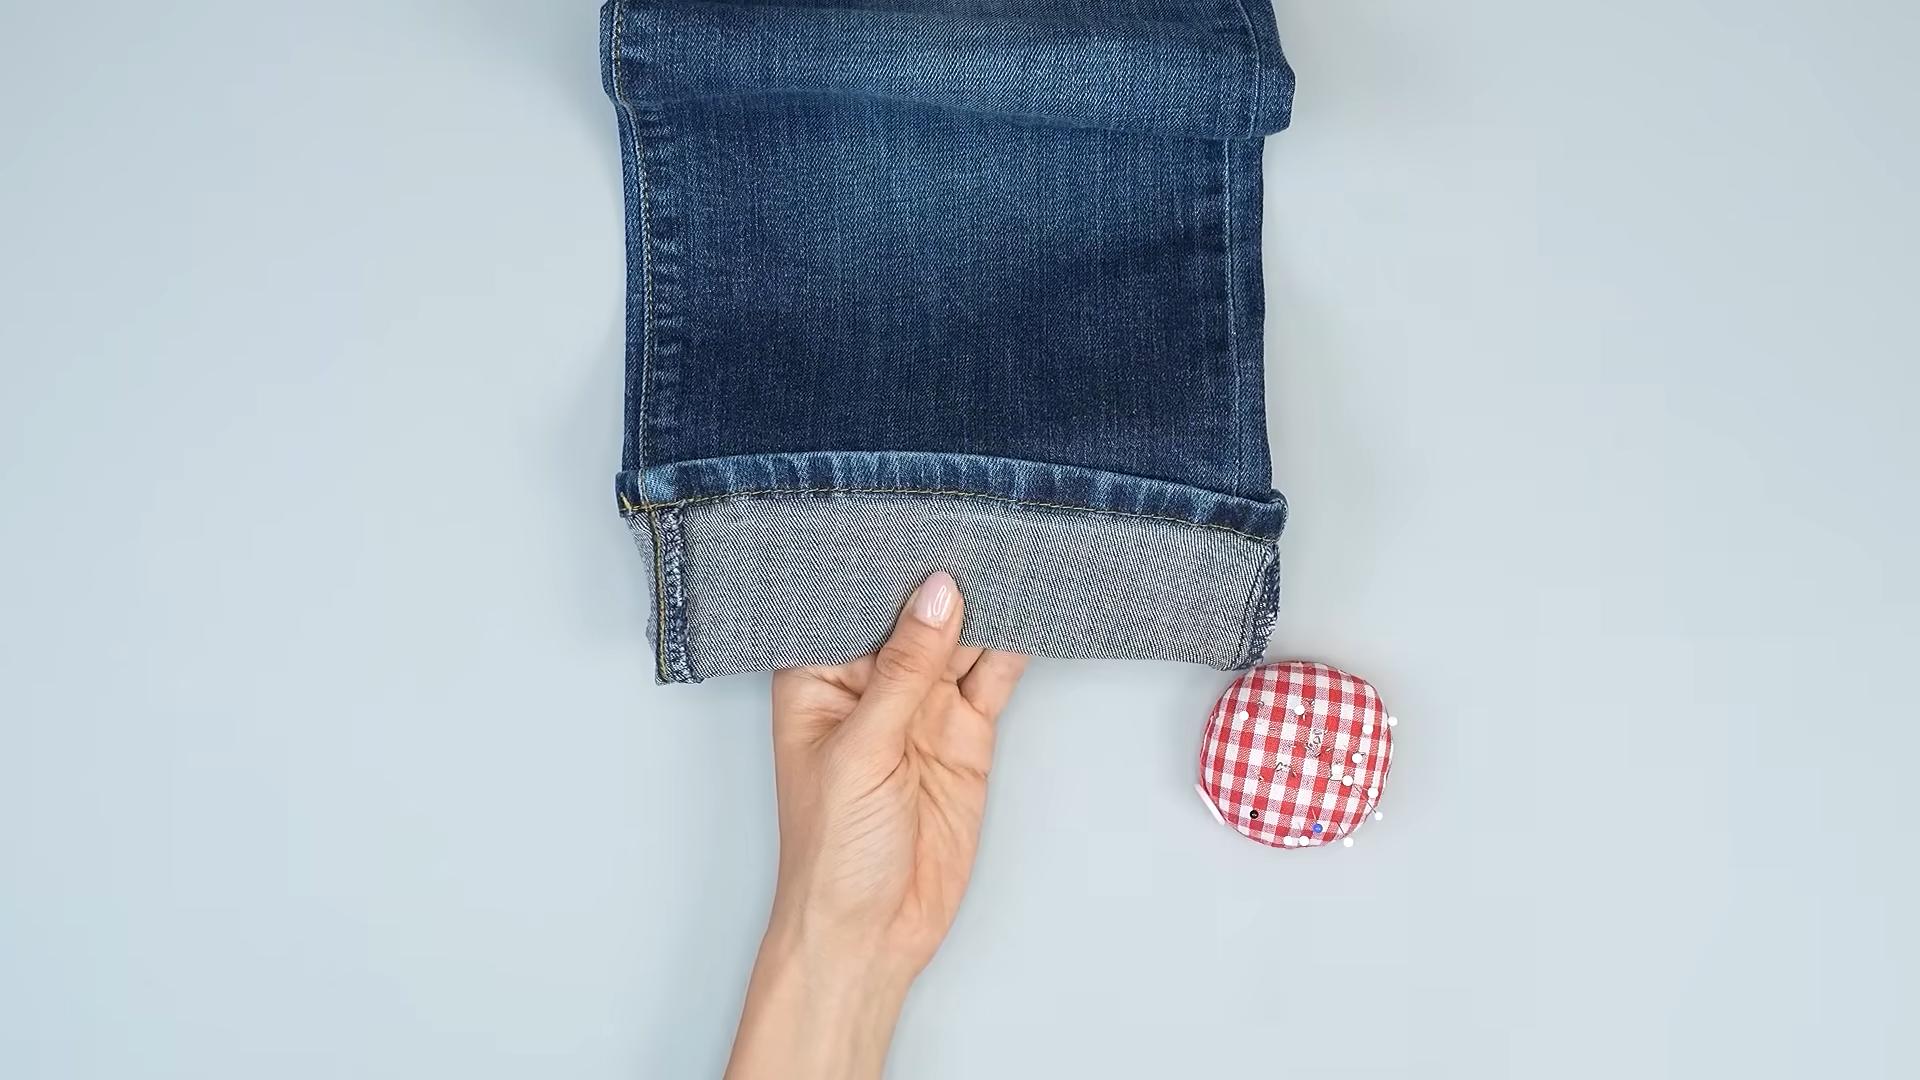
2. Fold the jeans up to your desired length. Make sure the fold is even all the way around the leg.
3. Pin the fold in place. Use pins to secure the folded hem, making sure they are perpendicular to the fold. This will help keep the fold in place while you work. I usually place pins every few inches.
4. Carefully remove the jeans. Try to keep the fold and pins intact as you take them off.
5. Lay your jeans on a flat surface. An ironing board is ideal, but a clean table or even the floor will work.
Creating the Fold
Now comes the fun part – creating the actual fold that will form your new hem. This is where precision is key, so take your time and double-check your measurements.
1. Measure the desired hem length. Using your measuring tape or ruler, measure the distance from the original hem to the pinned fold. This is the amount of fabric you’ll be folding up. Let’s say, for example, you want to shorten your jeans by 2 inches.
2. Unpin the jeans. Carefully remove the pins you used to mark the desired length.
3. Fold the jeans up by half the desired hem length. In our example, this would be 1 inch. Fold the raw edge of the jeans up towards the inside of the leg by 1 inch and press with your iron. This creates a clean, folded edge. The goal here is to hide the raw edge of the cut denim.
4. Iron the fold. Use a hot iron (check the care label on your jeans for the appropriate temperature) to press the fold firmly in place. A damp cloth can help create a sharper crease.
5. Fold the jeans up again by the remaining amount. Now, fold the jeans up again by the remaining 1 inch (in our example), bringing the original hem up to your desired length. The first fold should now be tucked inside this second fold.
6. Iron the entire folded hem. Press the entire folded hem with your iron, ensuring a crisp and even fold. Again, a damp cloth can be helpful.
Securing the Hem: Fabric Glue Method
If you’re opting for the fabric glue method, this section is for you. Fabric glue is a great option for a quick and easy, no-sew hem.
1. Apply fabric glue to the inside of the folded hem. Carefully lift the top layer of the folded hem and apply a thin, even line of fabric glue along the inside. Be sure to apply the glue to the entire circumference of the leg. Don’t overdo it with the glue – a little goes a long way! You want to avoid the glue seeping through the fabric.
2. Press the layers together. Gently press the top layer of the folded hem back down onto the glued surface. Make sure the edges are aligned and smooth.
3. Pin the hem in place (optional). If you want extra security, you can use pins to hold the hem in place while the glue dries.
4. Let the glue dry completely. Follow the instructions on your fabric glue for drying time. This usually takes a few hours. Avoid wearing or washing your jeans until the glue is completely dry.
5. Repeat for the other leg. Follow the same steps to hem the other leg of your jeans.
Securing the Hem: Hemming Tape Method
Prefer hemming tape? No problem! This method is just as easy and provides a strong, fusible bond.
1. Cut strips of hemming tape. Cut strips of hemming tape that are slightly shorter than the circumference of your jean leg. You’ll need enough strips to go all the way around the inside of the folded hem.
2. Place the hemming tape inside the folded hem. Lift the top layer of the folded hem and place the strips of hemming tape along the inside, spacing them evenly apart. Make sure the tape is positioned close to the edge of the fabric.
3. Iron the hem. Using a hot iron (check the instructions on your hemming tape for the appropriate temperature), press the folded hem firmly in place. Hold the iron in each section for the recommended time (usually a few seconds). The heat will melt the adhesive on the hemming tape, bonding the layers of fabric together.
4. Let the hem cool completely. Allow the hem to cool completely before moving or wearing your jeans. This will ensure a strong and lasting bond.
5. Repeat for the other leg. Follow the same steps to hem the other leg of your jeans.
Finishing Touches
Once you’ve secured the hem with either fabric glue or hemming tape, there are a few finishing touches you can add to make your jeans look even more polished.
1. Give your jeans a final press. After the glue has dried or the hemming tape has cooled, give your jeans one last press with the iron. This will help set the hem and remove any wrinkles.
2. Check for any loose edges. Inspect the hem for any loose edges or areas where the glue or hemming tape didn’t adhere properly. If you find any, simply apply a little more glue or hemming tape and press again.
3. Trim any excess fabric (optional). If you have a lot of excess fabric inside the folded hem, you can carefully trim it away with scissors. Be careful not to cut through the outer layer of the hem! This step is mostly for comfort and to reduce bulk.
Tips and Tricks for a Perfect Hem
Here are a few extra tips and tricks to help you achieve a flawless, no-sew hem:
* Choose the right fabric glue or hemming tape. Not all fabric glues and hemming tapes are created equal. Look for products that are specifically designed for fabric and that are washable and permanent. Read reviews and experiment to find what works best for you.
* Use a pressing cloth. A pressing cloth (a thin piece of cotton fabric) can protect your jeans from scorching or shine when ironing.
* Work in small sections. When applying fabric glue or hemming tape, work in small sections to ensure even coverage and a strong bond.
* Don’t be afraid to experiment. This is a DIY project, so don’t be afraid to experiment and find what works best for you. If you’re not happy with the results, you can always try again!
* Consider the weight of your denim. Thicker denim might require a stronger fabric glue or hemming tape.
* Wash inside out on a gentle cycle. To prolong the life of your hem, wash your jeans inside out on a gentle cycle and avoid using harsh detergents.
* Air dry your jeans. Tumble drying can damage the glue or hemming tape, so it’s best to air dry your jeans.
And there you have it! You’ve successfully hemmed your jeans without cutting them. Now you can enjoy your perfectly-lengthed denim without the commitment of a permanent alteration. Happy hemming!
Conclusion
So, there you have it! Mastering the art of how to hem jeans without cutting is not just a clever trick; it’s a game-changer for your wardrobe and your wallet. No more agonizing over the perfect length, no more sacrificing the original hem you love, and no more expensive trips to the tailor for a simple adjustment. This method empowers you to customize your jeans to fit perfectly, regardless of the shoes you’re wearing or the style you’re aiming for.
This DIY approach is a must-try for several compelling reasons. First and foremost, it preserves the integrity of your jeans. That original hem, often with its unique fading and character, is a defining feature. By avoiding cutting, you maintain that authentic look and feel. Second, it’s incredibly versatile. Whether you’re dealing with raw denim, distressed jeans, or a classic pair of Levi’s, this technique adapts beautifully. Third, it’s cost-effective. Think of all the money you’ll save on tailoring fees! And finally, it’s a satisfyingly simple project that anyone can accomplish with a few basic tools and a little patience.
But the beauty of this method lies not only in its practicality but also in its potential for personalization. Feel free to experiment with different stitching techniques. For a more subtle hem, consider using a blind hem stitch. If you’re feeling adventurous, try adding a decorative stitch for a unique touch. You can also play around with the amount of fabric you fold under, creating a slightly different look each time. For a more rugged, casual vibe, leave the folded hem slightly visible on the outside. For a cleaner, more polished appearance, ensure the fold is completely hidden.
Consider these variations to tailor the technique to your specific needs and preferences:
* The Double Fold: For heavier denim, a double fold can provide extra durability and a cleaner finish. Simply fold the fabric up twice before stitching.
* The Iron-On Hemming Tape Assist: If you’re new to sewing or want extra security, use iron-on hemming tape to hold the folded hem in place before stitching. This will prevent shifting and ensure a neat, even result.
* The Contrast Stitch: Use a thread color that contrasts with your jeans for a bold, eye-catching hem. This is a great way to add a personal touch and make your jeans stand out.
* The Frayed Edge: For a more relaxed, bohemian look, intentionally fray the edge of the folded hem after stitching. This adds texture and character to your jeans.
We wholeheartedly encourage you to give this DIY trick a try. It’s a rewarding experience that will transform the way you approach denim alterations. Don’t be intimidated if you’re not a seasoned sewer; this method is designed to be accessible to everyone. Grab your jeans, gather your supplies, and prepare to be amazed at how easy it is to achieve a perfect hem without sacrificing the original charm of your favorite pair.
Once you’ve mastered the art of how to hem jeans without cutting, we’d love to hear about your experience! Share your photos, tips, and variations in the comments below. Let’s create a community of denim enthusiasts who are empowered to customize their jeans with confidence and creativity. Your insights could inspire others to embrace this simple yet transformative technique. Happy hemming!
Frequently Asked Questions (FAQs)
What kind of sewing machine do I need to hem jeans without cutting?
You don’t necessarily need a fancy, high-end sewing machine. A basic sewing machine with a straight stitch and a zigzag stitch will work perfectly fine for hemming jeans without cutting. The key is to use a denim needle, which is stronger and sharper than a regular needle and designed to penetrate the thick fabric of jeans without breaking. If you’re using a vintage or older machine, make sure it’s properly maintained and oiled for optimal performance. If you plan on doing a lot of denim work, investing in a heavy-duty machine might be worthwhile, but it’s not essential for this particular project.
What if I don’t have a sewing machine? Can I still hem jeans without cutting?
Yes, absolutely! While a sewing machine makes the process faster and more efficient, you can definitely hem jeans without cutting by hand. Use a sturdy needle and strong thread (like denim thread or upholstery thread). A backstitch is a good choice for hand-sewing a hem, as it creates a strong and durable seam. Be patient and take your time to ensure neat and even stitches. It will take longer than using a machine, but the results can be just as professional-looking. You can also use fabric glue or hemming tape as a temporary solution, but these are not as durable as stitching.
How do I choose the right thread color for hemming my jeans?
The best thread color depends on the look you’re going for. For a subtle, almost invisible hem, choose a thread that closely matches the existing stitching on your jeans. If you want a more decorative or contrasting hem, you can choose a thread in a different color. Consider the overall style of your jeans and your personal preferences when making your decision. It’s always a good idea to test the thread color on a scrap piece of denim before you start sewing to make sure you’re happy with the result.
How much fabric should I fold under when hemming jeans without cutting?
The amount of fabric you fold under depends on the desired length of your jeans and the thickness of the denim. A general guideline is to fold under enough fabric to achieve the desired length, plus a little extra for the seam allowance. For lighter-weight denim, you might only need to fold under 1-2 inches. For heavier denim, you might need to fold under 2-3 inches. Experiment with different amounts to find what works best for your jeans. Remember, you can always adjust the fold before you start stitching.
What if my jeans are too long even after folding the hem?
If your jeans are still too long after folding the hem as much as possible, you have a couple of options. You can try folding the hem twice for a shorter length, especially if you’re working with thinner denim. Alternatively, you can consider a different hemming technique that involves cutting the excess fabric, but this will, of course, remove the original hem. If you’re not comfortable cutting your jeans, you might want to consult a professional tailor for advice.
Can I use this method on all types of jeans?
This method works best on jeans with a relatively straight leg or a slight bootcut. It may not be suitable for very wide-leg or flared jeans, as the folded hem could create an awkward shape. However, you can still try it and see if it works for your particular pair of jeans. The key is to ensure that the folded hem lies flat and doesn’t create any unwanted bulk or distortion.
How do I prevent the hem from unraveling after hemming?
To prevent the hem from unraveling, it’s important to use a strong stitch and to secure the ends of the thread properly. Backstitching at the beginning and end of each seam will help to lock the stitches in place. You can also use a seam sealant or fray check on the raw edge of the folded hem to further prevent unraveling. For extra durability, consider using a serger to finish the raw edge before folding it under.
What if I make a mistake while hemming?
Don’t panic! Mistakes happen. If you make a mistake while stitching, carefully remove the stitches with a seam ripper. Be gentle to avoid damaging the fabric. Once you’ve removed the stitches, you can try again. If you’ve accidentally created a hole in the fabric, you can try patching it with a small piece of denim or using a decorative stitch to cover it up. Remember, practice makes perfect, so don’t be discouraged if you don’t get it right the first time.
How do I care for my hemmed jeans?
To care for your hemmed jeans, follow the washing instructions on the garment label. In general, it’s best to wash jeans inside out in cold water to prevent fading. Avoid using harsh detergents or bleach. Tumble dry on low heat or hang to dry. If you notice any loose threads or unraveling, trim them carefully with scissors or use a seam sealant to prevent further damage. With proper care, your hemmed jeans will last for years to come.

Leave a Comment