

Hydroponic Water Spinach DIY: Ever dreamed of harvesting fresh, crisp water spinach right from your kitchen, regardless of the season? Imagine skipping those trips to the Asian market and having a constant supply of this delicious, nutritious green at your fingertips! Well, dream no more! This article is your ultimate guide to creating your very own hydroponic water spinach setup, a surprisingly simple and rewarding project that even beginners can master.
Water spinach, also known as Ong Choy or Kang Kong, has a rich history, deeply rooted in Asian cuisine and culture. For centuries, it’s been a staple in stir-fries, soups, and salads, prized for its mild flavor and impressive health benefits. But what if you could bypass the uncertainties of sourcing fresh, quality water spinach and cultivate it yourself? That’s where the magic of hydroponics comes in!
In today’s world, where access to fresh produce can be a challenge and concerns about pesticides are on the rise, learning how to grow your own food is more important than ever. This hydroponic water spinach DIY project not only provides you with a sustainable source of healthy greens but also offers a fun and educational experience. I’ll walk you through each step, from selecting the right materials to troubleshooting common issues, ensuring your success in growing lush, vibrant water spinach. Get ready to unleash your inner gardener and enjoy the satisfaction of harvesting your own homegrown goodness!
DIY Hydroponic Water Spinach: A Beginner’s Guide
Hey there, fellow gardening enthusiasts! Ever wanted to grow your own fresh, crunchy water spinach (also known as kangkong or ong choy) right in your kitchen? Well, you’re in the right place! I’m going to walk you through a super simple DIY hydroponic setup that’s perfect for beginners. Trust me, if I can do it, you can too!
What is Hydroponics, Anyway?
Before we dive in, let’s quickly cover what hydroponics actually is. Basically, it’s growing plants without soil, using nutrient-rich water solutions. It’s a fantastic way to grow food indoors, especially if you’re short on space or don’t have a green thumb for traditional gardening. Plus, it’s just plain cool!
Why Water Spinach?
Water spinach is an excellent choice for hydroponics because it’s fast-growing, relatively low-maintenance, and absolutely delicious. It thrives in water and loves the warm conditions that most indoor environments provide. You’ll be harvesting fresh greens in no time!
Materials You’ll Need
Alright, let’s gather our supplies. Don’t worry, you probably have a lot of this stuff lying around already.
* A Container: I recommend a dark-colored plastic storage bin (around 10-20 liters). The darkness helps prevent algae growth. A lid is a bonus!
* Net Cups: These are small plastic cups with holes in them. You’ll need enough to hold your water spinach seedlings. I usually use 6-8 for a bin of this size.
* Growing Medium: Rockwool cubes, coco coir, or even LECA (lightweight expanded clay aggregate) are all great options. I personally prefer rockwool because it’s easy to handle and retains moisture well.
* Hydroponic Nutrients: This is the most important part! You’ll need a balanced hydroponic nutrient solution specifically formulated for leafy greens. Look for a two-part or three-part solution for best results.
* Air Pump and Air Stone: These provide oxygen to the roots, which is crucial for healthy growth. A small aquarium air pump will do the trick.
* pH Meter or pH Test Strips: Maintaining the correct pH level is essential for nutrient absorption.
* pH Up and pH Down Solutions: To adjust the pH of your nutrient solution.
* Water Spinach Seeds: You can find these at most garden centers or online.
* A Drill (optional): For drilling holes in the lid of your container.
* Measuring Cups and Spoons: For accurately measuring your nutrient solution.
* Gloves: To protect your hands from the nutrient solution.
* Grow Lights (optional): If you don’t have a sunny spot, grow lights will help your water spinach thrive.
Step-by-Step Instructions: Building Your Hydroponic System
Okay, let’s get our hands dirty (well, not really, since it’s hydroponics!). Here’s how to build your simple hydroponic system:
1. Preparing the Container
1. Clean the Container: Thoroughly wash your plastic storage bin with soap and water to remove any dirt or debris. Rinse it well.
2. Drill Holes (if using a lid): If you’re using a lid, drill holes that are slightly smaller than the diameter of your net cups. Space them evenly across the lid. The net cups should fit snugly in the holes. If you don’t have a lid, you can create a makeshift one using cardboard or foam board. Just make sure it’s sturdy enough to hold the net cups.
3. Darken the Container (optional): If your container isn’t already dark-colored, you can paint the outside with black paint or wrap it in black plastic to prevent algae growth.
2. Setting Up the Air Pump and Air Stone
1. Connect the Air Stone: Attach the air stone to the tubing of your air pump.
2. Place the Air Stone: Place the air stone at the bottom of your container. This will ensure that the nutrient solution is well-oxygenated.
3. Position the Air Pump: Place the air pump outside the container, preferably on a higher surface, to prevent water from siphoning back into the pump in case of a power outage.
3. Preparing the Growing Medium and Net Cups
1. Soak the Growing Medium: If you’re using rockwool, soak the cubes in water for at least 30 minutes before using them. This will help them retain moisture. If you’re using coco coir, rinse it thoroughly to remove any excess salts.
2. Fill the Net Cups: Gently fill the net cups with your chosen growing medium. Don’t pack it too tightly, as this can restrict root growth.
4. Germinating the Water Spinach Seeds
1. Soak the Seeds: Soak the water spinach seeds in water for 12-24 hours to help them germinate faster.
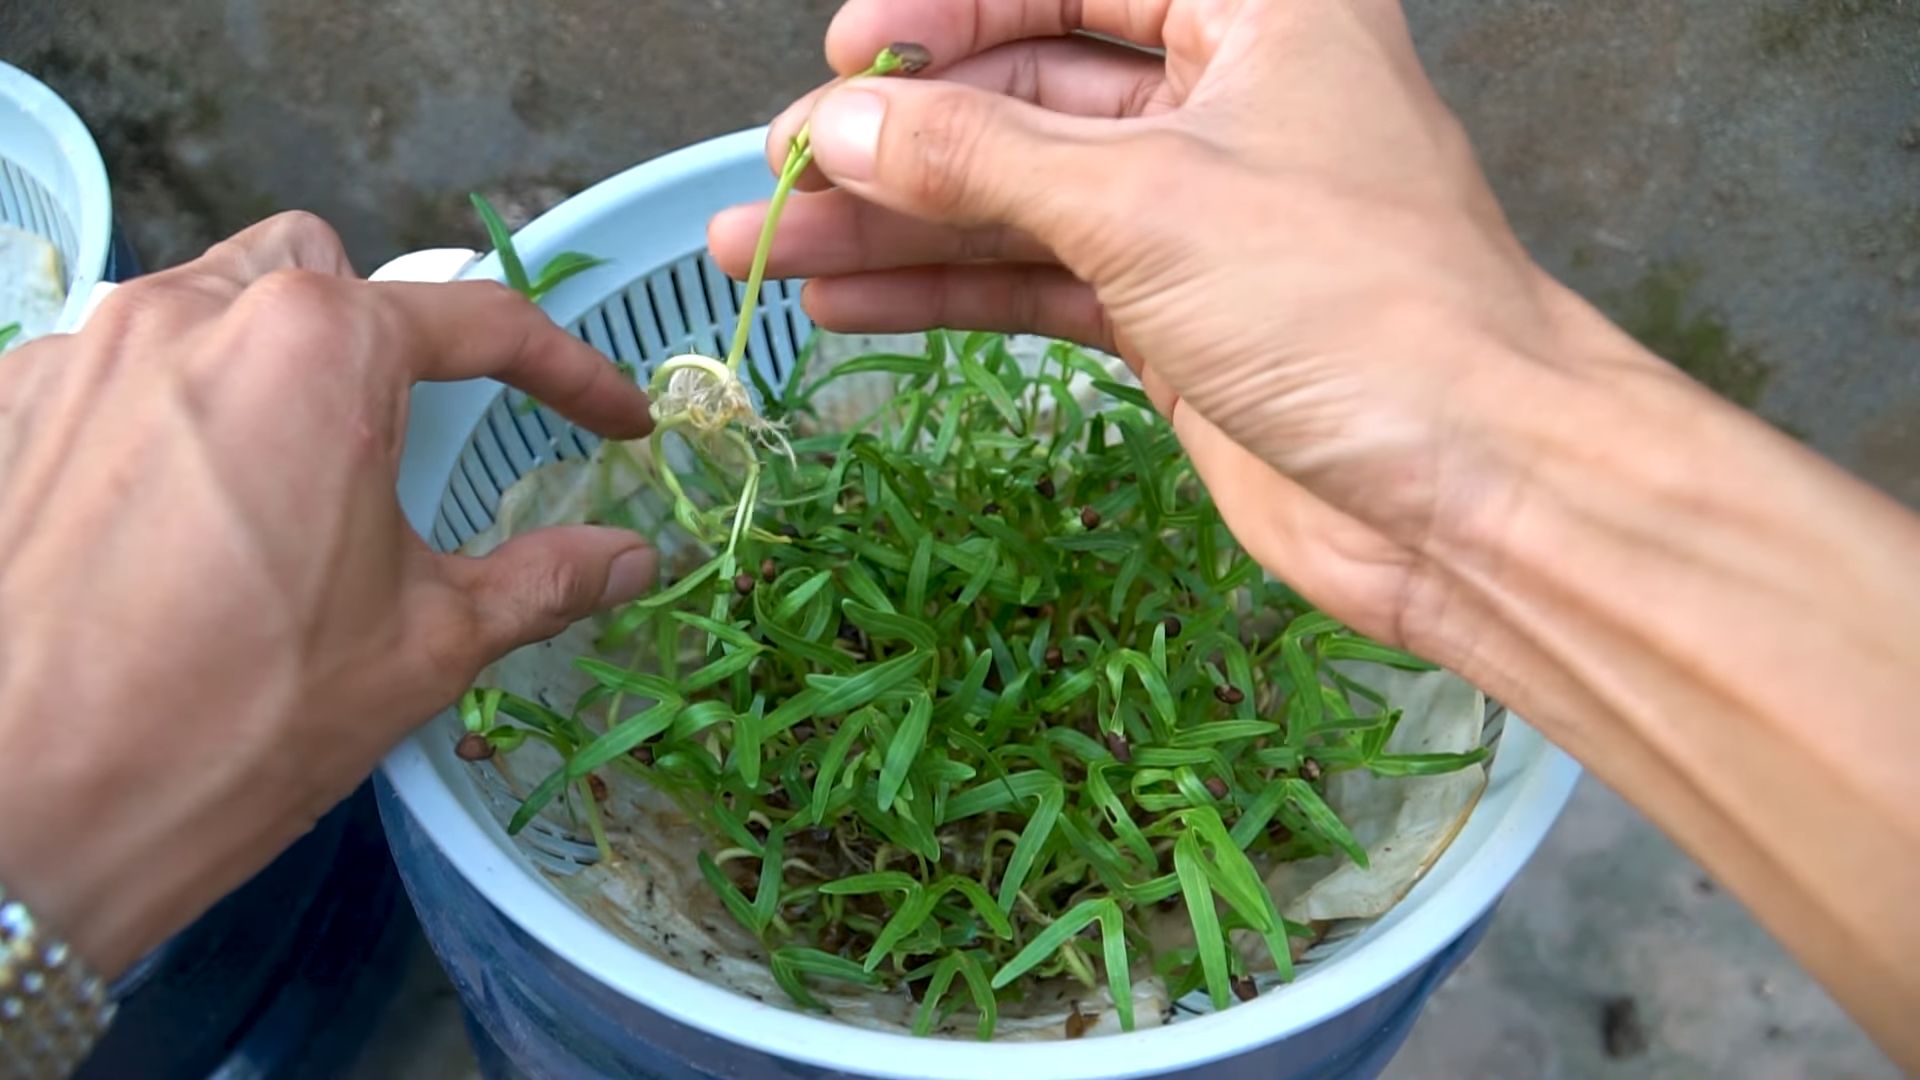
2. Sow the Seeds: Place 2-3 seeds in each net cup, on top of the growing medium.
3. Cover the Seeds: Lightly cover the seeds with a thin layer of growing medium.
4. Keep Moist: Gently mist the growing medium with water to keep it moist.
5. Provide Light: Place the net cups in a warm, well-lit area. If you don’t have enough natural light, use a grow light.
6. Wait for Germination: The seeds should germinate in 2-5 days.
5. Preparing the Nutrient Solution
1. Fill the Container: Fill the container with water, leaving a few inches of space at the top.
2. Add Nutrients: Carefully follow the instructions on your hydroponic nutrient solution to add the correct amount of nutrients to the water. Start with a half-strength solution for seedlings.
3. Adjust the pH: Use your pH meter or test strips to check the pH of the nutrient solution. The ideal pH for water spinach is between 6.0 and 7.0.
4. Adjust pH (if needed): If the pH is too high, add a small amount of pH down solution. If it’s too low, add a small amount of pH up solution. Always add these solutions gradually and re-check the pH after each addition.
5. Mix Well: Stir the nutrient solution thoroughly to ensure that the nutrients are evenly distributed.
6. Assembling the Hydroponic System
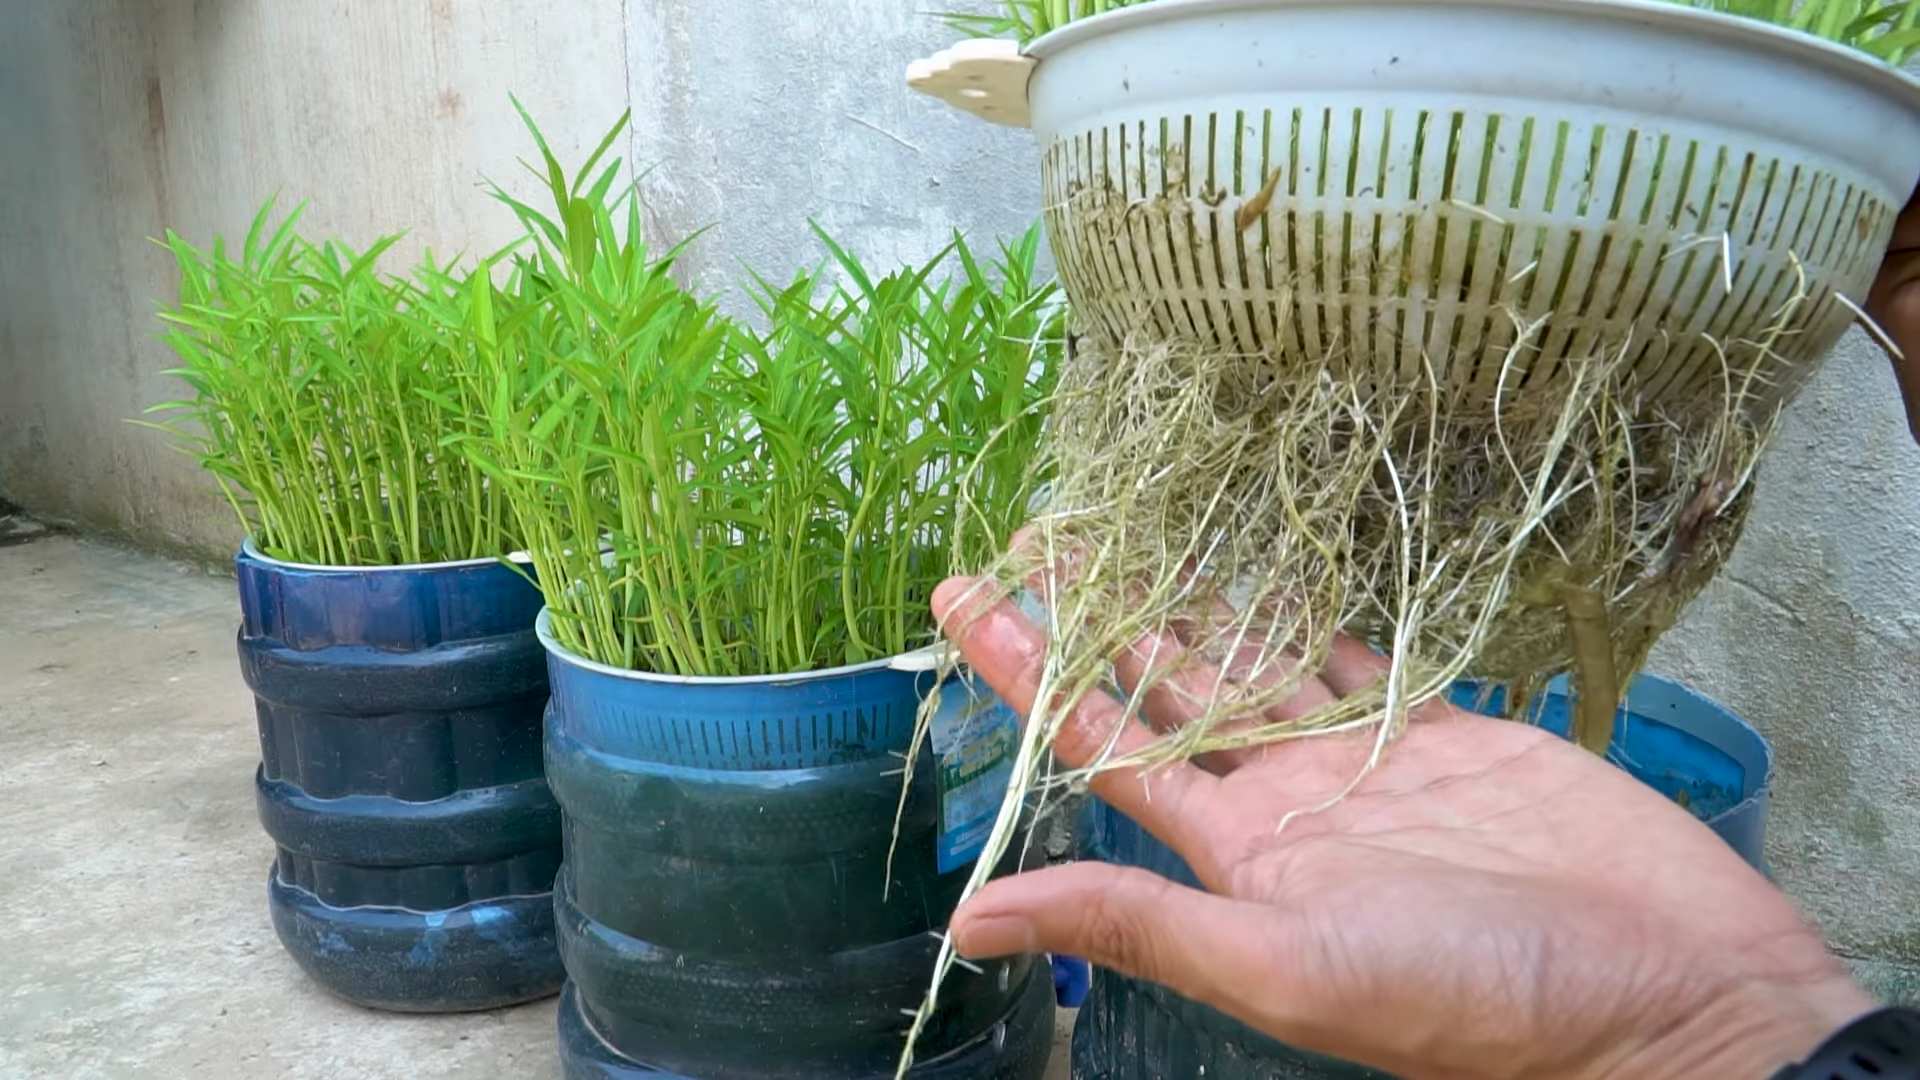
1. Place the Net Cups: Once the seedlings have sprouted and have a few leaves, carefully place the net cups into the holes in the lid (or arrange them on your makeshift lid). The bottom of the net cups should be submerged in the nutrient solution.
2. Turn on the Air Pump: Plug in the air pump and make sure the air stone is bubbling vigorously.
Maintaining Your Hydroponic Water Spinach
Now that your system is up and running, here’s how to keep your water spinach happy and healthy:
* Monitor the Water Level: Check the water level regularly and add more nutrient solution as needed. The roots should always be submerged in the solution.
* Check the pH: Check the pH of the nutrient solution every few days and adjust it as needed.
* Change the Nutrient Solution: Replace the nutrient solution every 1-2 weeks to prevent nutrient imbalances and the buildup of harmful bacteria.
* Provide Light: Water spinach needs plenty of light to thrive. If you don’t have a sunny spot, use grow lights. Aim for at least 12-14 hours of light per day.
* Monitor for Pests and Diseases: Keep an eye out for pests and diseases. If you spot any problems, address them promptly.
* Prune Regularly: Pruning encourages bushier growth and prevents the plants from becoming too leggy.
Harvesting Your Water Spinach
The best part! You can start harvesting your water spinach about 3-4 weeks after transplanting the seedlings.
* Harvesting Technique: Simply cut the stems a few inches above the water line. The plants will continue to grow and produce more leaves.
* Harvest Regularly: Harvest regularly to encourage continuous growth.
* Enjoy Your Harvest: Rinse the harvested water spinach thoroughly and use it in your favorite stir-fries, soups, or salads.
Troubleshooting Tips
* Yellowing Leaves: This could be a sign of nutrient deficiency. Make sure you’re using the correct amount of nutrients and that the pH is within the optimal range.
* Slow Growth: This could be due to insufficient light, low temperatures, or nutrient deficiencies.
* Algae Growth: This is a common problem in hydroponic systems. To prevent algae growth, use a dark-colored container, keep the nutrient solution cool, and
Conclusion
So, there you have it! Cultivating your own hydroponic water spinach is not only achievable but also incredibly rewarding. We’ve walked you through a simple, cost-effective DIY method that allows you to enjoy fresh, crisp water spinach right from your home, regardless of your gardening experience. Forget those wilted, overpriced bunches at the grocery store. With a little effort and this straightforward guide, you can have a continuous supply of this nutritious and delicious leafy green.
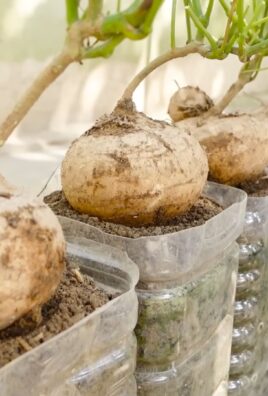
The beauty of this DIY hydroponic system lies in its adaptability. Feel free to experiment with different nutrient solutions to find what works best for your specific environment and water spinach variety. You could even try adding a small air pump to further oxygenate the water, potentially boosting growth rates. Consider using different containers – perhaps repurposing plastic bottles or creating a larger, more elaborate system if you find yourself hooked on hydroponics.
Why is this DIY trick a must-try? Because it empowers you to take control of your food source, reduces your reliance on commercially grown produce, and offers a sustainable and space-saving solution for growing fresh vegetables. Plus, it’s a fantastic learning experience that connects you with the natural world. Imagine the satisfaction of harvesting your own water spinach and incorporating it into your favorite stir-fries, soups, or salads. The taste is undeniably superior, and you’ll know exactly where your food came from and how it was grown.
Don’t be intimidated by the term “hydroponics.” This DIY method is designed to be accessible to everyone. The initial setup is minimal, and the ongoing maintenance is surprisingly easy. Once you get the hang of it, you’ll be amazed at how quickly your water spinach thrives.
We wholeheartedly encourage you to give this DIY hydroponic water spinach project a try. It’s a fun, educational, and ultimately delicious endeavor. And most importantly, it’s a fantastic way to enjoy fresh, healthy greens all year round.
We’re confident that you’ll be thrilled with the results. But don’t just take our word for it! Try it out for yourself and see the magic of hydroponics unfold before your eyes.
Once you’ve successfully grown your own hydroponic water spinach, we’d love to hear about your experience. Share your photos, tips, and any variations you’ve tried in the comments below. Let’s build a community of hydroponic enthusiasts and inspire others to embrace this sustainable and rewarding method of growing fresh produce. Your insights could be invaluable to someone just starting out. So, get your hands dirty (or rather, wet!) and embark on your hydroponic adventure today! Let us know how your hydroponic water spinach journey goes!
Frequently Asked Questions (FAQ)
What exactly is hydroponics, and is it difficult?
Hydroponics is a method of growing plants without soil, using water-based nutrient solutions. Instead of soil providing nutrients, the plants receive everything they need directly from the water. While it might sound complicated, basic hydroponic systems, like the one described in this guide, are surprisingly simple to set up and maintain. The difficulty level is low, especially for beginners, as it eliminates many of the common challenges associated with soil-based gardening, such as weeding and soil-borne diseases.
What kind of water should I use for my hydroponic system?
The best water to use is clean, filtered water. Tap water can be used, but it’s advisable to let it sit for 24 hours to allow chlorine to dissipate. Avoid using softened water, as it contains high levels of sodium, which can be harmful to plants. Rainwater is an excellent option if you have access to it, as it’s naturally soft and free of chemicals. Distilled water is also a good choice, but it lacks minerals, so you’ll need to ensure your nutrient solution provides all the necessary elements.
How often should I change the nutrient solution?
The frequency of changing the nutrient solution depends on the size of your system and the growth rate of your water spinach. As a general rule, change the solution every 1-2 weeks. However, it’s important to monitor the water level and the appearance of your plants. If the water level drops significantly or the plants show signs of nutrient deficiency (e.g., yellowing leaves), it’s time to change the solution. Regularly topping off the water level with fresh water is also crucial between changes.
What are the signs of nutrient deficiency in water spinach?
Several signs can indicate nutrient deficiencies. Yellowing leaves (chlorosis) are a common symptom, often indicating a lack of nitrogen or iron. Stunted growth can also be a sign of nutrient deficiency. Other symptoms may include purple or reddish discoloration of the leaves or stems, which can indicate a phosphorus deficiency. If you notice any of these signs, check the pH and EC (electrical conductivity) of your nutrient solution and adjust accordingly. Ensure you are using a balanced nutrient solution specifically formulated for leafy greens.
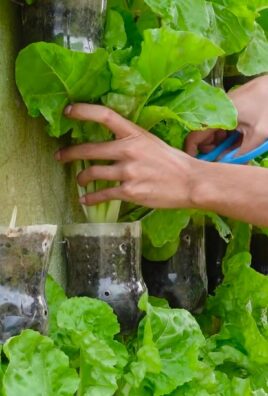
Can I grow other vegetables using this same hydroponic system?
Yes, you can grow other leafy greens and herbs using a similar hydroponic system. Lettuce, kale, spinach, basil, mint, and chives are all excellent candidates. However, keep in mind that different plants have different nutrient requirements, so you may need to adjust the nutrient solution accordingly. Fruiting vegetables like tomatoes and peppers generally require more complex hydroponic systems and nutrient formulations.
How much sunlight does hydroponic water spinach need?
Water spinach thrives in full sunlight, requiring at least 6 hours of direct sunlight per day. If you don’t have access to enough natural sunlight, you can supplement with grow lights. LED grow lights are an energy-efficient option. Position the lights close enough to the plants to provide adequate illumination but not so close that they burn the leaves.
Is hydroponic water spinach safe to eat?
Yes, hydroponically grown water spinach is perfectly safe to eat, provided you use food-grade materials for your system and a balanced nutrient solution. In fact, hydroponically grown produce is often considered cleaner and safer than soil-grown produce because it’s less susceptible to soil-borne diseases and pests. Always wash your water spinach thoroughly before eating it.
How do I prevent algae growth in my hydroponic system?
Algae growth is a common issue in hydroponic systems, as algae thrive in moist, nutrient-rich environments with sunlight. To prevent algae growth, keep your nutrient solution covered and shielded from direct sunlight. Opaque containers are ideal. You can also add a small amount of hydrogen peroxide to the nutrient solution to kill algae. Regularly cleaning your system can also help prevent algae buildup.
What if I encounter pests in my hydroponic water spinach?
While hydroponic systems are generally less susceptible to pests than soil-based gardens, pests can still occasionally appear. Common pests include aphids, spider mites, and whiteflies. If you encounter pests, try spraying your plants with a solution of insecticidal soap or neem oil. You can also introduce beneficial insects, such as ladybugs, to control pest populations. Regularly inspect your plants for signs of pests and address any infestations promptly.
How long does it take to harvest hydroponic water spinach?
Hydroponic water spinach typically grows much faster than soil-grown water spinach. You can usually start harvesting within 3-4 weeks of planting the seeds or cuttings. Harvest the outer leaves first, allowing the inner leaves to continue growing. This cut-and-come-again method allows you to harvest continuously for several weeks.

Leave a Comment