

Kitchen cleaning hacks – who doesn’t need a few of those up their sleeve? Let’s be honest, the kitchen is the heart of the home, but it can also quickly become a battlefield of splatters, spills, and sticky situations. I know I’ve definitely been there! But what if I told you that conquering kitchen chaos doesn’t require hours of scrubbing or a cabinet full of harsh chemicals?
For generations, resourceful cooks have passed down clever tips and tricks for keeping their kitchens sparkling. Think of your grandmother’s secret weapon for a spotless stovetop or that old wives’ tale about using lemon to banish odors. These aren’t just random ideas; they’re time-tested solutions born from necessity and a desire for a clean and inviting space.
In today’s busy world, time is precious. We all want a clean kitchen, but few of us have hours to dedicate to it each week. That’s where these kitchen cleaning hacks come in! They’re designed to be quick, easy, and often use ingredients you already have in your pantry. Imagine spending less time scrubbing and more time enjoying delicious meals with loved ones. This article is packed with DIY solutions that will transform your kitchen cleaning routine from a chore into a breeze. Get ready to discover some game-changing tips that will leave your kitchen sparkling and you feeling like a cleaning pro!

DIY Kitchen Cleaning Hacks: Sparkling Clean Without Breaking a Sweat!
Hey there, fellow home enthusiasts! Let’s face it, the kitchen is the heart of the home, but it can also be the messiest. From splattered sauces to greasy countertops, keeping it clean can feel like a never-ending battle. But don’t worry, I’m here to share some of my favorite DIY kitchen cleaning hacks that will make your life easier and your kitchen sparkle! These are tried and tested methods that use common household ingredients, so you can ditch those harsh chemicals and save some money too.
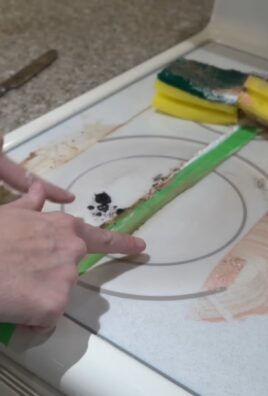
Tackling the Greasy Stovetop
A greasy stovetop is a common kitchen woe. It seems like no matter how careful you are, oil and food particles always find their way onto the surface. But fear not, I have a simple and effective solution!
What you’ll need:
* Baking soda
* Dish soap
* White vinegar
* Spray bottle
* Scrubbing sponge or brush
* Paper towels or a clean cloth
Step-by-step instructions:
1. Prepare the stovetop: Make sure your stovetop is cool to the touch. Remove any grates or burner caps.
2. Create a baking soda paste: In a bowl, mix baking soda with a small amount of water to form a thick paste. The consistency should be similar to toothpaste.
3. Apply the paste: Generously apply the baking soda paste to the greasy areas of your stovetop. Let it sit for at least 15-20 minutes. The longer it sits, the better it will work at loosening the grease.
4. Spray with vinegar: Fill a spray bottle with white vinegar and lightly spray the baking soda paste. The vinegar will react with the baking soda, creating a fizzing action that helps to further break down the grease.
5. Scrub away the grime: Use a scrubbing sponge or brush to scrub the stovetop. You may need to apply some elbow grease, especially for stubborn stains.
6. Wipe clean: Once you’ve scrubbed away the grease, wipe the stovetop clean with paper towels or a damp cloth. Rinse the cloth frequently to remove any residue.
7. Clean the grates and burner caps: While the baking soda paste is working its magic on the stovetop, you can clean the grates and burner caps. Soak them in a sink filled with hot, soapy water. For tough stains, you can also apply the baking soda paste to them and scrub.
8. Dry and reassemble: Once everything is clean, dry the stovetop, grates, and burner caps thoroughly before reassembling.
Cleaning the Microwave Like a Pro
Microwaves are notorious for accumulating splatters and spills. Cleaning them can be a real pain, but this hack makes it a breeze!
What you’ll need:
* White vinegar
* Water
* Microwave-safe bowl
* Sponge or cloth
Step-by-step instructions:
1. Prepare the cleaning solution: In a microwave-safe bowl, mix equal parts white vinegar and water (e.g., 1 cup of each).
2. Microwave the solution: Place the bowl in the microwave and heat it on high for 5-10 minutes. The mixture should boil and create steam inside the microwave.
3. Let it sit: After microwaving, leave the bowl inside the microwave for another 5-10 minutes. The steam will loosen the grime and make it easier to wipe away.
4. Wipe clean: Carefully remove the bowl (it will be hot!). Use a sponge or cloth to wipe down the interior of the microwave. The splatters should come off easily.
5. Clean the turntable: Remove the turntable and wash it with warm, soapy water.
6. Dry and reassemble: Dry the interior of the microwave and the turntable before reassembling.
Decluttering and Cleaning the Refrigerator
A clean and organized refrigerator not only looks better but also helps prevent food spoilage. Here’s how to tackle this task efficiently.
What you’ll need:
* Baking soda
* Warm water
* Dish soap (optional)
* Clean cloths or sponges
* Trash bags or bins
* Cooler (to store perishable items temporarily)
Step-by-step instructions:
1. Empty the refrigerator: Remove all items from the refrigerator, including shelves and drawers. Discard any expired or spoiled food.
2. Store perishable items: Place perishable items in a cooler with ice packs to keep them cold while you clean.
3. Wash removable parts: Wash the shelves and drawers with warm, soapy water. Rinse thoroughly and allow them to air dry.
4. Clean the interior: Mix a solution of warm water and baking soda (about 1 tablespoon of baking soda per quart of water). Use a clean cloth or sponge to wipe down the interior of the refrigerator, including the walls, ceiling, and floor.
5. Tackle stubborn stains: For stubborn stains, you can use a paste of baking soda and water. Apply the paste to the stain, let it sit for a few minutes, and then scrub gently.
6. Rinse and dry: Rinse the interior of the refrigerator with clean water and dry it thoroughly with a clean cloth.
7. Deodorize: To help absorb odors, place an open box of baking soda in the refrigerator.
8. Organize and restock: Once the refrigerator is clean and dry, replace the shelves and drawers. Organize your food items and restock the refrigerator.
9. Prevent future messes: To prevent future messes, line the shelves with plastic wrap or shelf liners. This will make it easier to clean up spills.
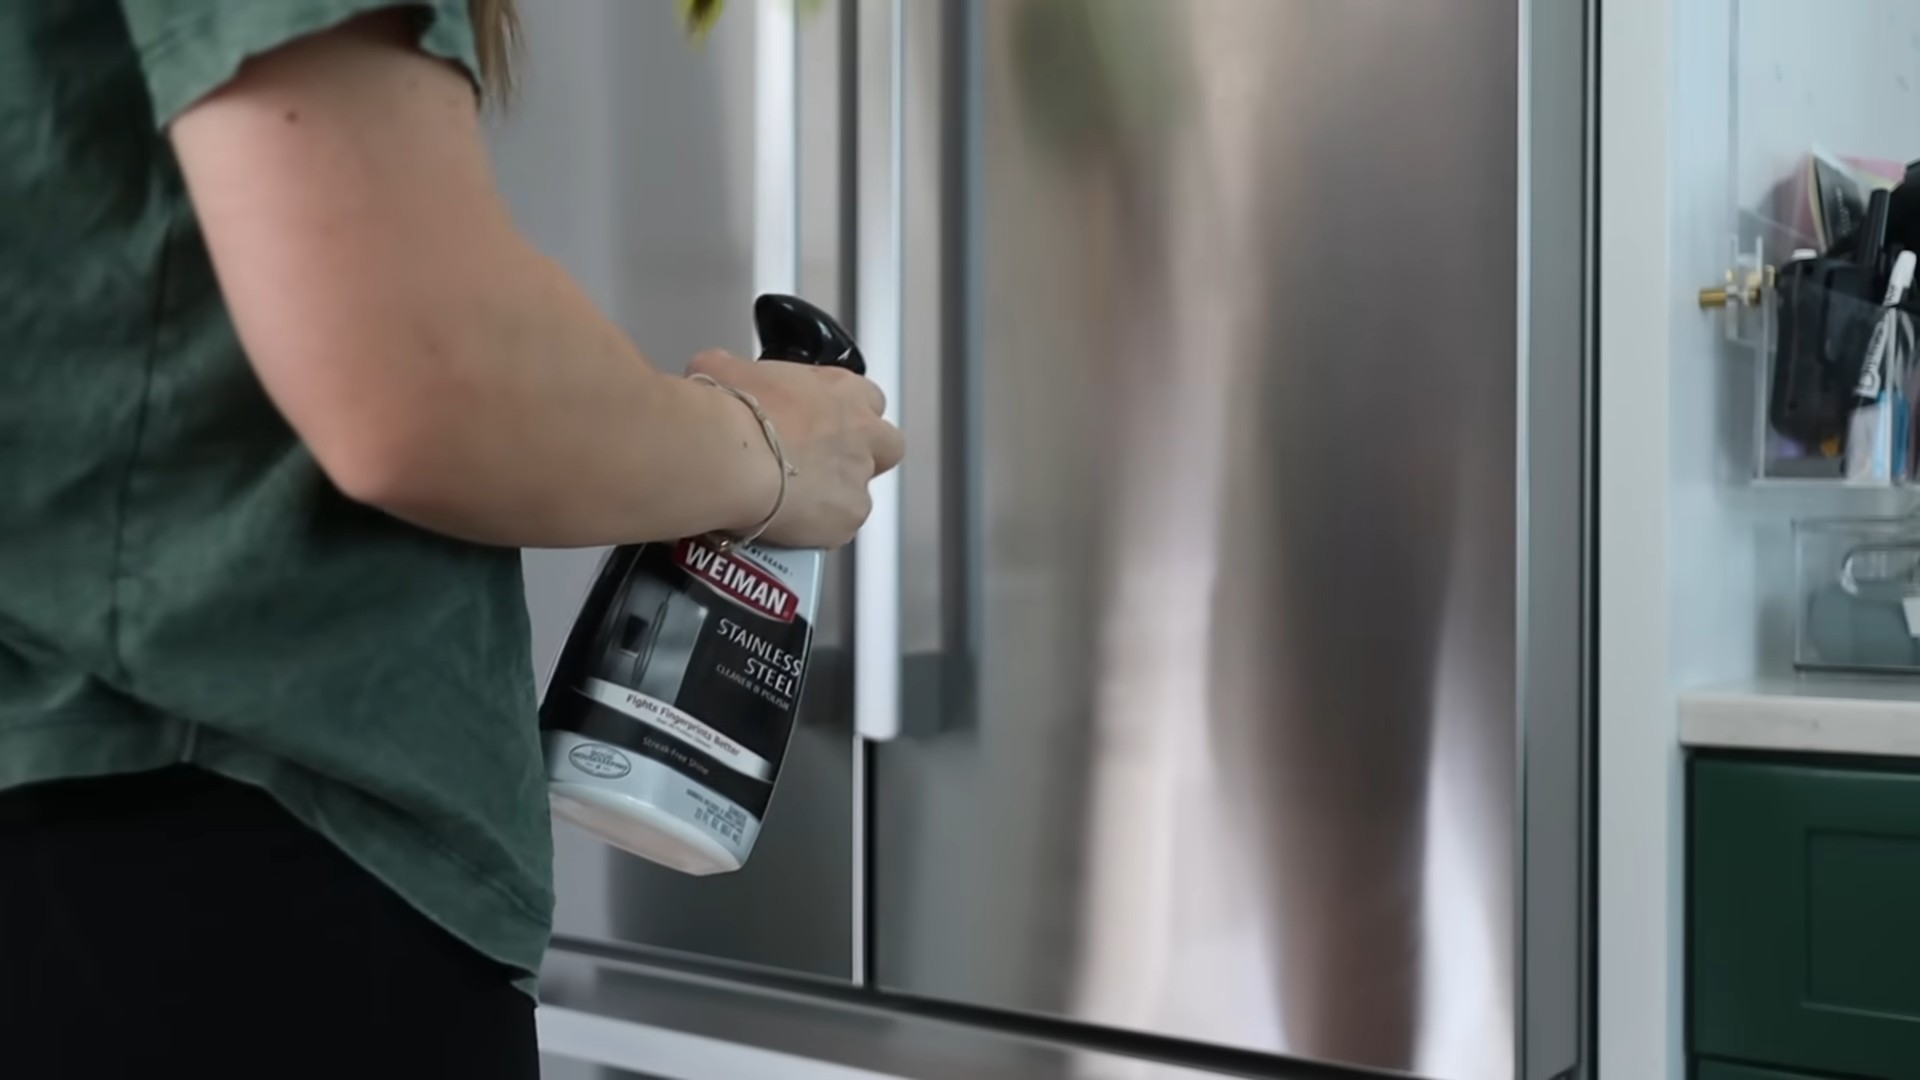
Shining Stainless Steel Appliances
Stainless steel appliances can add a touch of elegance to your kitchen, but they are also prone to fingerprints and smudges. Here’s how to keep them looking their best.
What you’ll need:
* White vinegar
* Olive oil
* Spray bottle
* Two clean microfiber cloths
Step-by-step instructions:
1. Clean with vinegar: Fill a spray bottle with white vinegar and lightly spray the stainless steel surface.
2. Wipe with the grain: Use one of the microfiber cloths to wipe the surface in the direction of the grain. This will help to remove fingerprints, smudges, and water spots.
3. Polish with olive oil: Pour a small amount of olive oil onto the second microfiber cloth.
4. Buff the surface: Use the olive oil-soaked cloth to buff the stainless steel surface. Again, wipe in the direction of the grain.
5. Remove excess oil: Use a clean part of the cloth to remove any excess olive oil.
6. Enjoy the shine: Your stainless steel appliances should now be sparkling clean and fingerprint-resistant!
Cleaning the Dishwasher for Optimal Performance
A clean dishwasher is essential for clean dishes. Over time, dishwashers can accumulate food particles, grease, and mineral deposits, which can affect their performance.
What you’ll need:
* White vinegar
* Baking soda
* Dish soap
* Toothpick or small brush
Step-by-step instructions:
1. Remove food debris: Check the dishwasher’s drain and remove any food debris or other obstructions.
2. Clean the spray arms: Remove the spray arms and clean them under running water. Use a toothpick or small brush to clear any clogs in the spray nozzles.
3. Vinegar rinse: Place a dishwasher-safe cup filled with white vinegar on the top rack of the dishwasher.
4. Run a hot cycle: Run the dishwasher on a hot cycle without any dishes. The vinegar will help to dissolve grease and mineral deposits.
5. Baking soda deodorizer: After the cycle is complete, sprinkle a cup of baking soda on the bottom of the dishwasher.
6. Run a short cycle: Run a short cycle to rinse away the baking soda.
7. Clean the door and seals: Wipe down the dishwasher door and seals with a damp cloth and dish soap.
Freshening Up the Garbage Disposal
Garbage disposals can be a breeding ground for bacteria and odors. Here’s how to keep yours clean and fresh.
What you’ll need:
* Ice cubes
* Lemon or lime wedges
* Salt
* Baking soda
* White vinegar
Step-by-step instructions:
1. Grind ice and salt: Run cold water into the garbage disposal. Add a handful of ice cubes and a tablespoon of salt. Grind the ice and salt for about a minute. The ice will help to dislodge any food particles, and the salt will act as an abrasive cleaner.
2. Citrus freshener:
Conclusion
So, there you have it! These simple yet incredibly effective kitchen cleaning hacks are game-changers for anyone looking to maintain a sparkling and hygienic cooking space without spending hours scrubbing or relying on harsh chemicals. We’ve explored how everyday items like baking soda, vinegar, and lemons can become your secret weapons against grease, grime, and stubborn stains.
But why are these DIY tricks a must-try? Firstly, they’re cost-effective. You likely already have most of these ingredients in your pantry, saving you money on expensive cleaning products. Secondly, they’re environmentally friendly. By using natural ingredients, you’re reducing your exposure to harmful chemicals and minimizing your impact on the planet. Thirdly, they’re surprisingly effective. From degreasing ovens to polishing stainless steel, these hacks deliver impressive results that rival those of commercial cleaners.
Consider these variations to personalize your cleaning routine:
* Infused Vinegar: Add citrus peels or herbs like rosemary to your vinegar solution for a more pleasant scent. Let it steep for a week before using.
* Baking Soda Paste: For extra stubborn stains, create a thick paste of baking soda and water. Apply it to the affected area, let it sit for a few minutes, and then scrub gently.
* Lemon Power: Use lemon halves to scrub cutting boards, garbage disposal, or even microwave interiors. The citric acid will disinfect and deodorize.
* DIY All-Purpose Cleaner: Combine equal parts water and vinegar in a spray bottle. Add a few drops of your favorite essential oil for fragrance. This is great for countertops and other surfaces.
* Oven Cleaning Boost: After applying the baking soda paste to your oven, leave a bowl of boiling water inside overnight. The steam will help loosen the grime, making it even easier to wipe away.
These kitchen cleaning hacks aren’t just about making your kitchen look good; they’re about creating a healthier and more enjoyable cooking environment. A clean kitchen is a happy kitchen, and a happy kitchen leads to delicious meals and memorable moments.
We wholeheartedly encourage you to try these DIY kitchen cleaning hacks and see the difference they can make in your home. Don’t be afraid to experiment and find what works best for you. Remember, the key is consistency. Incorporating these simple cleaning routines into your weekly schedule will prevent grime from building up and keep your kitchen looking its best.
Once you’ve tried these hacks, we’d love to hear about your experience! Share your before-and-after photos, your favorite variations, and any other tips you’ve discovered in the comments section below. Let’s create a community of clean kitchen enthusiasts and inspire each other to maintain sparkling and healthy homes. Your insights could be incredibly valuable to others who are just starting their DIY cleaning journey. So, go ahead, give these hacks a try, and let us know what you think!
FAQ
Q: Are these DIY kitchen cleaning hacks safe for all surfaces?
A: While most of these hacks are safe for a wide range of surfaces, it’s always a good idea to test them in an inconspicuous area first, especially on delicate materials like marble or granite. Vinegar, in particular, can etch certain surfaces, so use it with caution. For wooden surfaces, avoid excessive moisture and always wipe dry. When in doubt, consult the manufacturer’s instructions for your specific surfaces.
Q: Can I use these cleaning hacks if I have allergies or sensitivities?
A: If you have allergies or sensitivities, it’s crucial to be mindful of the ingredients you’re using. While baking soda, vinegar, and lemons are generally considered safe, some individuals may experience irritation. Wear gloves to protect your skin and ensure proper ventilation when cleaning. If you’re sensitive to strong smells, consider using diluted solutions or adding essential oils to mask the odor. If you experience any adverse reactions, discontinue use immediately and consult a healthcare professional.
Q: How often should I use these kitchen cleaning hacks?
A: The frequency of cleaning depends on your cooking habits and the level of mess you generate. For high-traffic areas like countertops and sinks, daily or every-other-day cleaning is recommended. Ovens and stovetops may require weekly or bi-weekly cleaning, depending on usage. Deep cleaning tasks like degreasing cabinets and cleaning appliances can be done monthly or as needed. The key is to establish a regular cleaning routine that prevents grime from building up and makes the task less daunting.
Q: What’s the best way to clean a greasy oven using baking soda and vinegar?
A: To clean a greasy oven using baking soda and vinegar, start by removing any loose debris. Then, make a paste of baking soda and water and spread it evenly throughout the oven, avoiding the heating elements. Let it sit overnight. The next day, spray the baking soda paste with vinegar. The mixture will fizz. Wipe away the grime with a damp cloth. For stubborn spots, use a scrub brush or sponge. Rinse thoroughly with water.
Q: Can I use these hacks to clean my microwave?
A: Yes, these hacks are excellent for cleaning microwaves. One effective method is to place a microwave-safe bowl filled with water and lemon slices (or vinegar) inside the microwave. Heat it on high for a few minutes until the water boils and the microwave is filled with steam. Let it sit for a few minutes to loosen the grime. Then, carefully remove the bowl and wipe down the interior of the microwave with a clean cloth. The steam will make it easy to remove splatters and food residue.
Q: Are there any surfaces I should avoid cleaning with vinegar?
A: Yes, avoid using vinegar on certain surfaces, including marble, granite, waxed wood, aluminum, and cast iron. The acidity of vinegar can damage these materials. For marble and granite, use a pH-neutral cleaner specifically designed for stone surfaces. For waxed wood, use a wood cleaner or polish. For aluminum and cast iron, use a mild soap and water solution.
Q: How can I get rid of stubborn odors in my kitchen?
A: There are several ways to eliminate stubborn odors in your kitchen. One effective method is to place a bowl of baking soda in the refrigerator or freezer to absorb odors. You can also simmer a pot of water with lemon slices, cinnamon sticks, or cloves on the stovetop to freshen the air. Another option is to use an air purifier with a carbon filter to remove airborne odors. Regularly cleaning your garbage disposal and emptying your trash cans will also help prevent unpleasant smells.
Q: What are some tips for keeping my kitchen clean on a daily basis?
A: To maintain a clean kitchen on a daily basis, make it a habit to wipe down countertops and sinks after each use. Wash dishes immediately after meals or load them into the dishwasher. Sweep or vacuum the floor to remove crumbs and spills. Empty the trash can regularly. By performing these simple tasks daily, you can prevent grime from building up and keep your kitchen looking its best.
Q: Can I use essential oils in these cleaning hacks?
A: Yes, essential oils can be added to these cleaning hacks for fragrance and added cleaning power. Some popular choices include lemon, tea tree, lavender, and eucalyptus. Add a few drops of your favorite essential oil to your cleaning solutions or spray bottles. Be sure to use high-quality essential oils and follow safety precautions. Some essential oils may not be safe for use around pets or children, so do your research before using them.


Leave a Comment