

Low Effort Cleaning Hacks: Let’s be honest, who *actually* enjoys spending hours scrubbing and toiling away to keep their home sparkling? I know I don’t! We all dream of a clean and tidy space, but the reality of fitting cleaning into our already busy lives can feel overwhelming. For centuries, people have sought clever shortcuts and ingenious methods to maintain cleanliness without sacrificing precious time and energy. Think of our grandmothers, passing down time-tested tips for stain removal and quick tidying – these were the original low effort cleaning hacks!
But why are these hacks so essential today? In our fast-paced world, time is a luxury. We’re juggling work, family, hobbies, and everything in between. Spending an entire weekend cleaning just isn’t feasible for most of us. That’s where these low effort cleaning hacks come in. They’re designed to streamline your cleaning routine, making it more efficient and less of a chore. Imagine reclaiming those lost hours and using them for things you truly enjoy!
This article is your ultimate guide to transforming your cleaning routine. I’m going to share my favorite DIY cleaning tricks and hacks that will help you achieve a spotless home with minimal effort. Get ready to say goodbye to endless scrubbing and hello to a cleaner, happier, and more relaxed you!

Low-Effort Cleaning Hacks: Making Your Life Easier!
Okay, let’s be honest, cleaning isn’t exactly anyone’s favorite pastime. But a clean home is a happy home, right? So, I’ve compiled some of my absolute favorite low-effort cleaning hacks that will save you time and energy. These are the tricks I use to keep my place looking presentable without spending hours scrubbing. Get ready to reclaim your weekends!
Hack 1: The Lazy Person’s Shower Cleaner
This is a game-changer. Seriously. No more scrubbing shower walls!
What you’ll need:
* Spray bottle
* Dish soap (Dawn works great!)
* White vinegar
* Sponge or squeegee (optional)
Step-by-step instructions:
1. Mix the solution: In your spray bottle, combine equal parts dish soap and white vinegar. I usually do about half a cup of each, but adjust the amount depending on the size of your spray bottle. You might need to warm the vinegar slightly in the microwave (just for a few seconds!) to help the dish soap dissolve better. Be careful not to boil it!
2. Spray it on: Generously spray the mixture all over your shower walls, door, and even the floor. Make sure to get everything coated.
3. Let it sit: This is the “lazy” part. Let the solution sit for at least 30 minutes, or even longer if you have stubborn soap scum. I often spray it on before I leave for work and rinse it off when I get home.
4. Rinse it off: Rinse the shower thoroughly with hot water. You should see the soap scum and grime just melting away.
5. Optional: If you have any particularly stubborn spots, you can give them a quick scrub with a sponge or use a squeegee to remove any remaining water.
Why this works: The dish soap helps to break down grease and grime, while the vinegar cuts through hard water stains and soap scum. It’s a powerful combination!
Hack 2: Microwave Cleaning Made Easy
Burnt popcorn? Splattered spaghetti sauce? Don’t worry, I’ve got you covered.
What you’ll need:
* Microwave-safe bowl
* Lemon (or vinegar)
* Water
* Sponge or cloth
Step-by-step instructions:
1. Prepare the cleaning solution: Fill the microwave-safe bowl with about a cup of water. Cut a lemon in half and squeeze the juice into the water. Then, drop the lemon halves into the bowl as well. If you don’t have a lemon, you can use a few tablespoons of white vinegar instead.
2. Microwave it: Place the bowl in the microwave and heat it on high for 3-5 minutes, or until the water is boiling and the microwave is filled with steam.
3. Let it sit: Leave the bowl in the microwave for another 5-10 minutes. The steam will loosen all the grime and splatters. Don’t open the door right away!
4. Wipe it clean: Carefully remove the bowl (it will be hot!). Use a sponge or cloth to wipe down the inside of the microwave. The grime should come off easily.
Why this works: The steam from the lemon water (or vinegar water) loosens the dried-on food particles, making them easy to wipe away. Plus, the lemon leaves your microwave smelling fresh and clean!
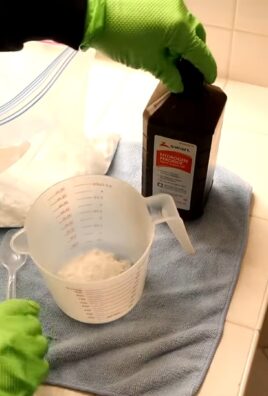
Hack 3: The Self-Cleaning Oven (Almost!)
Okay, this isn’t *exactly* self-cleaning, but it’s a lot less work than scrubbing for hours.
What you’ll need:
* Baking soda
* Water
* Spray bottle
* Spatula or scraper
* Sponge or cloth
Step-by-step instructions:
1. Remove oven racks: Take out the oven racks and set them aside. You can clean them separately in the sink with dish soap and hot water.
2. Make a baking soda paste: In a bowl, mix baking soda with enough water to form a thick paste.
3. Coat the oven: Spread the baking soda paste all over the inside of your oven, avoiding the heating elements. Make sure to cover all the greasy and burnt areas.
4. Let it sit: This is the key. Let the baking soda paste sit for at least 12 hours, or even overnight. The longer it sits, the better it will work.
5. Scrape and wipe: After letting the paste sit, use a spatula or scraper to remove as much of the dried baking soda as possible.
6. Wipe it clean: Use a damp sponge or cloth to wipe away any remaining baking soda residue. You may need to rinse and repeat a few times.
7. Spray with vinegar (optional): For any stubborn spots, spray them with white vinegar. The vinegar will react with the baking soda and help to loosen the grime. Wipe away the vinegar with a clean cloth.
8. Replace oven racks: Once the oven is clean and dry, replace the oven racks.
Why this works: Baking soda is a natural cleaner and deodorizer. It helps to absorb grease and loosen burnt-on food particles. The vinegar reacts with the baking soda to create a fizzing action that further helps to break down the grime.
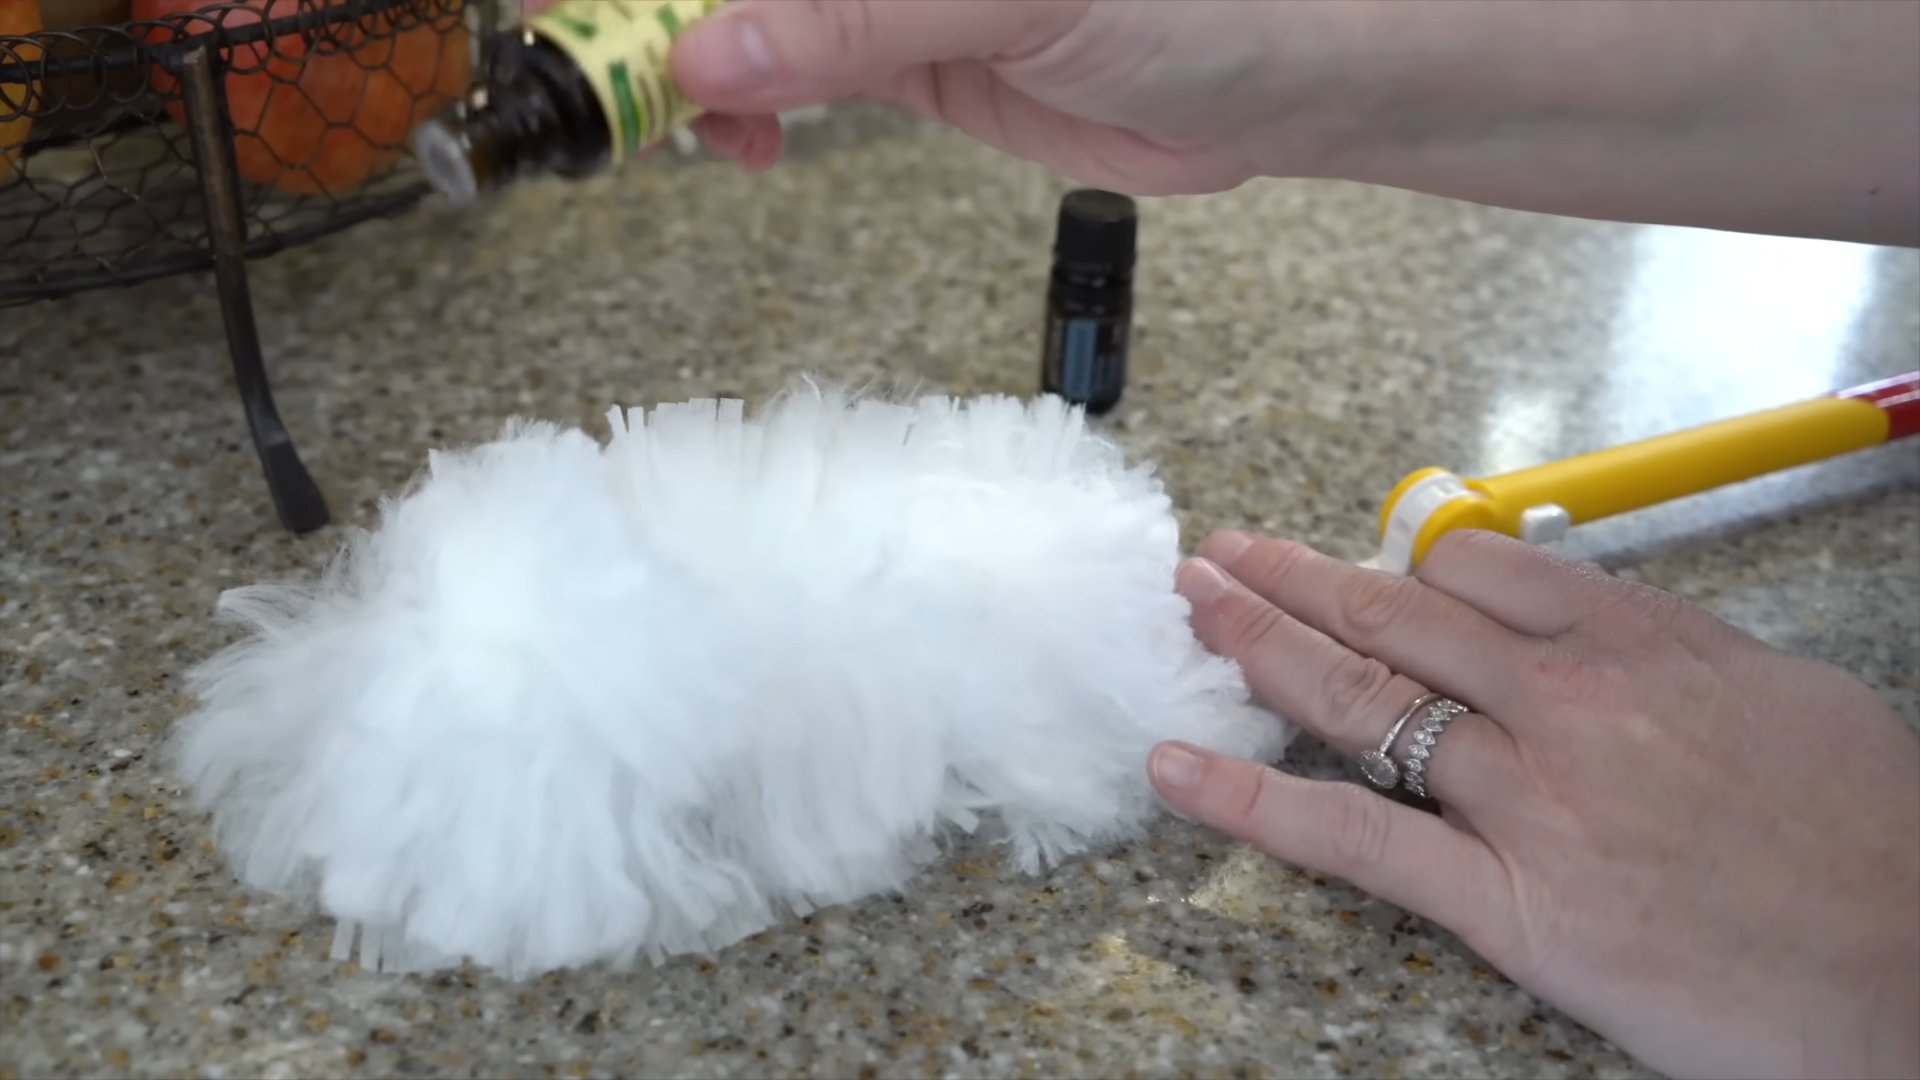
Hack 4: Dusting Like a Pro (Without the Effort)
Dusting can feel like a never-ending chore. But these tips will make it faster and more effective.
What you’ll need:
* Microfiber cloths
* Pillowcases
* Old socks
* Furniture polish (optional)
Step-by-step instructions:
1. Dust from top to bottom: Always start dusting from the highest surfaces and work your way down. This way, any dust that falls will land on surfaces you haven’t cleaned yet.
2. Use microfiber cloths: Microfiber cloths are much more effective at trapping dust than regular cloths. They also don’t leave behind any lint.
3. Dust ceiling fans with a pillowcase: This is a brilliant trick! Slide an old pillowcase over each fan blade, then gently wipe. The dust will be trapped inside the pillowcase instead of falling all over you and the room.
4. Dust blinds with old socks: Put an old sock on your hand and use it to dust your blinds. The sock will conform to the shape of the blinds and make it easy to clean between the slats.
5. Use furniture polish sparingly: If you’re using furniture polish, spray it onto a microfiber cloth instead of directly onto the furniture. This will prevent buildup and make it easier to control the amount of polish you’re using.
6. Vacuum regularly: Vacuuming your floors and carpets regularly will help to remove dust and dirt before it has a chance to settle on your furniture.
Why this works: Using the right tools and techniques can make dusting much more efficient. The pillowcase and sock tricks help to contain the dust, preventing it from spreading around the room.
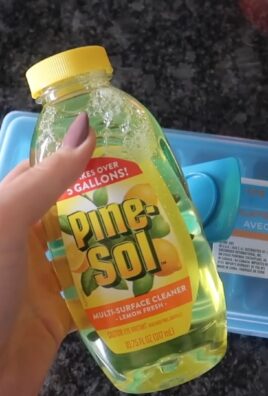
Hack 5: Quick and Easy Floor Cleaning
Keeping your floors clean doesn’t have to be a major undertaking.
What you’ll need:
* Vacuum cleaner or broom
* Spray mop (or bucket and mop)
* Floor cleaner (or vinegar and water)
Step-by-step instructions:
1. Vacuum or sweep: Start by vacuuming or sweeping your floors to remove any loose dirt, dust, and debris.
2. Prepare your cleaning solution: If you’re using a spray mop, fill the reservoir with your chosen floor cleaner. If you’re using a bucket and mop, mix your floor cleaner with water according to the manufacturer’s instructions. You can also use a solution of equal parts white vinegar and water for a natural cleaning option.
3. Mop the floors: Mop your floors, working in small sections. If you’re using a bucket and mop, wring out the mop head thoroughly to avoid leaving too much water on the floor.
4. Let the floors dry: Allow the floors to air dry completely. You can open windows or use a fan to speed up the drying process.
Why this works: Regular vacuuming and mopping will prevent dirt and grime from building up on your floors, making them easier to clean. Using a spray mop can save you time and effort compared to using a traditional bucket and mop.
Hack 6: Decluttering as You Go
This isn’t exactly a cleaning hack, but it makes cleaning so much easier!
What you’ll need:
* Boxes or bags for donations
* Trash can
Step-by-step instructions:
1. Keep a donation box handy: Place a box or bag in a convenient location (like a closet or corner of a room) and use it to
Conclusion
So, there you have it! These low effort cleaning hacks aren’t just about saving time; they’re about reclaiming your weekends and enjoying a cleaner, more comfortable home without the dreaded all-day scrubbing sessions. We’ve explored simple yet effective ways to tackle common household chores, from banishing microwave splatters with just water and lemon to effortlessly degreasing your oven with the power of ammonia. The beauty of these hacks lies in their accessibility – you likely already have most of the necessary ingredients lurking in your pantry or cleaning cabinet.
But why are these low effort cleaning hacks a must-try? Because they fundamentally change your relationship with cleaning. Instead of viewing it as a monumental task to be put off until the last possible moment, you can integrate these quick and easy methods into your routine, preventing dirt and grime from building up in the first place. This proactive approach not only saves you time and energy in the long run but also creates a more consistently clean and inviting living space.
Consider this: instead of spending an entire Saturday afternoon scrubbing your bathroom, you could dedicate just 15 minutes a week to wiping down surfaces with a vinegar solution after your shower. The result? A sparkling clean bathroom with minimal effort. Or, imagine the satisfaction of effortlessly removing stubborn stains from your carpet with a simple baking soda paste, avoiding the need for expensive and potentially harmful chemical cleaners.
These hacks are not just about cleaning; they’re about simplifying your life.
Now, let’s talk variations. Feel free to experiment and adapt these hacks to suit your specific needs and preferences. For example, if you’re not a fan of the smell of vinegar, try infusing it with citrus peels for a more pleasant aroma. Or, if you have particularly stubborn stains on your stovetop, consider using a combination of baking soda and hydrogen peroxide for extra cleaning power. The possibilities are endless!
Don’t be afraid to get creative and discover your own low effort cleaning hacks. The key is to think outside the box and look for simple, natural solutions to everyday cleaning challenges. Remember, the goal is to make cleaning less of a chore and more of a manageable part of your routine.
We wholeheartedly encourage you to try these low effort cleaning hacks and see the difference they can make in your home and your life. Start with just one or two that resonate with you and gradually incorporate more into your routine as you become more comfortable.
But the journey doesn’t end here! We want to hear about your experiences. Did these hacks work for you? Did you discover any variations that you found particularly effective? Share your tips, tricks, and stories in the comments below. Let’s create a community of like-minded individuals who are passionate about simplifying their lives and enjoying a cleaner, more comfortable home without the hassle. Your insights could help others discover new and innovative ways to tackle their cleaning challenges.
So, go ahead, give these low effort cleaning hacks a try. You might be surprised at how much time and energy you can save. And don’t forget to share your experiences with us – we can’t wait to hear from you! Let’s make cleaning less of a chore, together.
Frequently Asked Questions (FAQ)
Q: Are these low effort cleaning hacks safe for all surfaces?
A: While most of these hacks utilize natural and gentle ingredients like vinegar, baking soda, and lemon, it’s always a good idea to test them on a small, inconspicuous area first, especially on delicate surfaces like marble, granite, or wood. Vinegar, for example, can be too acidic for certain types of stone and may etch the surface. Similarly, abrasive cleaners like baking soda should be used with caution on easily scratched materials. Always read the manufacturer’s instructions for your specific surfaces and appliances before using any cleaning product, even natural ones. When in doubt, err on the side of caution and opt for a gentler cleaning method.
Q: How often should I use these low effort cleaning hacks?
A: The frequency of use will depend on your individual needs and lifestyle. However, the beauty of these hacks is that they are designed to be incorporated into your regular cleaning routine, preventing dirt and grime from building up in the first place. For example, you might want to wipe down your shower walls with a vinegar solution after each use to prevent soap scum buildup, or clean your microwave after each spill to avoid stubborn stains. The more consistently you use these hacks, the less time and effort you’ll need to spend on deep cleaning in the long run. Consider creating a weekly or monthly cleaning schedule that incorporates these hacks to stay on top of things.
Q: Can I use these low effort cleaning hacks if I have allergies or sensitivities?
A: If you have allergies or sensitivities, it’s crucial to carefully review the ingredients used in each hack and ensure that you are not allergic to any of them. For example, if you are allergic to citrus, you should avoid using lemon juice as a cleaning agent. Similarly, if you are sensitive to strong smells, you might want to dilute vinegar or use it in a well-ventilated area. It’s also a good idea to wear gloves and a mask when cleaning, especially if you have sensitive skin or respiratory issues. If you experience any adverse reactions, such as skin irritation or breathing difficulties, discontinue use immediately and consult with a doctor. You can also explore alternative natural cleaning agents that are less likely to trigger your allergies or sensitivities.
Q: Are these low effort cleaning hacks as effective as commercial cleaning products?
A: In many cases, yes! These low effort cleaning hacks can be just as effective as commercial cleaning products, and often more so, especially for everyday cleaning tasks. Natural ingredients like vinegar, baking soda, and lemon have powerful cleaning properties that can effectively remove dirt, grime, and stains. However, for particularly stubborn stains or heavy-duty cleaning tasks, you might need to use a combination of these hacks or supplement them with commercial cleaning products. The key is to experiment and find what works best for you and your specific cleaning needs. Plus, these hacks are often more environmentally friendly and cost-effective than commercial cleaning products.
Q: What are some other low effort cleaning hacks I can try?
A: The world of low effort cleaning hacks is vast and ever-evolving! Here are a few more ideas to get you started:
* **Clean your blender easily:** Fill your blender halfway with warm water and add a drop of dish soap. Blend for a few seconds, then rinse thoroughly.
* **Freshen your garbage disposal:** Toss in a few lemon or orange peels and run the disposal with cold water.
* **Dust your blinds with a sock:** Place an old sock over your hand and use it to dust your blinds.
* **Clean your showerhead with vinegar:** Fill a plastic bag with vinegar and secure it around your showerhead with a rubber band. Let it soak overnight, then remove the bag and run the shower to flush out any remaining vinegar.
* **Use dryer sheets to remove static cling:** Rub a dryer sheet over your clothes to eliminate static cling.
Remember, the key is to be creative and look for simple solutions to everyday cleaning challenges. Don’t be afraid to experiment and discover your own low effort cleaning hacks!
Leave a Comment