

Mushroom Growing at Home might sound like something reserved for seasoned horticulturalists, but trust me, it’s far more accessible (and rewarding!) than you think. Have you ever dreamed of plucking fresh, flavorful mushrooms right from your own kitchen? Imagine the culinary possibilities – creamy mushroom soup, savory mushroom pasta, or even just a simple sauté with garlic and herbs, all made with ingredients you nurtured yourself. This isn’t just about saving money at the grocery store; it’s about connecting with nature and experiencing the magic of fungi firsthand.
For centuries, mushrooms have held a special place in cultures around the world, from ancient medicinal practices in Asia to culinary delicacies in Europe. They’re not just food; they’re symbols of health, longevity, and even spiritual connection. Now, you can bring that rich history and vibrant flavor into your own home with some simple DIY techniques.
In today’s world, where we’re increasingly conscious of where our food comes from, mushroom growing at home offers a fantastic way to take control of your diet and reduce your environmental footprint. Plus, let’s be honest, who wouldn’t want to impress their friends and family with their newfound mushroom-cultivating skills? This guide will walk you through the easiest and most effective methods for growing mushrooms indoors, even if you have limited space or experience. Get ready to embark on a fascinating journey into the world of fungi – your taste buds (and your garden) will thank you!
Growing Gourmet Mushrooms at Home: A Beginner’s Guide
Hey there, fellow fungi enthusiasts! Ever dreamt of harvesting your own delicious, gourmet mushrooms right in your kitchen? Well, dream no more! I’m going to walk you through a simple and rewarding method for growing oyster mushrooms at home using readily available materials. Get ready to impress your friends and family with your newfound mushroom-growing prowess!
What You’ll Need: The Essential Supplies
Before we dive in, let’s gather our supplies. This is a low-tech, budget-friendly approach, so don’t worry about needing fancy equipment.
* Oyster Mushroom Spawn: This is the most crucial ingredient! You can purchase oyster mushroom spawn online from reputable suppliers. Make sure to choose a strain that suits your climate and preferences. I personally love the Pearl Oyster variety for its mild flavor and ease of growth.
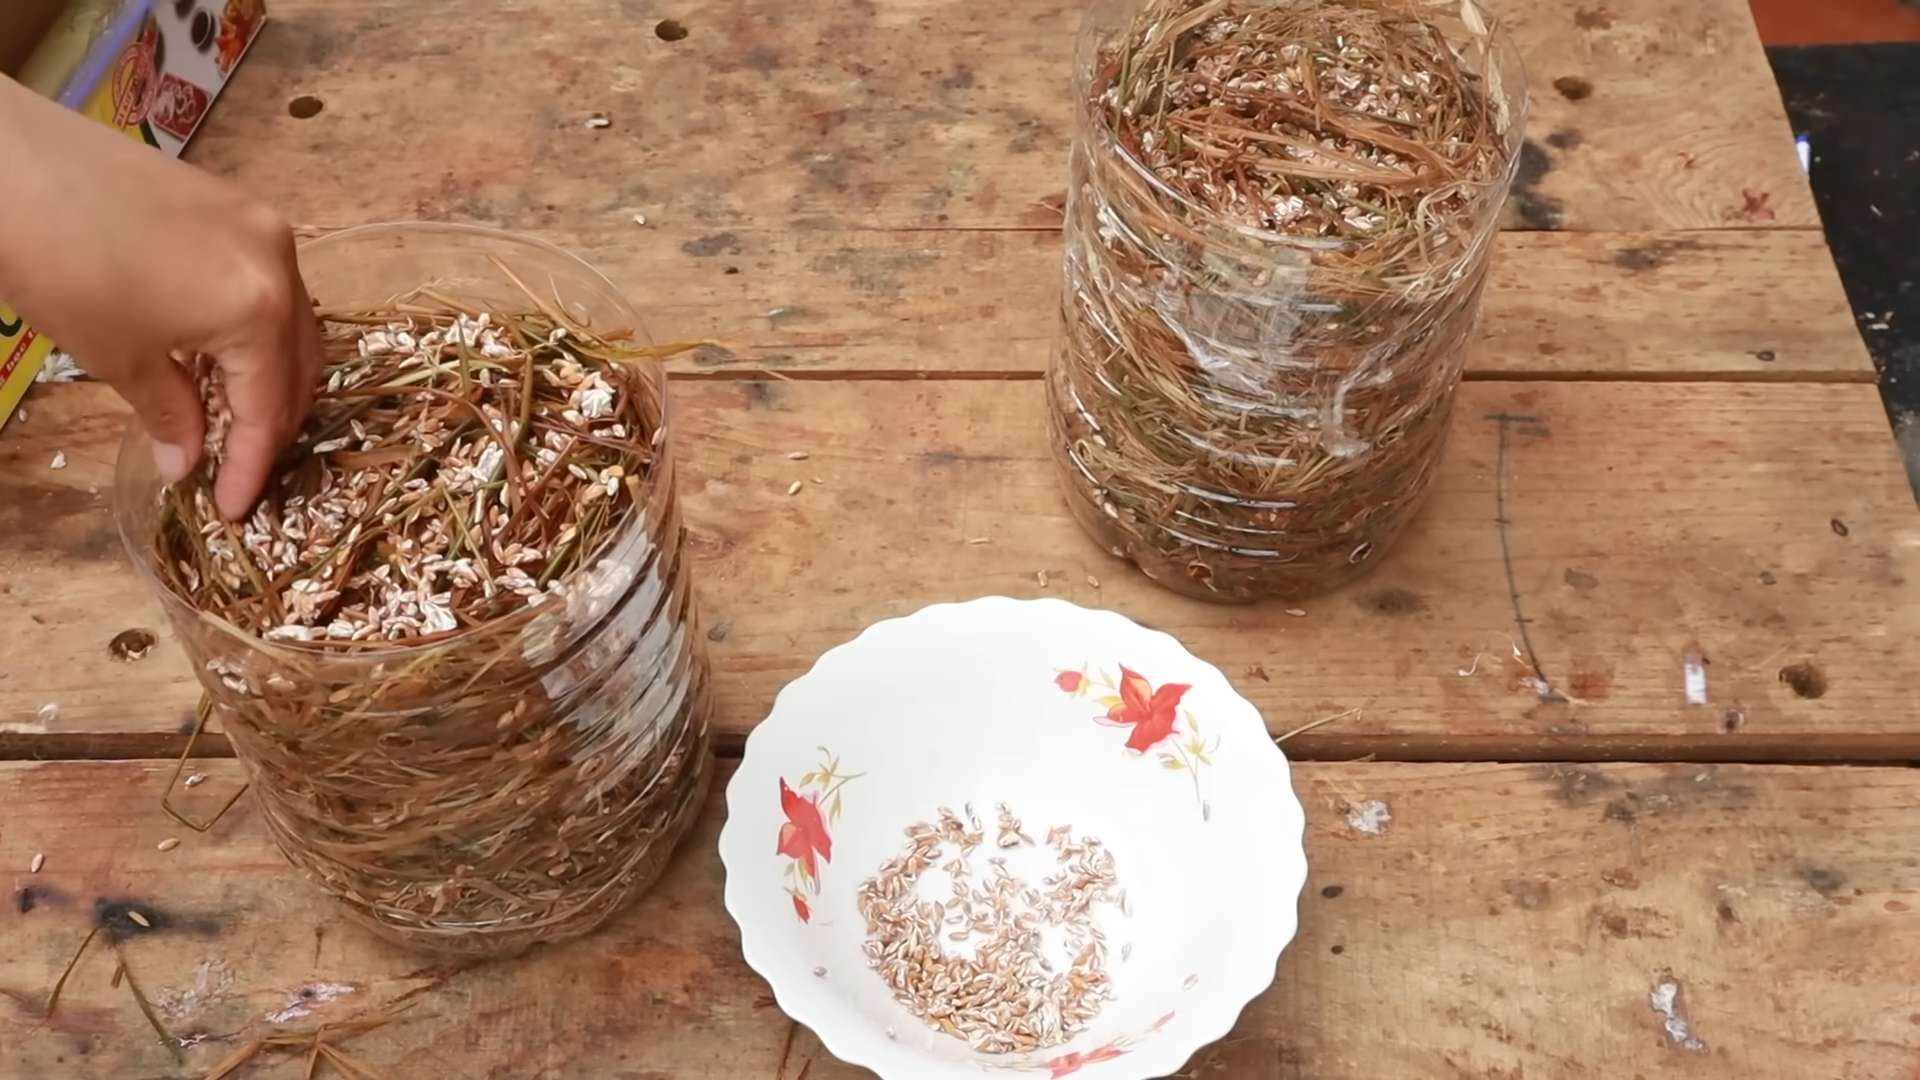
* Straw: This will be our substrate, the food source for the mushrooms. Wheat straw is ideal, but other types of straw can work too. Just make sure it’s clean and free from mold or pesticides. You can usually find straw at garden centers, farm supply stores, or even pet stores (used for animal bedding).
* Heat-Resistant Bags: These bags need to withstand high temperatures for pasteurization. Oven bags or polypropylene bags are good options. Avoid using regular plastic bags, as they will melt.
* Large Pot or Container: You’ll need a large pot or container to pasteurize the straw. A stockpot or even a clean trash can will work, depending on the amount of straw you’re using.
* Thermometer: A reliable thermometer is essential for monitoring the water temperature during pasteurization.
* Spray Bottle: Filled with clean water for misting the mushrooms later.
* Gloves: To maintain cleanliness and prevent contamination.
* Optional: Calcium Hydroxide (Hydrated Lime) – This can help adjust the pH of the water during pasteurization, making the straw more suitable for mushroom growth.
Step-by-Step Guide: From Straw to Shrooms
Okay, let’s get our hands dirty! Here’s a detailed breakdown of the entire process:
Phase 1: Preparing the Straw (Pasteurization)
This is a critical step to eliminate competing organisms and create a clean environment for your oyster mushrooms to thrive.
1. Chop the Straw: Using scissors or garden shears, chop the straw into smaller pieces, about 2-4 inches long. This will make it easier to pack into the bags and allow the mushroom mycelium to colonize it more effectively.
2. Soak the Straw: Place the chopped straw in your large pot or container and cover it completely with water. If you’re using calcium hydroxide, add about 1 tablespoon per gallon of water. This will help raise the pH and inhibit the growth of unwanted bacteria.
3. Pasteurize the Straw: Heat the water to a temperature of 160-180°F (71-82°C) and maintain this temperature for 60-90 minutes. Use your thermometer to monitor the temperature closely. This process will kill off most of the competing organisms without completely sterilizing the straw, which is beneficial for the oyster mushrooms.
4. Drain the Straw: After pasteurization, carefully drain the hot water from the straw. You can use a colander or a large strainer to do this. Allow the straw to cool down to room temperature. This is important because the hot straw can kill the mushroom spawn.
5. Squeeze Out Excess Water: Once the straw has cooled, squeeze out as much excess water as possible. The straw should be moist but not dripping wet. A good way to test this is to grab a handful of straw and squeeze it. Only a few drops of water should come out.
Phase 2: Inoculating the Straw (Adding the Spawn)
Now comes the exciting part – introducing the oyster mushroom spawn to the prepared straw!
1. Clean Your Work Area: Before you start, thoroughly clean your work surface with a disinfectant to minimize the risk of contamination.
2. Put on Gloves: Wear clean gloves to prevent introducing any unwanted bacteria or fungi to the straw.
3. Layer the Straw and Spawn: Take one of your heat-resistant bags and begin layering the straw and spawn. Start with a layer of straw, then sprinkle a generous amount of spawn over it. Repeat this process, alternating layers of straw and spawn, until the bag is almost full. Aim for a spawn rate of about 5-10% of the weight of the straw. This means that for every 10 pounds of straw, you should use about 0.5-1 pound of spawn.
4. Seal the Bag: Once the bag is full, seal it tightly with tape or a zip tie.
5. Create Air Exchange Holes: Using a clean knife or a sterilized needle, poke several small holes (about ¼ inch in diameter) in the bag. These holes will allow for air exchange, which is essential for the mushroom mycelium to grow. Space the holes evenly around the bag.
Phase 3: Incubation (Mycelial Colonization)
This is where the magic happens! The mushroom mycelium will spread throughout the straw, consuming it and preparing to fruit.
1. Find a Suitable Location: Place the inoculated bag in a dark, warm, and humid location. A closet, basement, or even under the sink can work well. The ideal temperature for incubation is between 65-75°F (18-24°C).
2. Monitor the Bag: Check the bag regularly for signs of contamination. Look for any unusual colors or smells. If you see any mold or other contaminants, discard the bag immediately to prevent it from spreading.
3. Wait for Colonization: Over the next 2-3 weeks, the mushroom mycelium will colonize the straw. You’ll notice a white, cottony growth spreading throughout the bag. Once the straw is completely covered in mycelium, it’s time to move on to the next phase.
Phase 4: Fruiting (Growing the Mushrooms)
Get ready to harvest your own delicious oyster mushrooms!
1. Move to a Fruiting Chamber: Once the straw is fully colonized, move the bag to a location with more light and humidity. A bathroom, kitchen counter, or even a greenhouse can work well.
2. Increase Humidity: Oyster mushrooms need high humidity to fruit properly. You can increase humidity by misting the bag with water several times a day. You can also create a simple fruiting chamber by placing the bag inside a clear plastic container with a lid. Add a layer of perlite or vermiculite to the bottom of the container and keep it moist.
3. Provide Light: Oyster mushrooms need some light to fruit, but direct sunlight can be harmful. Indirect sunlight or artificial light is ideal.
4. Make Cuts in the Bag: Using a clean knife, make several cuts in the bag where you want the mushrooms to grow. These cuts will provide an opening for the mushrooms to emerge.
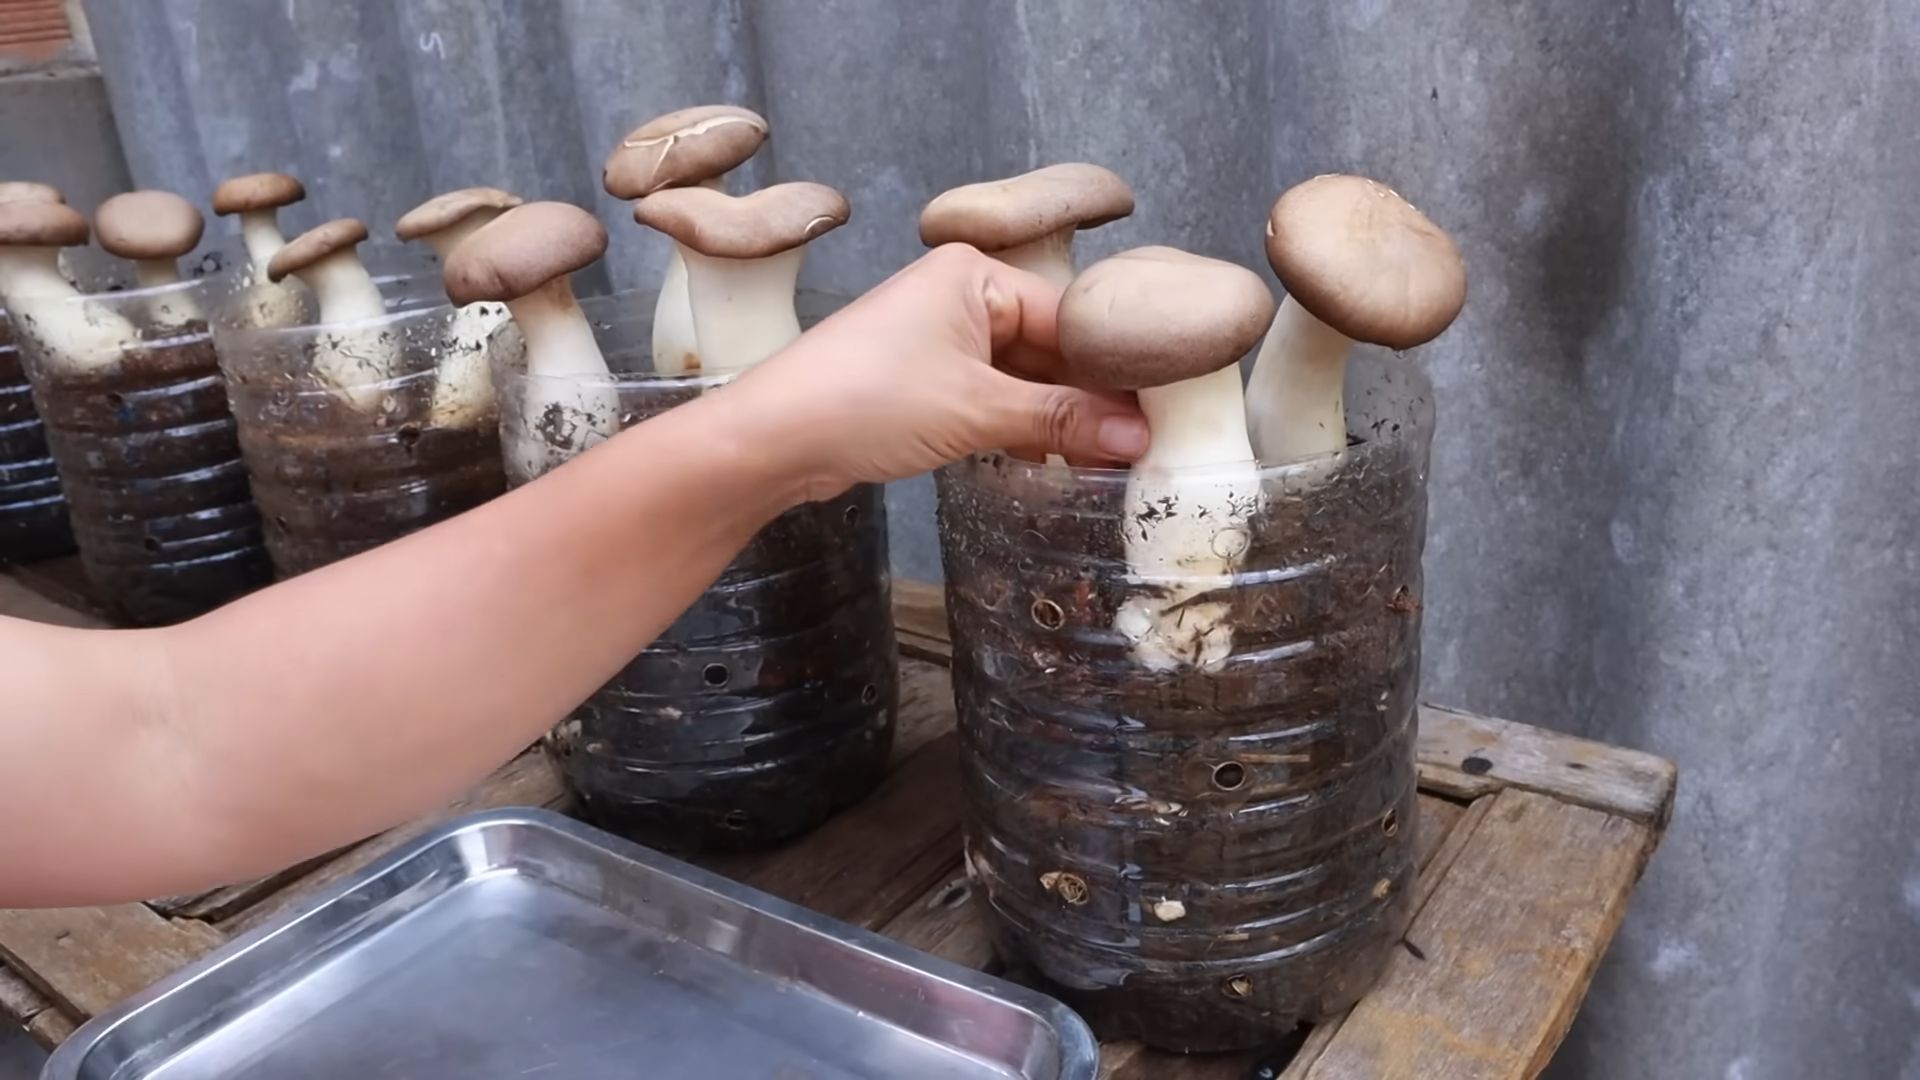
5. Wait for Fruiting: Over the next few days, you’ll start to see small mushroom pins forming at the cuts in the bag. These pins will grow rapidly into mature oyster mushrooms.
6. Harvest the Mushrooms: Harvest the mushrooms when the caps are fully developed but before they start to release spores. To harvest, simply twist or cut the mushrooms off the bag.
Tips for Success: Maximizing Your Mushroom Yield
Here are a few extra tips to help you get the most out of your mushroom-growing experience:
* Maintain Cleanliness: Cleanliness is crucial for preventing contamination. Always wash your hands and use clean tools when working with the straw and spawn.
* Proper Pasteurization: Make sure to pasteurize the straw properly to eliminate competing organisms.
* Adequate Humidity: Oyster mushrooms need high humidity to fruit properly. Mist the bag regularly or create a fruiting chamber to maintain humidity levels.
* Good Air Exchange: Oyster mushrooms need good air exchange to grow. Make sure to provide adequate ventilation in your fruiting chamber.
* Be Patient: Mushroom growing takes time and patience. Don’t get discouraged if you don’t see results immediately. Just keep following the steps and you’ll eventually be rewarded with a bountiful harvest.
* Second Flush: After harvesting your first flush of mushrooms, you can often get a second (or even third) flush by rehydrating the straw. Simply soak the bag in water for a few hours and then return it to the fruiting chamber.
Troubleshooting: Common Problems and Solutions
Even with the best efforts, you might encounter some challenges along the way. Here are a few common problems and how to address them:
* Contamination: If you see any mold or other contaminants growing in the bag, discard it immediately. Contamination can be caused by poor hygiene, inadequate pasteurization, or improper storage of the spawn.
* Slow Colonization: If the mycelium
Conclusion
So, there you have it! Cultivating your own mushrooms at home is not only surprisingly simple, but also incredibly rewarding. Forget those expensive, often lackluster, supermarket mushrooms. Imagine the satisfaction of harvesting plump, flavorful fungi grown with your own two hands, knowing exactly where they came from and what went into them. This DIY mushroom growing trick is a game-changer for anyone who appreciates fresh, sustainable food and wants to add a touch of magic to their kitchen.
Why is this a must-try? Because it empowers you to take control of your food source, reduces your carbon footprint, and provides you with a constant supply of delicious, nutritious mushrooms. Plus, it’s a fascinating hobby that connects you with the natural world in a unique and tangible way. Think of the possibilities! You can impress your friends and family with gourmet meals featuring your homegrown delicacies, experiment with different mushroom varieties, and even share your knowledge with others.
Variations and Suggestions:
Don’t feel limited to just one type of mushroom. Once you’ve mastered the basics, explore the world of oyster mushrooms (known for their rapid growth and versatility), shiitake mushrooms (prized for their rich, umami flavor), or even the more challenging but incredibly rewarding lion’s mane mushrooms (a culinary and medicinal powerhouse). You can adjust the substrate to suit the specific needs of each variety. For example, oyster mushrooms thrive on straw, while shiitake mushrooms prefer hardwood sawdust.
Consider experimenting with different growing locations. While a dark, humid basement is ideal, you can also use a closet, a spare room, or even a shaded outdoor area. Just be sure to maintain the proper temperature and humidity levels. A simple humidity monitor and a spray bottle can be your best friends in this endeavor.
Another variation involves using different containers. While buckets and bags are common choices, you can also use repurposed containers like plastic tubs or even old laundry baskets. Just make sure they are clean and have adequate drainage.
A Final Word of Encouragement:
Don’t be intimidated by the process. Mushroom growing may seem complex at first, but with a little research and patience, you’ll be amazed at how easy it is to get started. Remember to start small, follow the instructions carefully, and don’t be afraid to experiment. The most important thing is to have fun and enjoy the journey.
We encourage you to try this DIY mushroom growing trick and share your experience with us! Let us know what varieties you’ve grown, what challenges you’ve faced, and what successes you’ve achieved. Your feedback will help us improve this guide and inspire others to embark on their own mushroom growing adventures. Share your photos and stories on social media using #HomegrownMushrooms and let’s build a community of passionate mushroom cultivators! Embrace the world of mushroom growing at home and unlock a world of flavor and satisfaction.
Frequently Asked Questions (FAQ)
What are the best mushrooms to start growing at home for beginners?
Oyster mushrooms are generally considered the easiest and fastest-growing mushrooms for beginners. They are very forgiving and can tolerate a wider range of conditions compared to other varieties. They also fruit relatively quickly, providing a satisfyingly rapid return on your investment. Shiitake mushrooms are another good option, although they require a bit more patience as they take longer to fruit. Avoid more complex varieties like morels or truffles when you’re just starting out.
What kind of substrate should I use for growing mushrooms?
The ideal substrate depends on the type of mushroom you’re growing. Oyster mushrooms thrive on straw, coffee grounds, or even cardboard. Shiitake mushrooms prefer hardwood sawdust. You can purchase pre-sterilized substrate online or at gardening supply stores, or you can prepare your own. If you’re preparing your own substrate, it’s crucial to sterilize it properly to kill any competing organisms that could hinder mushroom growth. This can be done by steaming, pressure cooking, or using a chemical sterilant.
How do I maintain the proper humidity for mushroom growth?
Maintaining adequate humidity is crucial for successful mushroom cultivation. Mushrooms need a humid environment to thrive. You can increase humidity by misting the growing area with water several times a day. You can also use a humidity tent or a humidifier to maintain a consistent level of moisture. A simple humidity monitor will help you track the humidity levels and make adjustments as needed. Aim for a humidity level of around 80-90% for most mushroom varieties.
How long does it take for mushrooms to grow?
The time it takes for mushrooms to grow varies depending on the variety and the growing conditions. Oyster mushrooms can fruit in as little as a week or two, while shiitake mushrooms may take several months. The key is to be patient and provide the mushrooms with the right environment. Factors such as temperature, humidity, and light can all affect the growth rate.
What are some common problems I might encounter when growing mushrooms, and how can I fix them?
One common problem is contamination, which can be caused by bacteria, mold, or other fungi. To prevent contamination, it’s essential to sterilize your substrate properly and maintain a clean growing environment. If you notice any signs of contamination, such as green or black mold, remove the affected area immediately. Another common problem is insufficient humidity, which can cause the mushrooms to dry out and shrivel. To fix this, increase the humidity by misting the growing area more frequently or using a humidifier. Pests, such as fungus gnats, can also be a problem. You can control fungus gnats by using sticky traps or by introducing beneficial nematodes to the growing area.
Can I grow mushrooms outdoors?
Yes, you can grow mushrooms outdoors, but it requires more attention to environmental factors. Choose a shaded location with good drainage. You can create a mushroom bed by layering straw, wood chips, and compost. Inoculate the bed with mushroom spawn and keep it moist. Outdoor mushroom cultivation is best suited for temperate climates with consistent rainfall.
Are there any mushrooms I should avoid growing at home?
Yes, some mushrooms are poisonous and should never be grown or consumed. It’s crucial to be able to accurately identify any mushroom before eating it. If you’re unsure about the identity of a mushroom, it’s best to err on the side of caution and discard it. Some mushrooms, like the death cap (Amanita phalloides), are extremely poisonous and can be fatal if ingested. Stick to growing well-known and easily identifiable varieties like oyster mushrooms, shiitake mushrooms, or button mushrooms.
How do I harvest my mushrooms?
Harvest mushrooms when the caps are fully developed but before they start to release spores. To harvest, gently twist the mushroom at the base until it comes loose from the substrate. Avoid pulling the mushroom, as this can damage the mycelium and prevent future flushes.
How do I store my harvested mushrooms?
Store harvested mushrooms in a paper bag in the refrigerator. Avoid storing them in plastic bags, as this can cause them to become slimy. Mushrooms are best consumed fresh, but they can also be dried or frozen for later use. To dry mushrooms, slice them thinly and spread them out on a baking sheet. Dry them in a low oven or a dehydrator until they are brittle. To freeze mushrooms, blanch them in boiling water for a few minutes, then cool them in ice water. Drain them well and freeze them in a single layer on a baking sheet. Once they are frozen, transfer them to a freezer bag.
Where can I find reliable information about mushroom growing?
There are many resources available online and in libraries about mushroom growing. Look for books, articles, and videos from reputable sources, such as universities, mycological societies, and experienced mushroom cultivators. Be wary of information from unverified sources, as it may be inaccurate or misleading. Joining a local mycological society is a great way to learn from experienced growers and connect with other mushroom enthusiasts.
Leave a Comment