

Natural Oven Cleaning Hack: Is your oven looking less like a culinary haven and more like a burnt offering? Don’t despair! I know the dread of facing a grimy oven – it’s a chore we all put off. But what if I told you there’s a simple, effective, and completely natural way to restore your oven to its sparkling glory? Forget harsh chemicals and elbow grease; this DIY cleaning hack uses ingredients you probably already have in your pantry!
For generations, resourceful homemakers have relied on the power of natural ingredients to keep their homes clean and fresh. Before the age of commercial cleaners, baking soda and vinegar were the go-to solutions for everything from scrubbing countertops to deodorizing refrigerators. This natural oven cleaning hack is a modern twist on those time-tested techniques, bringing the wisdom of the past into your present-day kitchen.
Why do you need this DIY trick? Because nobody wants to cook in a dirty oven! Not only is it unhygienic, but baked-on grime can also affect the taste and even the cooking time of your food. Plus, harsh chemical cleaners can leave behind lingering odors and potentially harmful residues. This natural method is safer for you, your family, and the environment. So, let’s ditch the chemicals and embrace the power of nature to get your oven looking its best!
DIY Natural Oven Cleaning Hack: Sparkling Clean Without the Harsh Chemicals
Okay, let’s face it, cleaning the oven is probably on everyone’s list of least favorite chores. The baked-on grime, the lingering smells, and the thought of using harsh chemicals – it’s just not a fun time. But what if I told you there’s a way to get your oven sparkling clean using ingredients you probably already have in your pantry? That’s right, we’re going natural! This DIY oven cleaning hack is not only effective but also safe for your family and the environment. So, ditch the harsh chemicals and let’s get started!
What You’ll Need
Before we dive in, let’s gather our supplies. This is a pretty simple list, which is one of the things I love about this method.
* Baking Soda
* White Vinegar
* Water
* Spray Bottle
* Spatula or Scraper (plastic or silicone is best to avoid scratching)
* Sponge or Scrub Brush
* Rubber Gloves (optional, but recommended)
* Old Towels or Rags
The Baking Soda Paste: Our Grime-Fighting Hero
This is the heart of our cleaning process. The baking soda paste acts as a gentle abrasive, loosening the baked-on food and grease without damaging your oven’s interior.
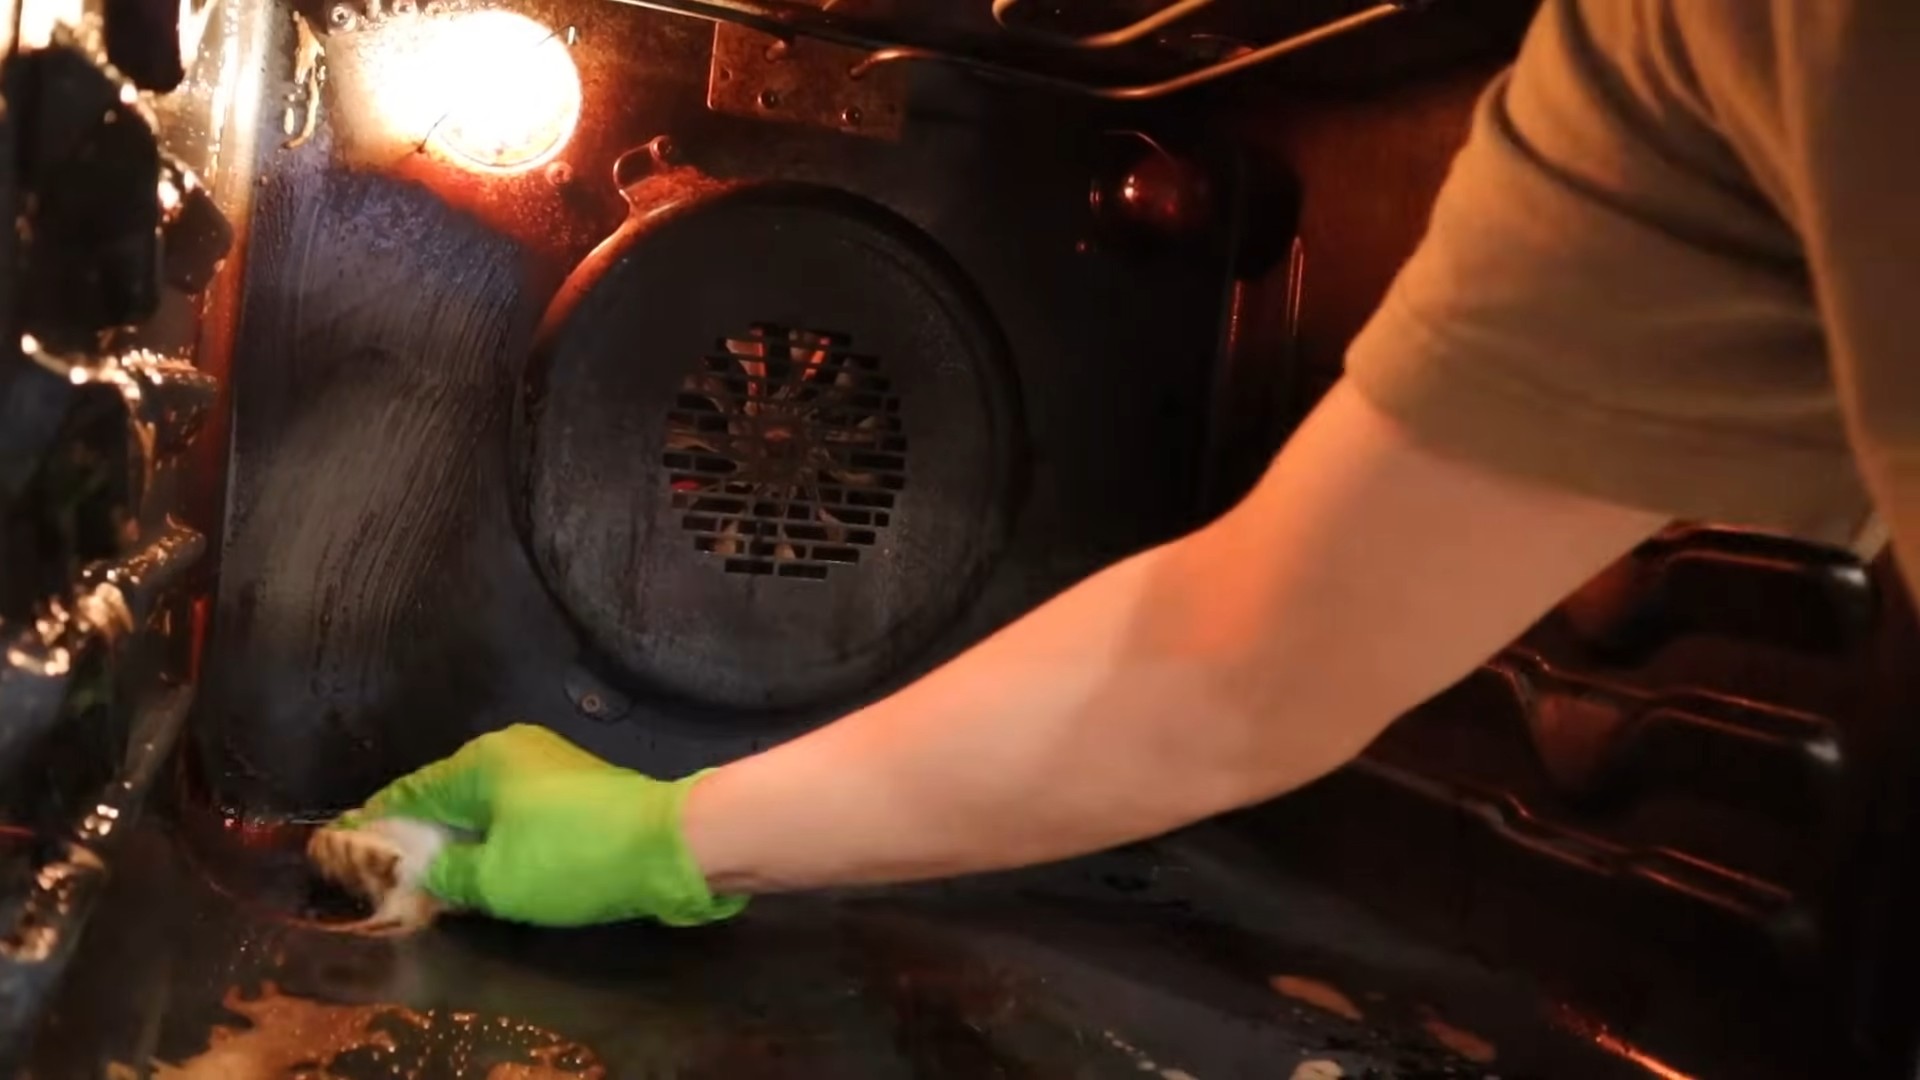
1. Empty the Oven: First things first, remove everything from your oven – racks, baking stones, thermometers, anything that’s not permanently attached. We want a clean slate to work with.
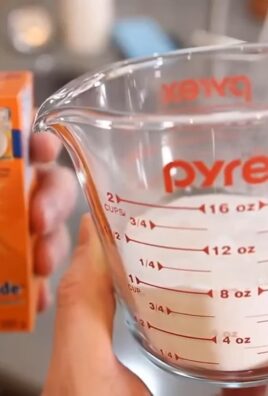
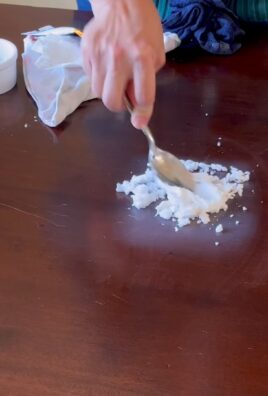
2. Mix the Paste: In a bowl, combine 1/2 cup of baking soda with a few tablespoons of water. Add the water gradually until you form a thick, spreadable paste. You want it to be similar to the consistency of frosting. If you add too much water, just add a little more baking soda to thicken it up.
3. Coat the Oven: Now, put on your gloves (if you’re using them) and start applying the baking soda paste to the interior surfaces of your oven. This includes the walls, the floor, the door (inside), and even the heating elements (if you can reach them safely). Avoid the heating elements if you are unsure. I usually skip the heating elements just to be safe.
* Pro Tip: Focus on the areas with the most baked-on grime. You can apply a thicker layer of paste to these spots.
4. Let it Sit: This is the most important part – patience! We need to let the baking soda paste work its magic. Leave it on for at least 12 hours, or even better, overnight. The longer it sits, the easier it will be to remove the grime. I usually apply it before I go to bed and then tackle the cleaning in the morning.
Cleaning the Oven Racks: A Soak in the Tub
While the baking soda paste is working its magic inside the oven, let’s tackle those greasy oven racks.
1. Line the Tub: Grab an old towel or a plastic drop cloth and line the bottom of your bathtub. This will protect the tub from scratches and grime.
2. Soak the Racks: Place the oven racks in the tub and fill it with hot water. Make sure the racks are completely submerged.
3. Add the Cleaning Power: Add 1/2 cup of dish soap and 1/2 cup of baking soda to the water. The dish soap will help cut through the grease, and the baking soda will boost the cleaning power.
4. Let Them Soak: Let the racks soak for at least 2-3 hours, or even overnight for really stubborn grime. The longer they soak, the easier it will be to scrub them clean.
5. Scrub and Rinse: After soaking, drain the tub and use a scrub brush or sponge to scrub the racks clean. The grime should come off fairly easily. Rinse the racks thoroughly with clean water.
6. Dry the Racks: Dry the racks with a clean towel before placing them back in the oven.
The Vinegar Spray: Activating the Cleaning Power
Now that the baking soda paste has had time to work its magic, it’s time to activate its cleaning power with vinegar.
1. Fill the Spray Bottle: Pour white vinegar into a spray bottle. You can use it undiluted for maximum cleaning power.
2. Spray the Oven: Generously spray the baking soda paste with vinegar. You’ll notice a fizzing reaction – this is the baking soda and vinegar reacting, which helps to loosen the grime even further.
3. Let it Fizz: Let the vinegar sit for a few minutes to allow the fizzing action to work its magic.
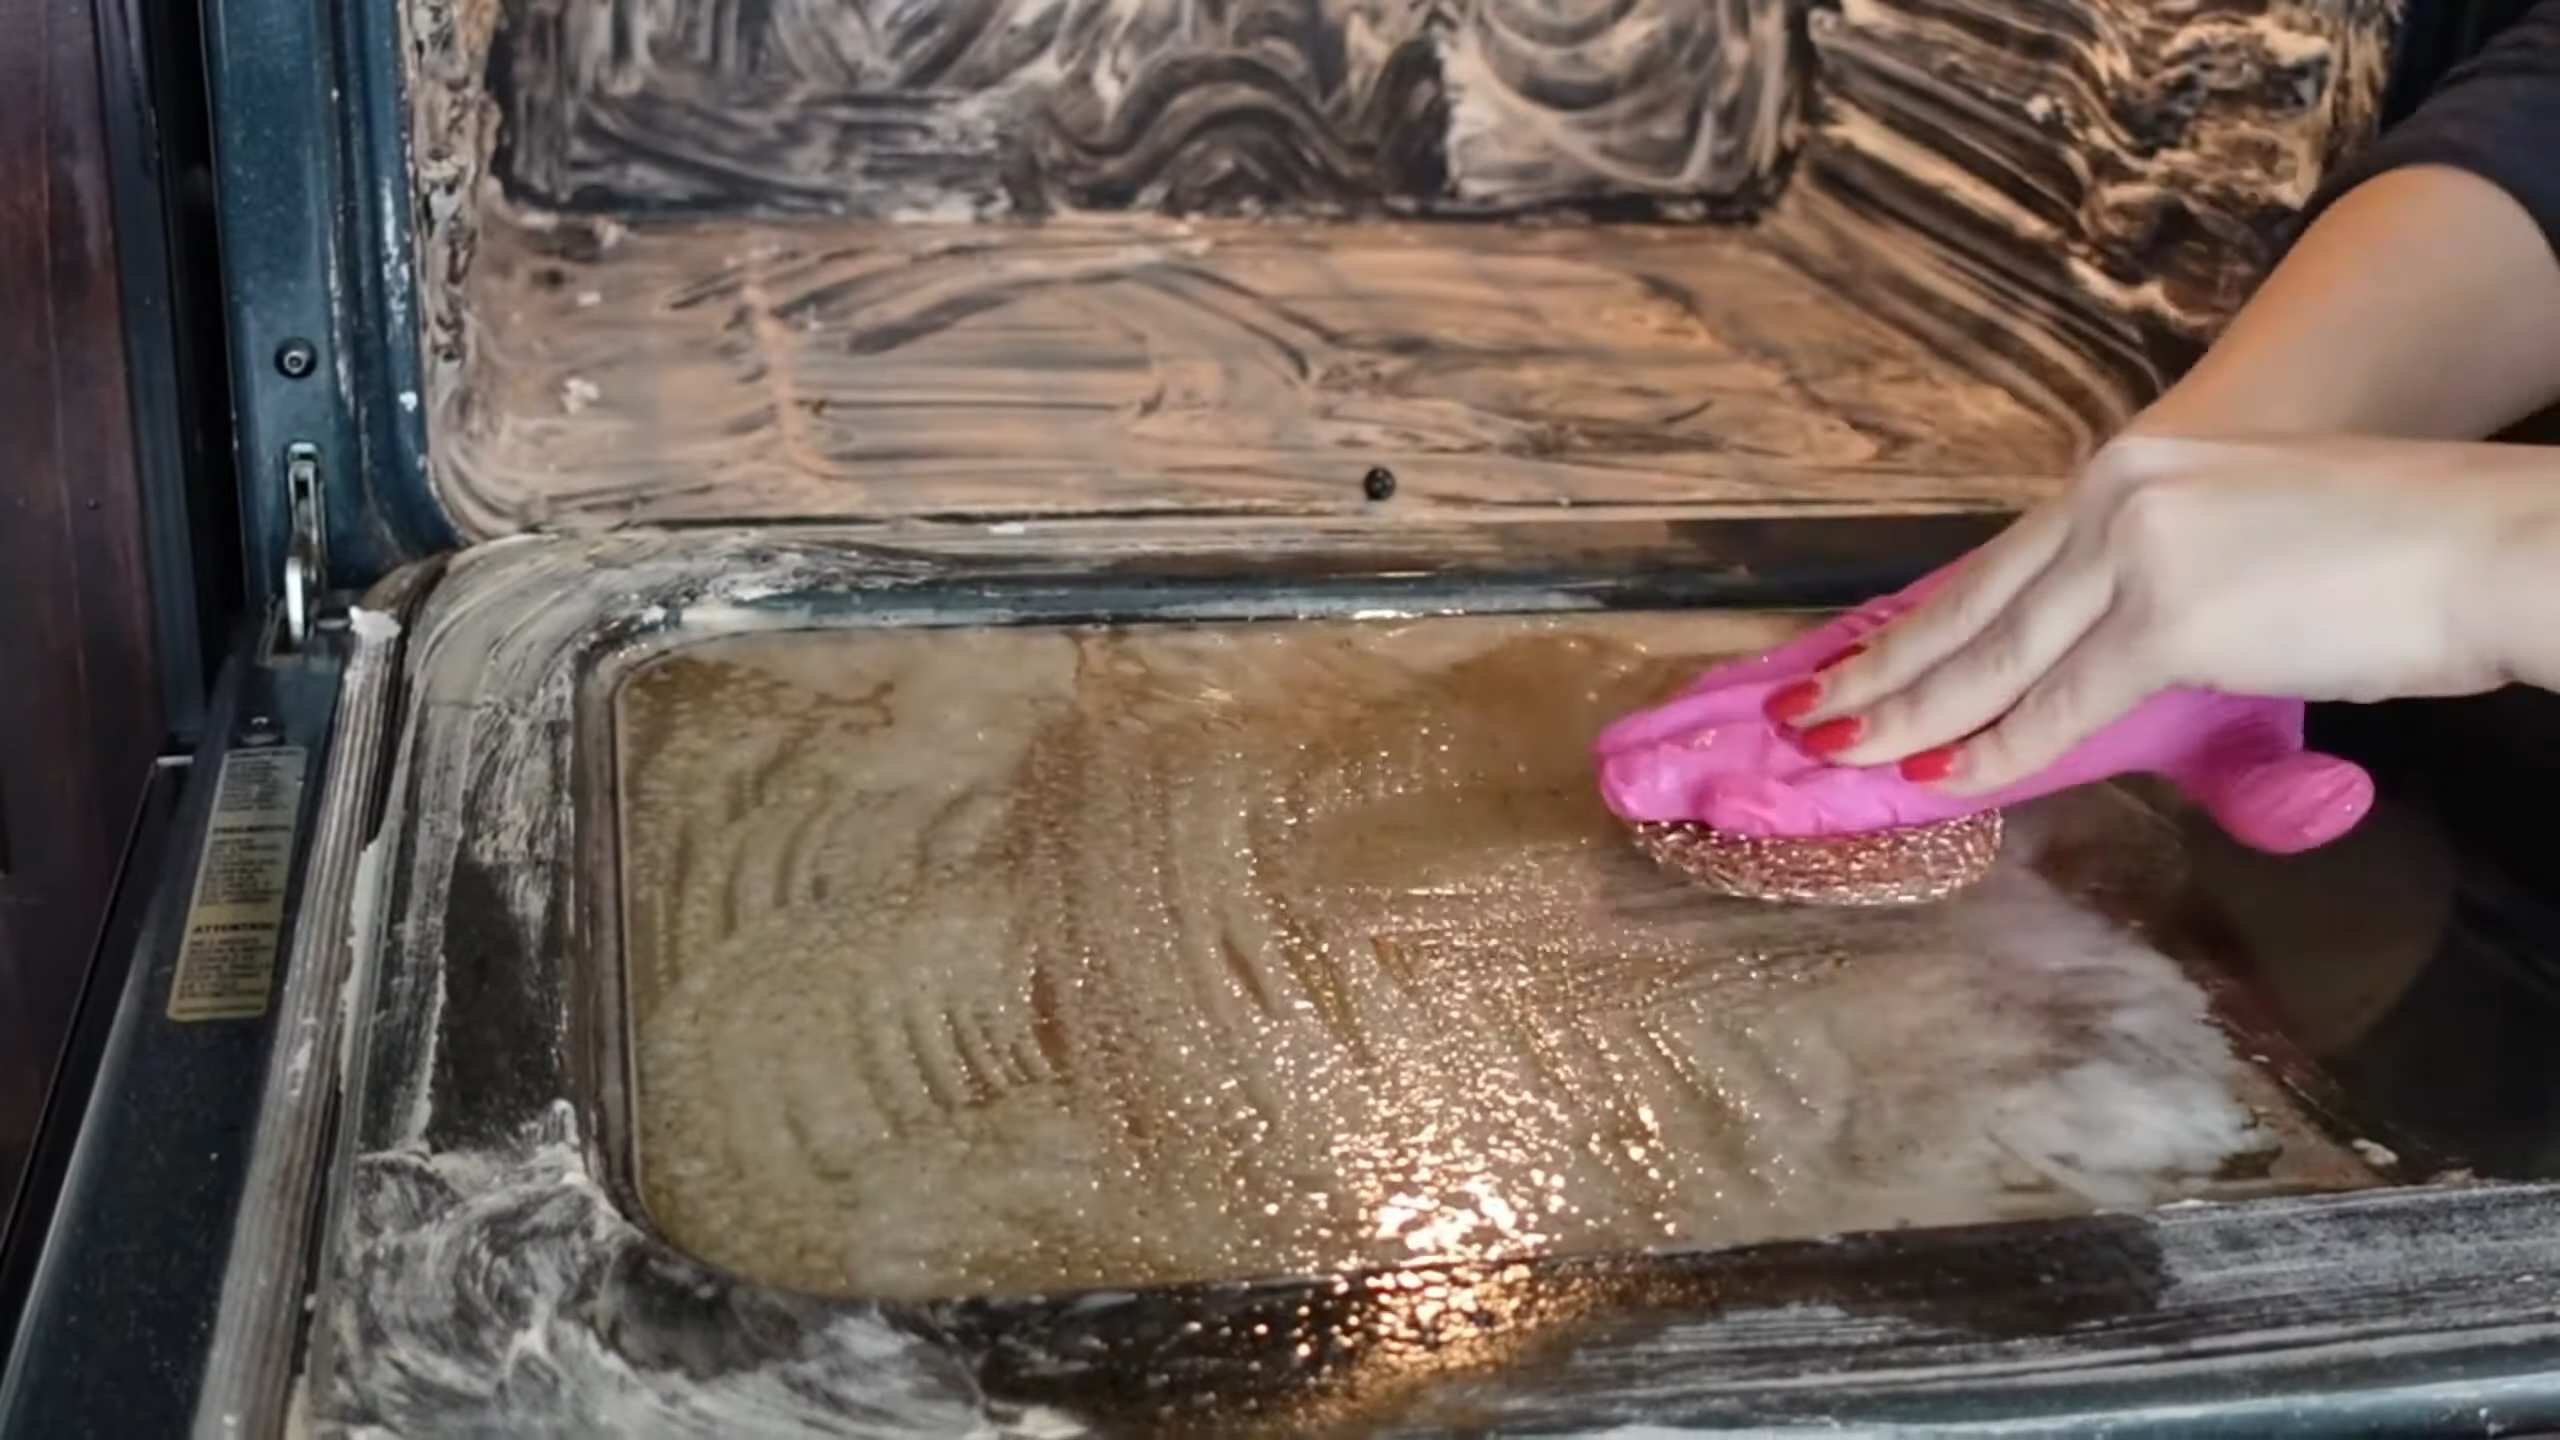
Wiping Away the Grime: The Final Touches
Now for the satisfying part – wiping away all that grime!
1. Wipe it Down: Use a damp sponge or scrub brush to wipe away the baking soda paste and loosened grime. You may need to use a little elbow grease for stubborn spots.
* Pro Tip: If you’re having trouble removing the paste, try using a plastic spatula or scraper to gently scrape it off.
2. Rinse and Repeat: Rinse the sponge or scrub brush frequently with clean water. You may need to wipe down the oven several times to remove all the baking soda residue.
3. Dry the Oven: Once you’ve removed all the baking soda paste and grime, dry the interior of the oven with a clean towel.
4. Reassemble: Place the clean oven racks back into the oven.
Dealing with Stubborn Spots
Sometimes, even with the baking soda and vinegar, you might encounter some stubborn spots that just won’t budge. Don’t worry, here are a few tricks to try:
* More Baking Soda Paste: Apply a fresh layer of baking soda paste to the stubborn spot and let it sit for a few more hours.
* Lemon Juice: Cut a lemon in half and rub it directly onto the stubborn spot. The citric acid in the lemon can help to break down the grime.
* Steel Wool: As a last resort, you can try using a fine-grade steel wool pad to gently scrub the stubborn spot. Be careful not to scratch the oven’s interior.
Preventative Measures: Keeping Your Oven Clean Longer
Now that your oven is sparkling clean, let’s talk about how to keep it that way!
* Wipe Up Spills Immediately: The easiest way to prevent baked-on grime is to wipe up spills as soon as they happen.
* Use Oven Liners: Oven liners can catch drips and spills, making cleanup much easier.
* Regular Cleaning: Don’t wait until your oven is completely covered in grime to clean it. A quick wipe-down every few weeks can prevent buildup.
* Baking Sheets: Use baking sheets to catch drips and spills when cooking messy foods.
A Few Extra Tips and Tricks
* Self-Cleaning Ovens: While this method is great for avoiding harsh chemicals, if you have a self-cleaning oven, you can still use it occasionally. Just be sure to follow the manufacturer’s instructions carefully.
* Ventilation: When cleaning your oven, make sure to open a window or turn on the exhaust fan to ventilate the area.
* Safety First: Always unplug your oven before cleaning it. And be careful when working around the heating elements.
* Test in an Inconspicuous Area: Before applying the baking soda paste to the entire oven, test it in a small, inconspicuous area to make sure it doesn’t damage the finish.
Enjoy Your Sparkling Clean Oven!
And there you have it! A natural and effective way to clean your oven without harsh chemicals. I hope this DIY hack helps you keep your oven sparkling clean and makes your cooking experience even more enjoyable. Happy cleaning!
Conclusion
So, there you have it! This natural oven cleaning hack isn’t just a cleaning method; it’s a revolution in how you approach household chores. Ditch the harsh chemicals, the lingering fumes, and the endless scrubbing. Embrace the power of simple, readily available ingredients to achieve a sparkling clean oven.
Why is this a must-try? Because it’s effective, eco-friendly, and economical. You’re not just cleaning your oven; you’re contributing to a healthier home environment and reducing your impact on the planet. Plus, you’ll save money by avoiding expensive, specialized cleaning products. It’s a win-win-win!
But the beauty of this natural oven cleaning hack lies in its adaptability. Feel free to experiment with variations to suit your specific needs and preferences. For instance, if you have particularly stubborn baked-on grime, you can create a paste of baking soda, salt, and a little bit of water. Apply this paste directly to the problem areas, let it sit for an extended period (even overnight), and then scrub away. You can also add a few drops of your favorite essential oil, like lemon or tea tree, to the baking soda paste for an extra boost of freshness and antibacterial properties. Just be sure the essential oil is safe for oven temperatures if you’re using the self-cleaning function afterward.
Another variation involves using vinegar in a spray bottle to dampen the baking soda paste before scrubbing. The vinegar reacts with the baking soda, creating a fizzing action that helps to loosen the grime. This is especially helpful for tackling grease splatters on the oven door.
Don’t be afraid to adjust the ratios of baking soda and water to achieve the consistency you prefer. Some people like a thicker paste, while others prefer a more liquid solution. The key is to find what works best for you and your oven.
We’re confident that once you try this natural oven cleaning hack, you’ll never go back to conventional cleaning methods. It’s a game-changer that will leave your oven sparkling, your home smelling fresh, and your conscience clear.
So, what are you waiting for? Gather your ingredients, roll up your sleeves, and prepare to be amazed. And most importantly, we want to hear about your experience! Share your before-and-after photos, your tips and tricks, and your overall thoughts in the comments section below. Let’s create a community of clean oven enthusiasts and spread the word about this amazing natural cleaning solution. Your feedback will not only help others discover this fantastic method but also inspire us to continue sharing eco-friendly and effective cleaning solutions. Let’s make oven cleaning a breeze, naturally!
Frequently Asked Questions (FAQ)
1. Is this natural oven cleaning hack safe for all types of ovens?
Generally, yes, this natural oven cleaning hack is safe for most types of ovens, including electric, gas, and convection ovens. However, it’s always a good idea to consult your oven’s manufacturer’s instructions before trying any new cleaning method. Pay particular attention to any warnings about using abrasive cleaners or specific cleaning agents. For self-cleaning ovens, it’s crucial to remove all baking soda residue before initiating the self-cleaning cycle, as the high temperatures can cause the baking soda to harden and become difficult to remove. If you have a particularly delicate or antique oven, it’s best to test the cleaning solution on a small, inconspicuous area first to ensure it doesn’t cause any damage.
2. How long should I leave the baking soda paste on the oven?
The ideal time to leave the baking soda paste on your oven depends on the severity of the grime. For lightly soiled ovens, 3-4 hours might be sufficient. However, for ovens with heavy baked-on grease and food residue, leaving the paste on overnight (12-14 hours) is highly recommended. The longer the paste sits, the more time it has to penetrate and loosen the grime, making it easier to scrub away. If you’re short on time, you can try applying the paste in the morning before you leave for work and then scrubbing it off when you get home. Just be sure to keep the oven door slightly ajar to allow for proper ventilation.
3. What’s the best way to remove the baking soda paste after it has sat?
Removing the baking soda paste can be a bit messy, but with the right tools and techniques, it’s manageable. Start by using a plastic scraper or spatula to remove as much of the loose paste as possible. Avoid using metal scrapers, as they can scratch the oven’s surface. Next, use a damp sponge or cloth to wipe away the remaining residue. You may need to rinse the sponge or cloth frequently to avoid spreading the grime around. For stubborn areas, try spraying the paste with vinegar and letting it fizz for a few minutes before wiping it away. Finally, use a clean, dry cloth to buff the oven’s surface and remove any lingering streaks.
4. Can I use this natural oven cleaning hack on the oven door glass?
Yes, this natural oven cleaning hack works wonders on oven door glass. The baking soda paste helps to loosen baked-on grease and grime, making it easier to wipe away. Apply the paste to the glass, let it sit for a few hours or overnight, and then scrub it with a non-abrasive sponge or cloth. For particularly stubborn stains, you can try using a razor blade scraper (carefully!) to remove the grime. Be sure to hold the scraper at a shallow angle to avoid scratching the glass. After scrubbing, wipe the glass clean with a damp cloth and then dry it with a clean towel.
5. What if I don’t have baking soda? Can I use something else?
While baking soda is the star ingredient in this natural oven cleaning hack, you can try using other alternatives if you don’t have any on hand. One option is to use a mixture of salt and cream of tartar. Combine equal parts of salt and cream of tartar with enough water to form a paste. Apply the paste to the oven, let it sit for a few hours, and then scrub it away. Another option is to use a mixture of vinegar and water. Spray the oven with vinegar, let it sit for a few minutes, and then scrub it with a sponge or cloth. However, keep in mind that these alternatives may not be as effective as baking soda, especially for heavily soiled ovens.
6. How often should I use this natural oven cleaning hack?
The frequency with which you should use this natural oven cleaning hack depends on how often you use your oven and how messy it gets. For most people, cleaning the oven every 1-3 months is sufficient. However, if you use your oven frequently or tend to make messy dishes, you may need to clean it more often. It’s always a good idea to wipe up spills and splatters as soon as they happen to prevent them from baking onto the oven’s surface and becoming difficult to remove. Regular maintenance will help keep your oven clean and prevent the need for deep cleaning as often.
7. Is it safe to use the self-cleaning function after using this natural oven cleaning hack?
Yes, it is generally safe to use the self-cleaning function after using this natural oven cleaning hack, but it’s crucial to ensure that all baking soda residue has been completely removed. Any remaining baking soda can harden during the high-temperature self-cleaning cycle and become very difficult to remove. Thoroughly wipe down the oven with a damp cloth multiple times to ensure that no baking soda remains. If you’re unsure, it’s best to err on the side of caution and skip the self-cleaning function altogether.
8. Can I use this method on the racks and other removable parts of the oven?
Absolutely! This method works great on oven racks and other removable parts. You can soak the racks in a bathtub or large sink filled with hot water and baking soda. Let them soak for several hours or overnight, then scrub them with a brush or sponge. For stubborn grime, you can also apply a baking soda paste directly to the racks. Rinse the racks thoroughly with clean water and dry them before placing them back in the oven. This method is much safer and more effective than using harsh chemical cleaners on oven racks.

Leave a Comment