

Planting Bitter Gourd might seem intimidating, but trust me, with a few clever tricks and a little DIY spirit, you can harvest your own bounty of this nutritious and unique vegetable right in your backyard! Forget those bland, store-bought gourds – imagine the satisfaction of serving up a dish made with something you nurtured from seed to table.
Bitter gourd, also known as bitter melon or karela, has a rich history, deeply rooted in Asian and African cultures. For centuries, it’s been celebrated not only for its distinctive flavor but also for its impressive medicinal properties. From traditional remedies to culinary delights, this humble vegetable has played a significant role in various communities.
But why should you consider planting bitter gourd? Well, beyond the cultural significance and potential health benefits, growing your own allows you to control the quality and freshness of your produce. Plus, let’s be honest, who doesn’t love a good DIY project? In this article, I’m going to share some simple yet effective home gardening tricks that will make planting bitter gourd a breeze, even if you’re a complete beginner. We’ll cover everything from seed preparation to pest control, ensuring you have a thriving bitter gourd patch in no time. So, grab your gardening gloves, and let’s get started!
Planting Bitter Gourd: A Comprehensive DIY Guide
Hey there, fellow gardening enthusiasts! Today, I’m super excited to share my tried-and-true method for growing bitter gourd, also known as bitter melon or karela. Don’t let the name scare you; while it has a distinct bitter taste, it’s incredibly nutritious and a staple in many cuisines. Plus, the satisfaction of harvesting your own homegrown produce is unbeatable! This guide will walk you through every step, from seed preparation to harvesting, ensuring you have a bountiful crop.
Choosing the Right Variety and Location
Before we dive into the nitty-gritty, let’s talk about variety and location. There are several types of bitter gourd, varying in size, shape, and bitterness. Some popular choices include:
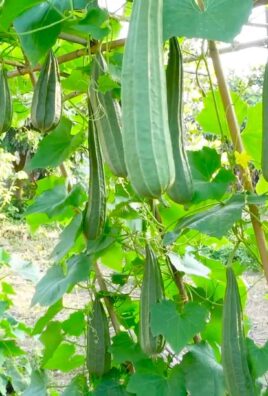
* Long Green: A common variety, known for its long, slender fruits.
* Short White: A smaller, rounder variety with a milder flavor.
* Chinese Bitter Melon: Often less bitter than other varieties.
I personally prefer the Long Green variety because it’s readily available and produces a good yield.
As for location, bitter gourd thrives in warm climates with plenty of sunshine. Here’s what to keep in mind:
* Sunlight: Bitter gourd needs at least 6-8 hours of direct sunlight per day.
* Soil: Well-drained, fertile soil is crucial. Amend your soil with compost or well-rotted manure to improve drainage and nutrient content.
* Support: Bitter gourd is a vine, so it needs a trellis or other support structure to climb on.
Preparing the Seeds for Success
Bitter gourd seeds have a tough outer shell, which can make germination a bit tricky. To improve your chances of success, I highly recommend scarifying and soaking the seeds.
* Scarification: Gently nick the seed coat with a knife or sandpaper. Be careful not to damage the inner part of the seed. This helps water penetrate the seed more easily.
* Soaking: Soak the scarified seeds in warm water for 24-48 hours. This further softens the seed coat and encourages germination.
Step-by-Step Planting Guide
Now for the fun part – planting! Here’s a detailed guide to get you started:
1. Prepare the Soil: Choose a sunny spot in your garden and prepare the soil. Dig a hole that is about 12 inches wide and 12 inches deep. Mix the soil you removed with compost or well-rotted manure. This will provide your bitter gourd plants with the nutrients they need to thrive.
2. Start Seeds Indoors (Optional): While you can directly sow bitter gourd seeds in the ground, starting them indoors gives them a head start, especially in cooler climates. I usually start my seeds indoors about 4-6 weeks before the last expected frost.
* Fill small pots or seedling trays with a good quality seed-starting mix.
* Plant 2-3 seeds per pot, about ½ inch deep.
* Water gently and keep the soil consistently moist.
* Place the pots in a warm, sunny location or under grow lights.
* Once the seedlings emerge (usually within 7-14 days), thin them to one plant per pot.
3. Direct Sowing: If you’re opting for direct sowing, wait until the soil has warmed up to at least 65°F (18°C).
* Sow the scarified and soaked seeds directly into the prepared soil, about ½ inch deep.
* Space the seeds about 2-3 feet apart.
* Water gently and keep the soil consistently moist.
4. Transplanting Seedlings: If you started your seeds indoors, it’s time to transplant them into the garden.
* Harden off the seedlings by gradually exposing them to outdoor conditions for a week or so.
* Choose a cloudy day to transplant to minimize stress on the plants.
* Dig a hole slightly larger than the root ball of the seedling.
* Gently remove the seedling from the pot and place it in the hole.
* Backfill with soil and water thoroughly.
* Space the plants about 2-3 feet apart.
5. Install Support Structures: Bitter gourd vines can grow quite long, so it’s essential to provide them with a sturdy support structure.
* A trellis, fence, or even a strong bamboo stake will work.
* Install the support structure near the plants soon after transplanting or direct sowing.
* As the vines grow, gently guide them onto the support structure and tie them loosely with twine or plant ties.
Caring for Your Bitter Gourd Plants
Once your bitter gourd plants are established, it’s important to provide them with proper care to ensure a healthy and productive harvest.
* Watering: Water regularly, especially during dry periods. Bitter gourd needs consistent moisture to thrive. Aim for about 1 inch of water per week.
* Fertilizing: Feed your plants with a balanced fertilizer every 2-3 weeks. I like to use a liquid fertilizer diluted to half strength. You can also side-dress with compost or well-rotted manure.
* Weeding: Keep the area around your plants free of weeds. Weeds compete with your bitter gourd for nutrients and water.
* Pruning: Pruning can help improve air circulation and encourage fruit production. Remove any yellowing or dead leaves. You can also pinch off the tips of the vines to encourage branching.
* Pest and Disease Control: Keep an eye out for common pests like aphids, spider mites, and squash bugs. Treat infestations promptly with insecticidal soap or neem oil. Bitter gourd can also be susceptible to fungal diseases like powdery mildew. Improve air circulation and avoid overhead watering to prevent these diseases. If necessary, use a fungicide.
Pollination: Helping Nature Along
Bitter gourd produces separate male and female flowers on the same plant. Pollination is necessary for fruit development. Bees and other insects usually do the job, but sometimes you may need to hand-pollinate.
* Identifying Male and Female Flowers: Male flowers have a long, slender stem, while female flowers have a small, immature fruit at the base of the flower.
* Hand-Pollination: In the early morning, use a small paintbrush to collect pollen from the male flower and transfer it to the stigma of the female flower.
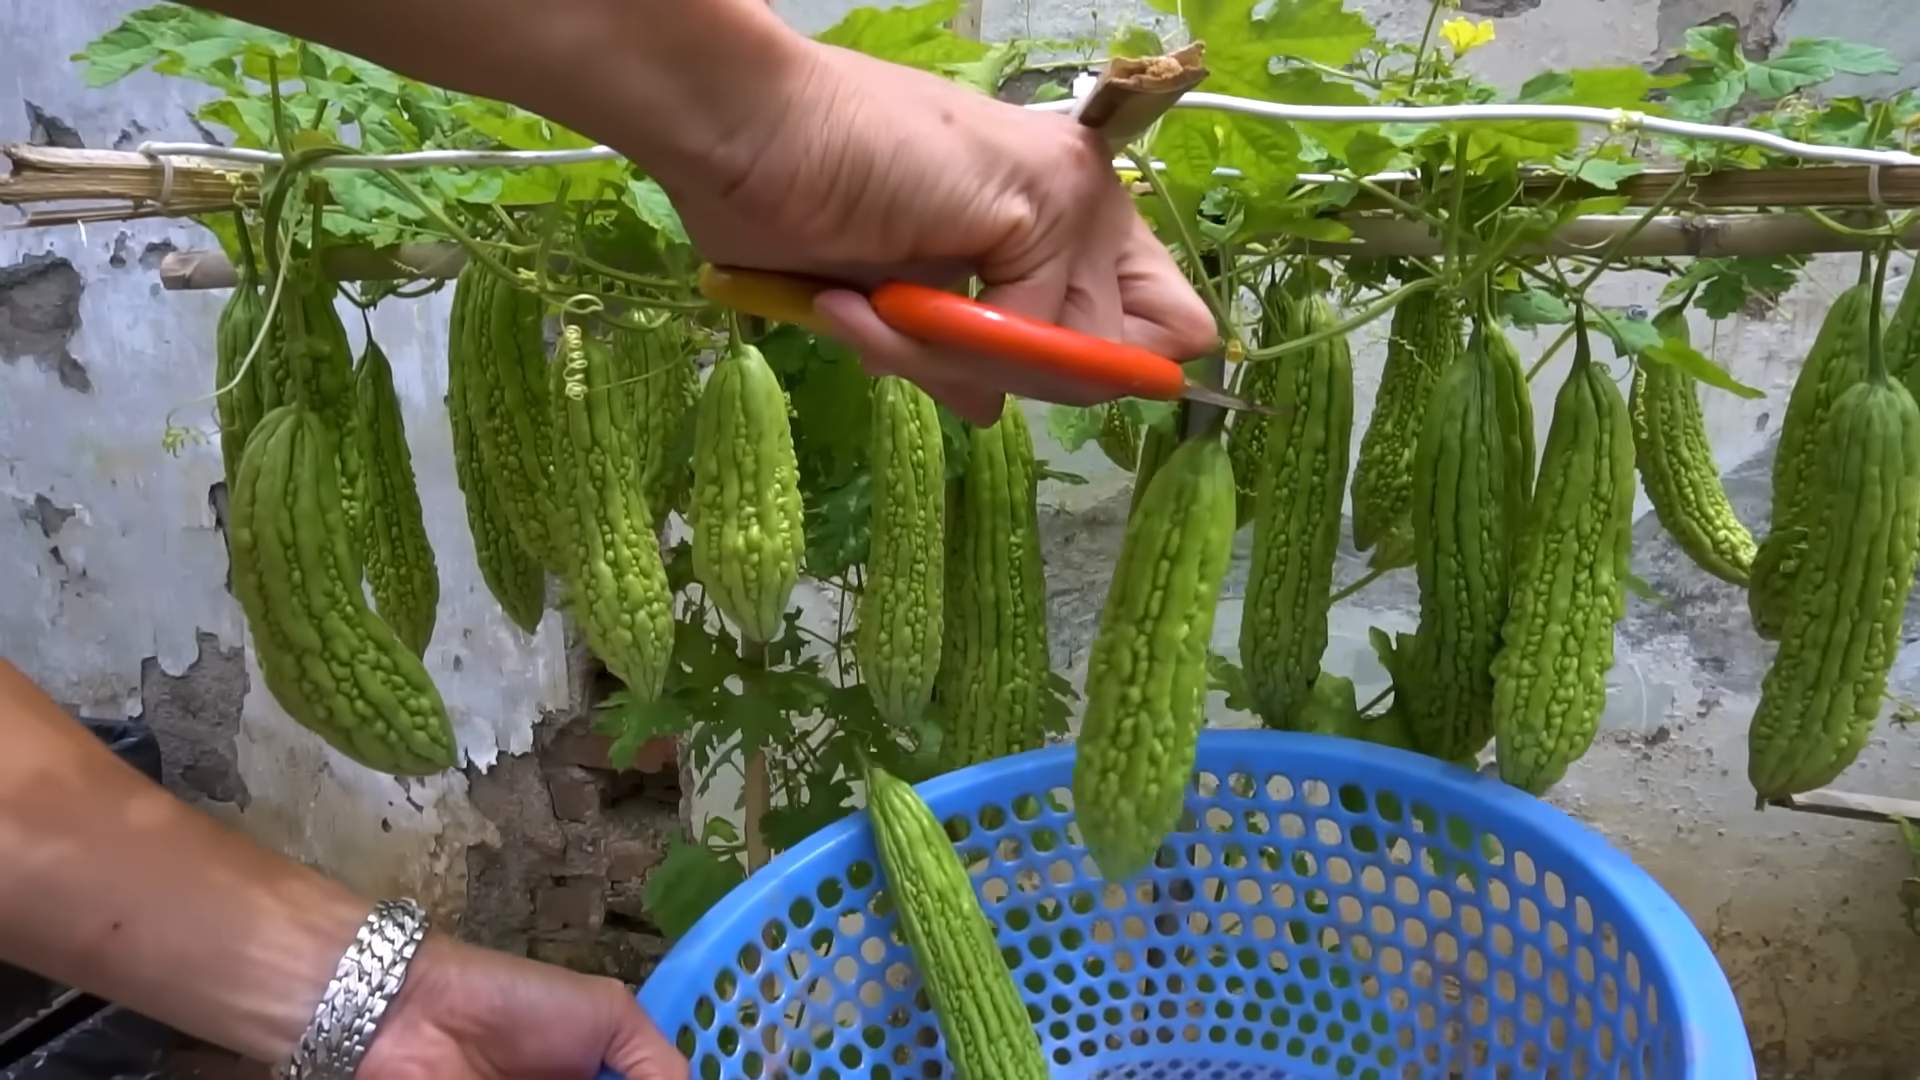
Harvesting Your Bounty
The moment you’ve been waiting for! Bitter gourd is typically ready to harvest about 2-3 months after planting.
* Harvesting Time: Harvest the fruits when they are still green and firm. Overripe fruits will turn yellow and become more bitter.
* Harvesting Technique: Use a sharp knife or pruners to cut the fruit from the vine, leaving a small stem attached.
* Storage: Store harvested bitter gourd in the refrigerator for up to a week.
Troubleshooting Common Problems
Even with the best care, you might encounter some challenges along the way. Here are a few common problems and how to address them:
* Poor Germination: Make sure your seeds are fresh and properly scarified and soaked. Soil temperature is also crucial for germination.
* Yellowing Leaves: This could be a sign of overwatering, underwatering, nutrient deficiency, or disease. Check the soil moisture and adjust your watering accordingly. Fertilize your plants regularly and inspect them for signs of disease.
* Lack of Fruit Production: This could be due to poor pollination, insufficient sunlight, or nutrient deficiency. Hand-pollinate your plants if necessary, ensure they are getting enough sunlight, and fertilize them regularly.
* Pest Infestations: Regularly inspect your plants for pests and treat infestations promptly with appropriate methods.
Enjoying Your Homegrown Bitter Gourd
Now that you’ve successfully grown your own bitter gourd, it’s time to enjoy the fruits of your labor! Bitter gourd can be used in a variety of dishes, from stir-fries and curries to soups and salads. Its unique bitter flavor adds a distinctive touch to any meal.
I hope this guide has been helpful. Happy gardening, and may your bitter gourd harvest be plentiful!
Conclusion
So, there you have it! Planting bitter gourd doesn’t have to be a daunting task. By embracing this simple DIY trick, you’re not just growing a vegetable; you’re cultivating a resilient and productive plant that will reward you with a bountiful harvest. The secret lies in the pre-sprouting technique, which gives your bitter gourd seeds a significant head start, bypassing the common germination challenges and ensuring a higher success rate.
Why is this a must-try? Because it’s efficient, cost-effective, and dramatically increases your chances of enjoying fresh, homegrown bitter gourd. Imagine the satisfaction of harvesting your own produce, knowing you nurtured it from seed to table. Plus, you’ll be avoiding the pesticides and chemicals often used in commercially grown vegetables.
But don’t stop there! Experiment with different varieties of bitter gourd. Try the long, slender types or the smaller, round ones. Each has its unique flavor profile and texture. You can also explore different trellising methods to maximize space and sunlight exposure. Consider companion planting with beans or marigolds to deter pests and attract beneficial insects.
Furthermore, think about the soil composition. While the method described works well with a standard potting mix, enriching the soil with compost or well-rotted manure will provide your bitter gourd plants with the extra nutrients they need to thrive. You can also amend the soil with bone meal to promote strong root development and flowering.
We wholeheartedly encourage you to try this DIY trick for planting bitter gourd. It’s a game-changer for both novice and experienced gardeners alike. Don’t be afraid to get your hands dirty and embrace the process. The rewards are well worth the effort.
Once you’ve tried it, we’d love to hear about your experience! Share your photos, tips, and any variations you’ve discovered in the comments below. Let’s create a community of bitter gourd enthusiasts, sharing our knowledge and celebrating our successes. Your insights could help others overcome challenges and achieve their own bountiful harvests. Remember, gardening is a journey of continuous learning and experimentation. So, get planting, get sharing, and get ready to enjoy the delicious and nutritious benefits of homegrown bitter gourd! Let us know if this **planting bitter gourd** trick worked for you!
Frequently Asked Questions (FAQs)
Q: Why is pre-sprouting bitter gourd seeds so important?
A: Pre-sprouting gives bitter gourd seeds a significant advantage. Bitter gourd seeds have a notoriously tough outer shell, which can make germination slow and uneven. Pre-sprouting softens this shell and allows the seedling to emerge more easily and quickly. This is especially crucial in regions with shorter growing seasons or less-than-ideal soil conditions. By pre-sprouting, you’re essentially giving the seeds a head start, ensuring a higher germination rate and stronger, healthier seedlings. It also allows you to select only the viable seeds for planting, saving you time and resources.
Q: How long should I soak the bitter gourd seeds before wrapping them in a damp paper towel?
A: Generally, soaking the seeds for 12-24 hours is sufficient. This allows the water to penetrate the hard outer shell and initiate the germination process. Avoid soaking for longer than 24 hours, as this can lead to the seeds becoming waterlogged and potentially rotting. Use lukewarm water for soaking to further encourage germination.
Q: What if my bitter gourd seeds don’t sprout after a week in the damp paper towel?
A: Don’t give up immediately! Sometimes, bitter gourd seeds can be stubborn. Ensure the paper towel remains consistently damp but not soaking wet. Check the temperature – it should be warm, ideally between 75-85°F (24-29°C). If the temperature is too low, the seeds may not germinate. You can try placing the wrapped seeds in a warm location, such as on top of a refrigerator or near a heating vent. If after two weeks, the seeds still haven’t sprouted, it’s likely they are not viable and you should try a fresh batch of seeds.
Q: What type of soil is best for planting bitter gourd seedlings?
A: Bitter gourd thrives in well-draining, fertile soil that is rich in organic matter. A good potting mix amended with compost or well-rotted manure is ideal. The soil pH should be slightly acidic to neutral, around 6.0 to 7.0. Avoid heavy clay soils, as they can retain too much moisture and lead to root rot. If you have clay soil, amend it with plenty of organic matter, such as compost, peat moss, or aged manure, to improve drainage and aeration.
Q: How much sunlight does bitter gourd need?
A: Bitter gourd requires at least 6-8 hours of direct sunlight per day to thrive. Choose a planting location that receives ample sunlight throughout the day. If you’re growing bitter gourd indoors, use grow lights to supplement natural sunlight, especially during the winter months. Insufficient sunlight can lead to weak growth, reduced flowering, and poor fruit production.
Q: How often should I water my bitter gourd plants?
A: Water bitter gourd plants regularly, especially during hot and dry weather. Keep the soil consistently moist but not waterlogged. Water deeply at the base of the plant, avoiding wetting the foliage, which can increase the risk of fungal diseases. Check the soil moisture regularly by sticking your finger about an inch into the soil. If the soil feels dry, it’s time to water. Reduce watering during cooler or rainy periods.
Q: What kind of fertilizer should I use for bitter gourd?
A: Bitter gourd benefits from regular fertilization, especially during the growing season. Use a balanced fertilizer with equal amounts of nitrogen, phosphorus, and potassium (e.g., 10-10-10) or a fertilizer specifically formulated for vegetables. Apply the fertilizer according to the manufacturer’s instructions. You can also supplement with organic fertilizers, such as compost tea or fish emulsion, to provide additional nutrients and improve soil health. Avoid over-fertilizing, as this can lead to excessive vegetative growth and reduced fruit production.
Q: How do I control pests and diseases on my bitter gourd plants?
A: Regularly inspect your bitter gourd plants for pests and diseases. Common pests include aphids, spider mites, and squash bugs. Control pests by handpicking them off the plants, using insecticidal soap, or introducing beneficial insects, such as ladybugs. Common diseases include powdery mildew and downy mildew. Prevent diseases by providing good air circulation, avoiding overhead watering, and applying fungicides if necessary. Choose disease-resistant varieties of bitter gourd to minimize the risk of disease problems.
Q: When is the best time to harvest bitter gourd?
A: Harvest bitter gourd when the fruits are still young and tender, typically about 2-3 months after planting. The fruits should be firm and have a bright green color. Overripe bitter gourd will turn yellow or orange and become bitter and tough. Use a sharp knife or pruning shears to cut the fruits from the vine, leaving a short stem attached. Harvest regularly to encourage continued fruit production.
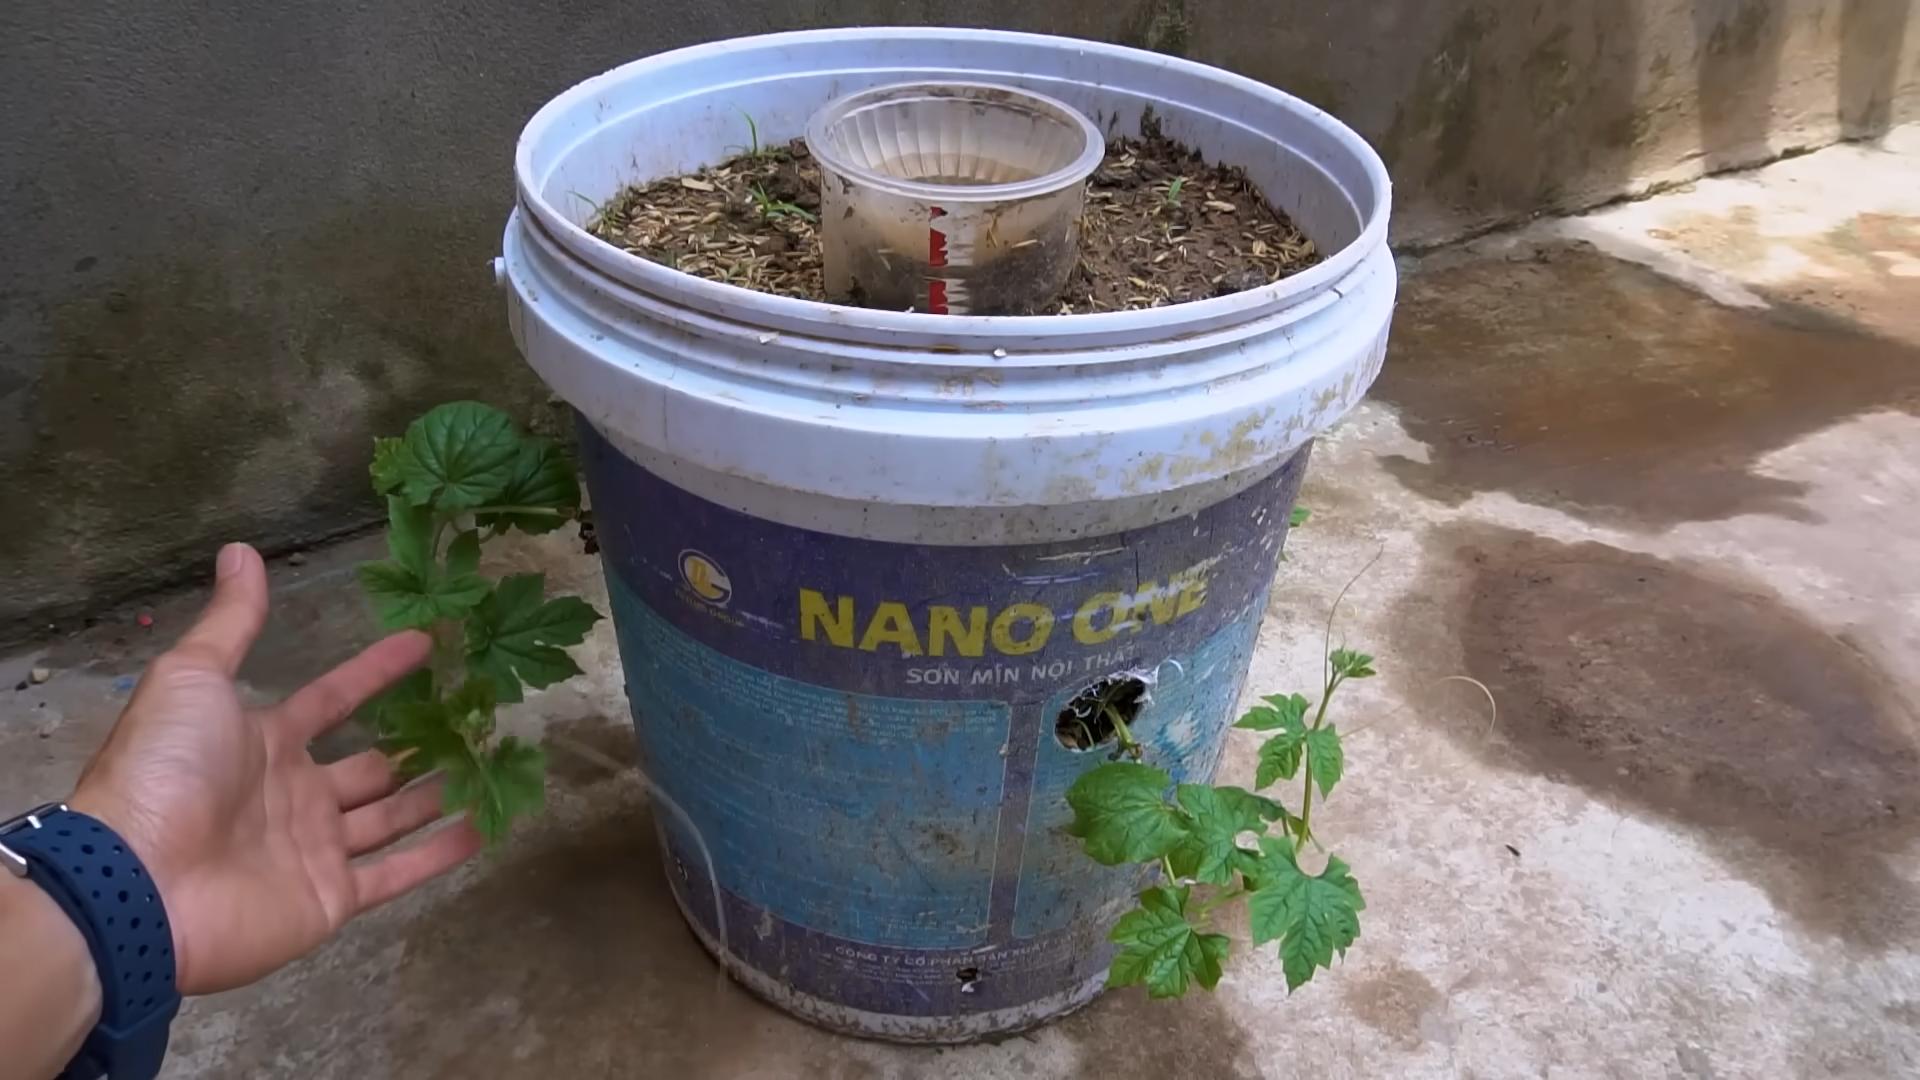
Q: Can I grow bitter gourd in containers?
A: Yes, bitter gourd can be successfully grown in containers, provided you choose a large enough container (at least 10-15 gallons) and provide adequate support for the vines. Use a well-draining potting mix and ensure the container has drainage holes. Water and fertilize regularly, as container-grown plants tend to dry out and deplete nutrients more quickly than those grown in the ground. Provide a trellis or other support structure for the vines to climb on.
Leave a Comment