

Remove water rings wood surfaces? Don’t panic! We’ve all been there. You set down a cold glass, forget a coaster, and BAM! A ghostly white ring stares back at you, seemingly mocking your furniture. But before you resign yourself to living with these unsightly blemishes, let me tell you a secret: you can banish those water rings with some surprisingly simple DIY tricks.
For generations, keeping wood furniture pristine has been a mark of pride. Think of the meticulously cared-for antiques passed down through families, each piece telling a story. While modern finishes offer some protection, the dreaded water ring remains a persistent foe. These rings aren’t just surface stains; they’re caused by moisture penetrating the finish, creating a cloudy effect.
Why is knowing how to remove water rings wood so important? Because your furniture deserves to look its best! Plus, learning these DIY hacks saves you money on expensive furniture repair services. Imagine the satisfaction of restoring your favorite coffee table or antique dresser to its former glory with just a few household items. I’m going to show you some easy and effective methods to tackle those pesky rings and keep your wood furniture looking beautiful for years to come. Let’s get started!
Removing Water Rings from Wood Furniture: A DIY Guide
Okay, so you’ve got those dreaded white rings on your beautiful wood furniture. Don’t panic! It happens to the best of us. A misplaced glass, a sweaty beverage, and BAM! Instant furniture faux pas. But before you resign yourself to living with them forever, let me tell you, there are several DIY methods you can try to banish those water rings for good. I’m going to walk you through a few of my favorite and most effective techniques.
Understanding Water Rings
First, let’s understand what we’re dealing with. Those white rings aren’t actually *in* the wood. They’re moisture trapped *in* the finish. The heat and moisture from the glass cause the finish to cloud up. So, our goal is to gently coax that moisture out.
Method 1: The Hair Dryer Trick
This is often the first method I try because it’s quick, easy, and uses something most of us already have.
What You’ll Need:
* A hair dryer
* A soft cloth (microfiber is ideal)
Step-by-Step Instructions:
1. Prepare the Area: Make sure the surface is clean and dry. Wipe away any spills or debris around the water ring with a clean, dry cloth.
2. Heat Application: Set your hair dryer to a low or medium heat setting. Hold it a few inches away from the water ring.
3. Gentle Heating: Move the hair dryer back and forth over the ring in a sweeping motion. Don’t hold it in one spot for too long, as you could damage the finish.
4. Observe and Wipe: As you heat the area, keep a close eye on the water ring. You should start to see it fade. Gently wipe the area with your soft cloth as you go. The heat helps to release the trapped moisture, and the cloth helps to absorb it.
5. Repeat if Necessary: If the ring doesn’t disappear completely after the first try, repeat the process. You might need to do it several times, especially for stubborn rings.
6. Cool Down: Once the ring is gone (or significantly faded), let the area cool down completely.
7. Buff: After it’s cool, buff the area gently with a clean, soft cloth to restore the shine.
Important Note: Be patient! This method might take some time and several repetitions. Don’t get discouraged if you don’t see results immediately. Also, always start with the lowest heat setting and gradually increase it if needed.
Method 2: The Iron and Cloth Method
This method uses a bit more heat, so it’s important to be extra careful. It’s best for more stubborn rings that the hair dryer didn’t quite conquer.
What You’ll Need:
* An iron (dry, no steam!)
* A thin cotton cloth (like a t-shirt or pillowcase)
* Water (optional, for dampening the cloth)
Step-by-Step Instructions:
1. Prepare the Area: As always, make sure the surface is clean and dry.
2. Prepare the Cloth: Fold the cotton cloth into several layers so it’s thick enough to protect the wood finish from direct heat. You can slightly dampen the cloth if you want, but make sure it’s not soaking wet. Just a little moisture can help.
3. Iron Setting: Set your iron to a low, dry setting (no steam!).
4. Placement: Place the folded cloth directly over the water ring.
5. Ironing: Gently press the iron onto the cloth over the water ring. Use a circular motion and don’t leave the iron in one spot for too long.
6. Check Progress: Lift the cloth periodically to check the progress. You should see the water ring starting to fade.
7. Repeat if Necessary: If the ring is still visible, repeat the process. You might need to adjust the heat setting slightly, but always err on the side of caution.
8. Cool Down: Once the ring is gone (or significantly faded), remove the cloth and let the area cool down completely.
9. Buff: Buff the area gently with a clean, soft cloth to restore the shine.
Important Note: This method can be risky if you’re not careful. Too much heat can damage the finish. Always start with the lowest heat setting and work your way up gradually. And never use steam!
Method 3: The Mayonnaise Method
Yes, you read that right! Mayonnaise can actually help remove water rings. The oils in mayonnaise can help to rehydrate the finish and draw out the trapped moisture.
What You’ll Need:
* Mayonnaise (full-fat is best)
* A soft cloth
* A clean, dry cloth
Step-by-Step Instructions:
1. Apply Mayonnaise: Apply a generous dollop of mayonnaise directly onto the water ring.
2. Let it Sit: Let the mayonnaise sit on the ring for at least an hour, or even overnight for stubborn rings. The longer it sits, the better chance it has to work.
3. Wipe Away: After the allotted time, wipe away the mayonnaise with a soft cloth.
4. Clean and Buff: Clean the area with a clean, damp cloth to remove any remaining mayonnaise residue. Then, buff the area dry with a clean, soft cloth to restore the shine.
Important Note: This method might sound strange, but it really works! The oils in the mayonnaise help to penetrate the finish and draw out the trapped moisture. Just make sure to clean the area thoroughly afterward to remove any mayonnaise residue.
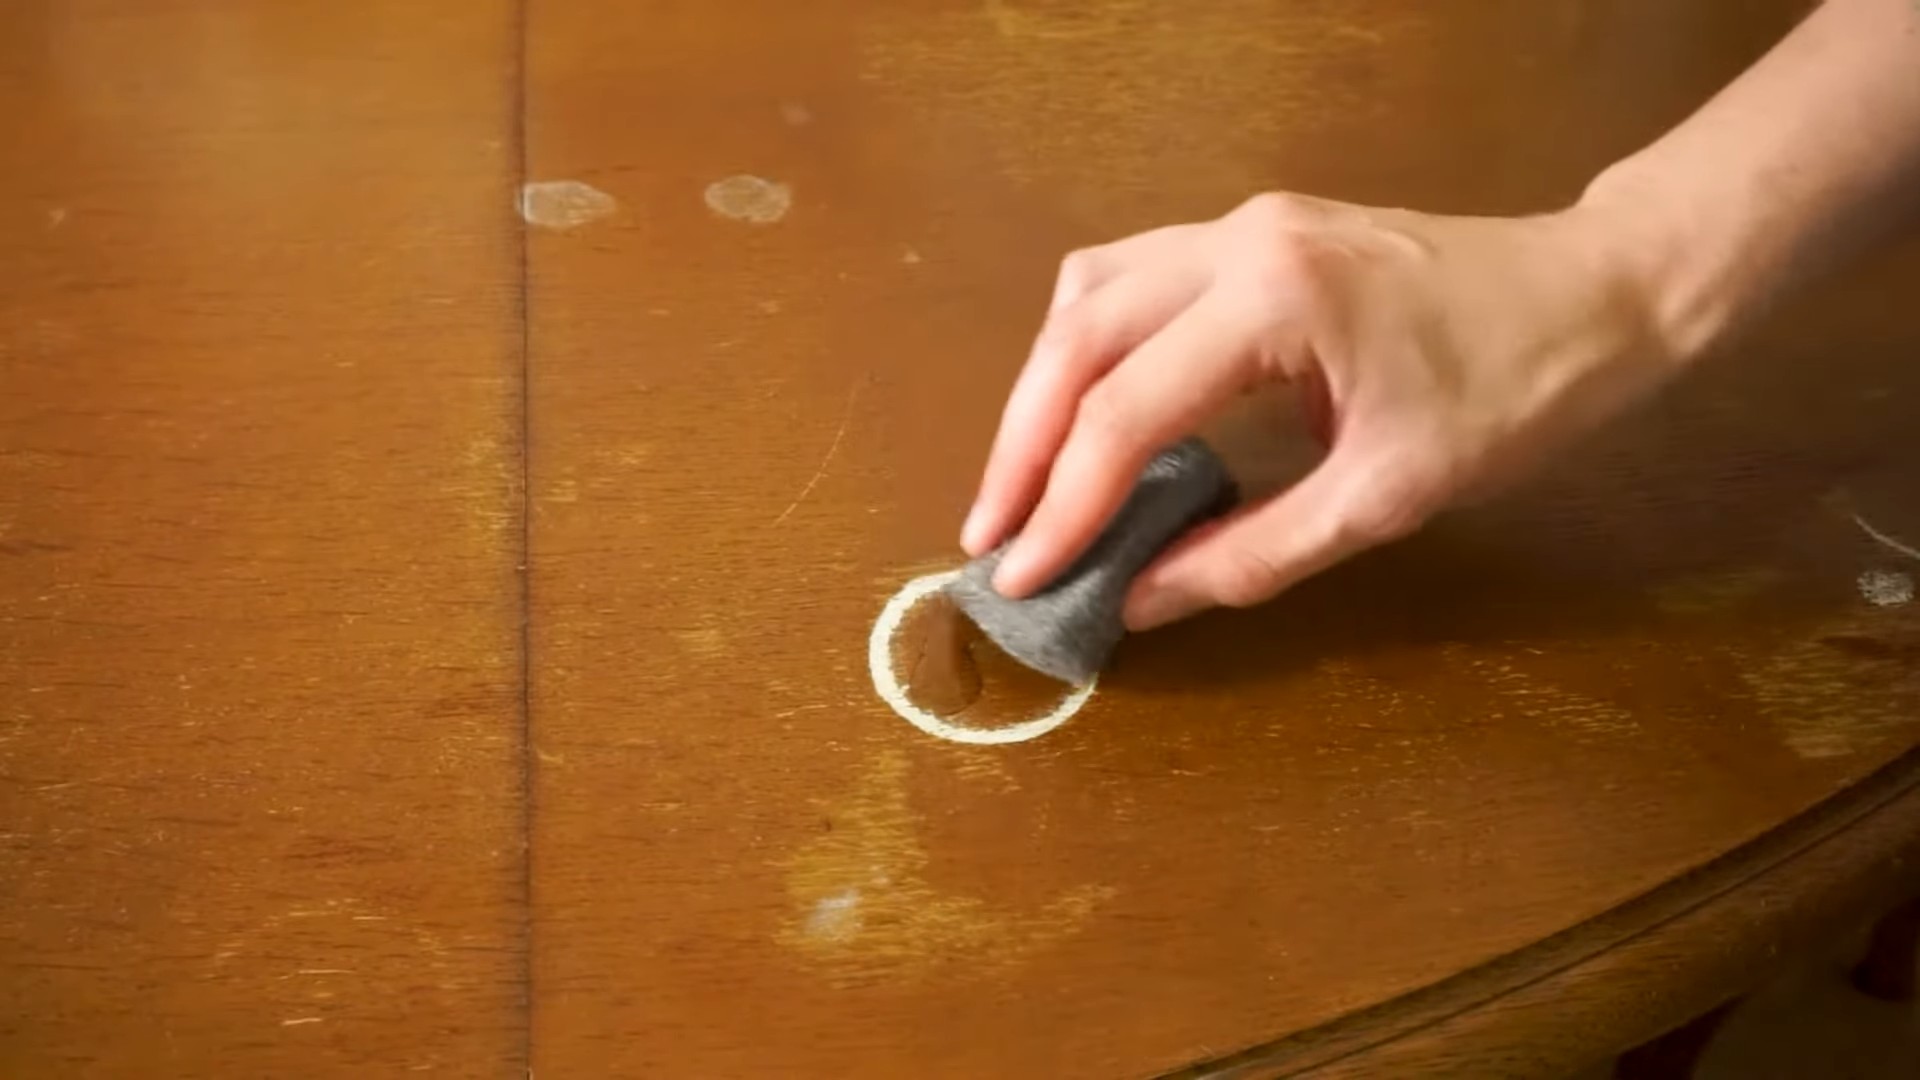
Method 4: The Toothpaste Method (Use with Caution!)
This method is a bit more abrasive, so I only recommend using it as a last resort if the other methods haven’t worked. It involves using a mild abrasive to gently buff away the water ring.
What You’ll Need:
* Non-gel toothpaste (plain white toothpaste)
* A soft cloth
* A clean, damp cloth
Step-by-Step Instructions:
1. Apply Toothpaste: Apply a small amount of non-gel toothpaste to a soft cloth.
2. Gentle Rubbing: Gently rub the toothpaste onto the water ring in a circular motion. Be very careful not to apply too much pressure, as you could scratch the finish.
3. Check Progress: After a few seconds of rubbing, check the progress. You should see the water ring starting to fade.
4. Wipe Away: Wipe away the toothpaste with a clean, damp cloth.
5. Buff: Buff the area dry with a clean, soft cloth to restore the shine.
Important Note: This method is abrasive, so use it with extreme caution. Test it in an inconspicuous area first to make sure it doesn’t damage the finish. And always use a non-gel toothpaste, as gel toothpaste can be too abrasive.
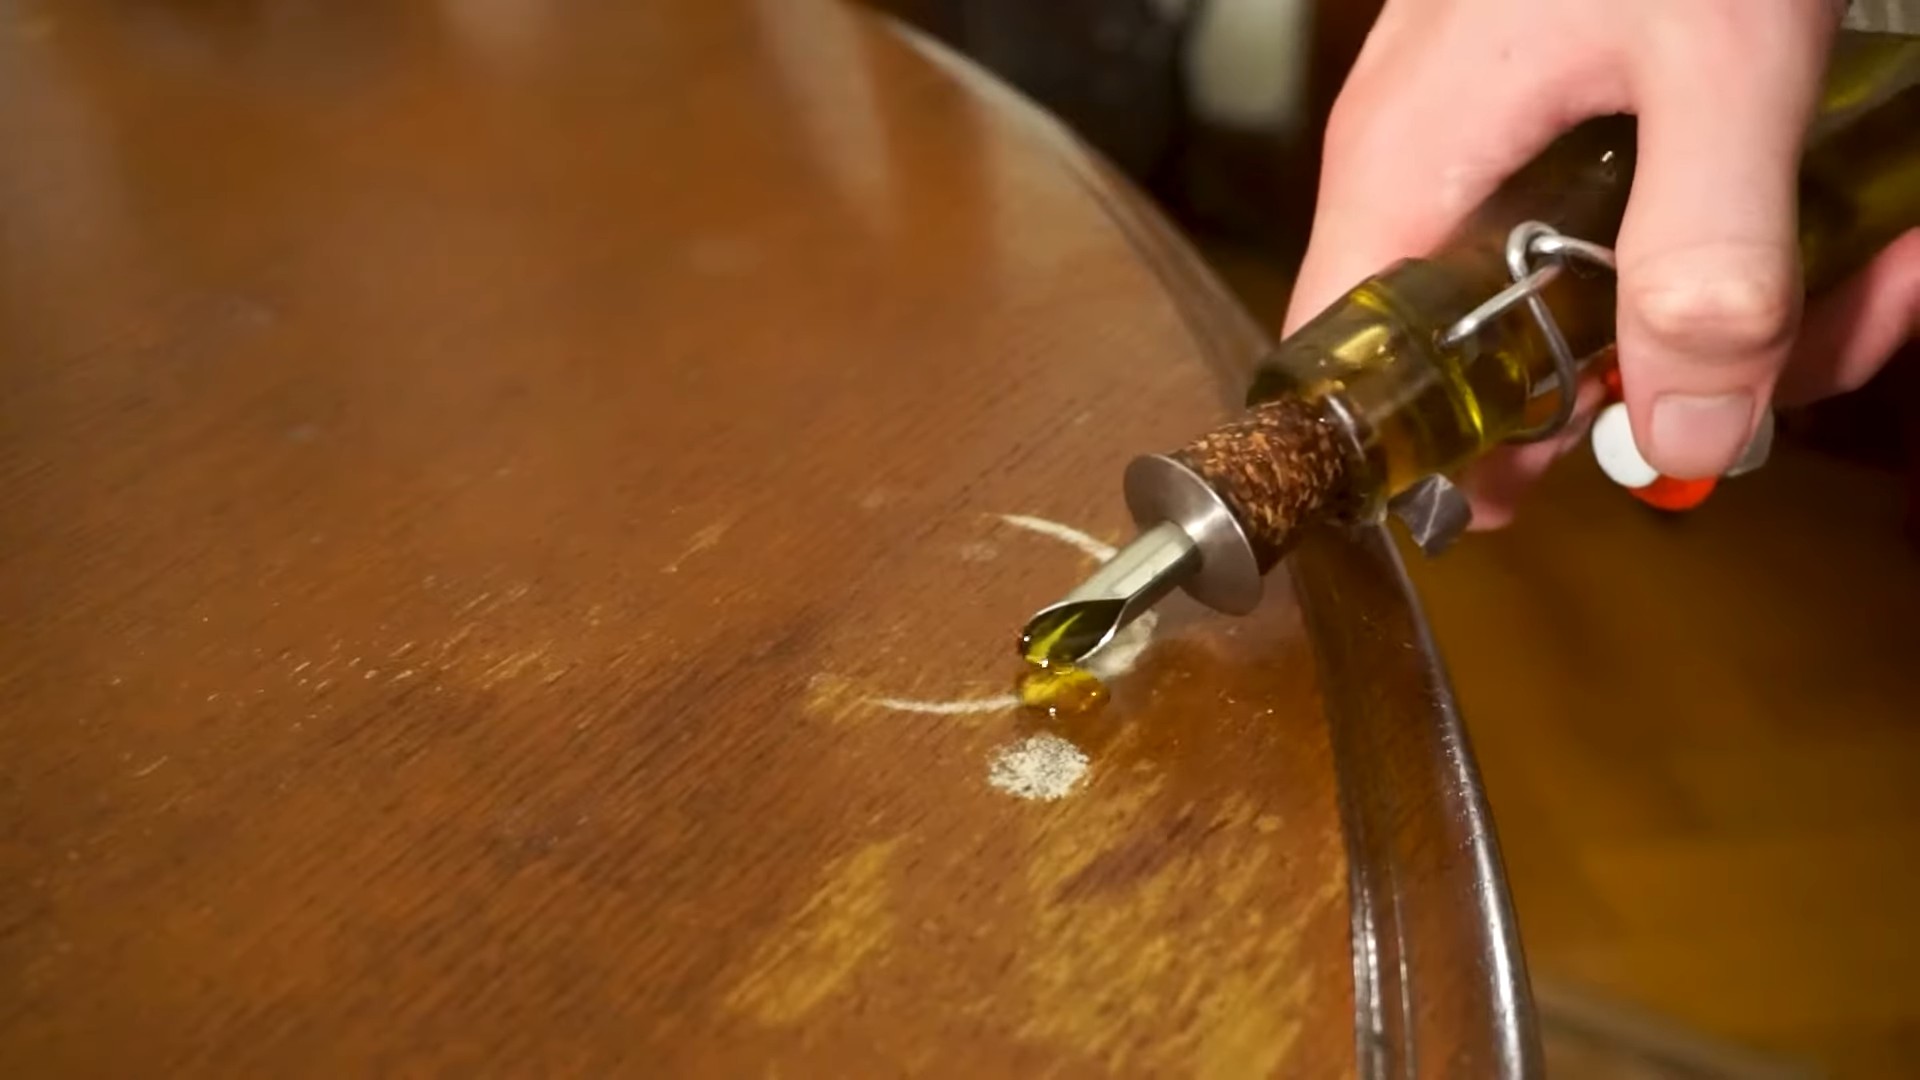
Method 5: The Olive Oil and Salt Method
This is another slightly abrasive method, but the olive oil helps to lubricate the surface and minimize the risk of scratching.
What You’ll Need:
* Olive oil
* Salt (fine table salt)
* A soft cloth
* A clean, damp cloth
Step-by-Step Instructions:
1. Make a Paste: Mix together a small amount of olive oil and salt to form a paste.
2. Apply the Paste: Apply the paste to the water ring.
3. Gentle Rubbing: Gently rub the paste onto the water ring in a circular motion. Again, be very careful not to apply too much pressure.
4. Check Progress: After a few seconds of rubbing, check the progress.
5. Wipe Away: Wipe away the paste with a clean, damp cloth.
6. Buff: Buff the area dry with a clean, soft cloth to restore the shine.
Important Note: Like the toothpaste method, this is a slightly abrasive method, so use it with caution. Test it in an inconspicuous area first.
Preventing Future Water Rings
Of course, the best way to deal with water rings is to prevent them from happening in the first place! Here are a few tips:
* Use Coasters: Always use coasters under glasses, mugs, and other containers that might leave a water ring.
* Wipe Up Spills Immediately: Don’t let spills sit on your furniture. Wipe them up as soon as they happen.
* Use Placemats: Use placemats under plates and bowls to protect your furniture from spills and heat.
* Consider a Protective Finish: If you’re really concerned about water rings, you might consider applying a protective finish to your furniture.
I hope these methods help you banish those pesky
Conclusion
So, there you have it! Removing water rings from wood furniture doesn’t have to involve expensive products or professional help. This simple, effective DIY trick, using items you likely already have in your home, offers a fantastic solution to those unsightly blemishes that can detract from the beauty of your wooden surfaces. We’ve explored a method that’s not only budget-friendly but also surprisingly gentle on your furniture’s finish.
Why is this DIY trick a must-try? Because it’s a game-changer for anyone who values the appearance of their wood furniture. Water rings can make even the most well-cared-for pieces look neglected. This method offers a quick, easy, and affordable way to restore your furniture’s luster and protect its value. It’s about reclaiming the beauty of your wood and preventing further damage.
But don’t stop there! While the iron and cloth method is incredibly effective, feel free to experiment with variations to suit your specific needs and the type of wood you’re working with. For instance, if you’re dealing with a particularly stubborn ring, you might try adding a very small amount of white vinegar to the water you dampen the cloth with. However, always test this in an inconspicuous area first to ensure it doesn’t damage the finish. Another variation involves using a hairdryer instead of an iron. This method is gentler and can be particularly useful for delicate or antique wood furniture. Just be sure to keep the hairdryer moving and avoid overheating the surface. You can also try using mayonnaise or petroleum jelly, leaving it on the ring overnight and wiping it away in the morning. These options work by drawing the moisture out of the wood.
Ultimately, the key to success is patience and a gentle approach. Avoid applying excessive heat or pressure, and always work in small increments. Remember to protect your furniture with coasters and placemats in the future to prevent new water rings from forming. Prevention is always better than cure!
We wholeheartedly encourage you to try this DIY trick for removing water rings from wood. It’s a simple yet powerful solution that can make a significant difference in the appearance of your furniture. Don’t let those rings ruin your beautiful wood any longer.
And now, we want to hear from you! Did this trick work for you? Did you try any variations? Share your experiences and tips in the comments below. Your feedback will help other readers and contribute to a community of DIY enthusiasts who are passionate about preserving the beauty of their homes. Let’s banish those water rings together! We are confident that with a little care and this simple technique, you can keep your wood furniture looking its best for years to come.
FAQ
What causes water rings on wood furniture?
Water rings are caused by moisture penetrating the finish of the wood and becoming trapped. This can happen when a cold glass or damp object is placed directly on the wood surface without a coaster or placemat. The moisture seeps into the finish, causing the wood to swell and create a visible ring. The type of finish on the wood also plays a role; some finishes are more porous than others and therefore more susceptible to water damage.
Is this DIY trick safe for all types of wood furniture?
While this DIY trick is generally safe for most types of wood furniture, it’s always best to test it in an inconspicuous area first. Different types of wood and finishes can react differently to heat and moisture. Antique furniture or pieces with delicate finishes should be treated with extra caution. If you’re unsure about the type of wood or finish, consult a professional furniture restorer before attempting any DIY repairs.
What kind of cloth should I use?
A soft, clean cotton cloth is ideal. An old t-shirt or a microfiber cloth works well. Avoid using abrasive cloths or paper towels, as they can scratch the finish of the wood. The cloth should be slightly damp, not soaking wet. Excess moisture can further damage the wood.
How hot should the iron be?
The iron should be set to a low or medium heat setting. Avoid using the steam setting, as this will add more moisture to the wood. The goal is to gently warm the wood and draw out the trapped moisture, not to scorch it. Always keep the iron moving and avoid leaving it in one spot for too long.
How long should I iron the water ring?
Iron the water ring in short bursts, checking the progress frequently. Start with 10-15 seconds and then lift the cloth to see if the ring is fading. Repeat as needed, but avoid overheating the wood. Patience is key! It may take several attempts to completely remove the ring.
What if the water ring is very old or stubborn?
For old or stubborn water rings, you may need to repeat the process several times. You can also try using a slightly damp cloth with a small amount of white vinegar. However, always test this in an inconspicuous area first to ensure it doesn’t damage the finish. Another option is to try using mayonnaise or petroleum jelly. Apply a small amount to the ring, cover it with plastic wrap, and let it sit overnight. In the morning, wipe away the mayonnaise or petroleum jelly and buff the area with a clean cloth.
Can I use a hairdryer instead of an iron?
Yes, a hairdryer can be used as a gentler alternative to an iron. Set the hairdryer to a low or medium heat setting and keep it moving over the water ring. Avoid overheating the wood. This method may take longer than using an iron, but it’s a safer option for delicate or antique furniture.
How can I prevent water rings from forming in the future?
The best way to prevent water rings is to use coasters and placemats under glasses, cups, and other items that may contain moisture. Clean up spills immediately to prevent them from soaking into the wood. You can also apply a protective finish to your wood furniture, such as a wax or sealant. Regular dusting and polishing will also help to protect the finish and prevent water damage.
What if this DIY trick doesn’t work?
If this DIY trick doesn’t work, it’s possible that the water damage is too severe or that the finish is too damaged. In this case, it’s best to consult a professional furniture restorer. They will be able to assess the damage and recommend the best course of action. Attempting more aggressive DIY repairs could potentially cause further damage to the furniture.
Where can I find more information about wood furniture care?
There are many resources available online and in libraries about wood furniture care. You can also consult with a professional furniture restorer or a woodworker for advice. Look for reputable sources that provide accurate and reliable information. Proper care and maintenance will help to keep your wood furniture looking its best for years to come.
Leave a Comment