

Spring cleaning living dining rooms can feel like a Herculean task, right? I get it! After a long winter of cozy nights in, our living and dining spaces often bear the brunt of accumulated clutter and dust. But what if I told you that tackling these rooms could be more than just a chore – it could be a refreshing ritual, a chance to breathe new life into the heart of your home?
Historically, spring cleaning has been a tradition in many cultures, often linked to religious observances like Passover or Nowruz, the Persian New Year. It’s a time to cleanse and renew, both physically and spiritually. While we might not be sweeping out the old year in a literal sense, the urge to declutter and refresh our living spaces remains deeply ingrained.
Why is spring cleaning living dining rooms so important? Well, beyond the obvious aesthetic benefits, a clean and organized space can significantly impact your mental well-being. Imagine walking into a room free of clutter, where everything has its place. It’s instantly calming and inviting, creating a more relaxing and enjoyable environment for you and your family. Plus, getting rid of dust and allergens can improve your indoor air quality, leading to better health. In this article, I’m going to share some of my favorite DIY tricks and hacks to make spring cleaning your living and dining rooms a breeze. Let’s get started and transform your spaces into havens of peace and tranquility!

Spring Cleaning Your Living and Dining Rooms: A DIY Deep Dive
Okay, friends, let’s tackle the heart of the home – the living and dining rooms! Spring cleaning these spaces can feel daunting, but I promise, with a little planning and elbow grease, we can transform them into sparkling sanctuaries. I’m going to walk you through my tried-and-true method, breaking it down into manageable steps so you don’t get overwhelmed. Let’s get started!
Phase 1: Decluttering and Prepping
Before we even think about dusting or scrubbing, we need to declutter. This is crucial because cleaning around clutter is just moving dirt from one place to another.
* Gather Your Supplies: You’ll need trash bags (for actual trash and donations), boxes or bins for items to relocate, cleaning cloths (microfiber are my favorite!), a duster, a vacuum cleaner with attachments, and your favorite cleaning solutions. I personally love using a mix of vinegar and water for many surfaces – it’s eco-friendly and effective!
* Set the Mood: Put on some upbeat music! Cleaning is much more enjoyable when you’re grooving to your favorite tunes.
* Work in Sections: Don’t try to tackle the entire room at once. Focus on one area at a time – a bookshelf, a corner, the coffee table. This makes the process less overwhelming.
Step-by-Step Instructions:
1. Clear the Surfaces: Start by removing everything from surfaces like coffee tables, side tables, shelves, and the dining table. This includes books, decorations, remotes, and anything else that doesn’t belong.
2. Sort and Purge: As you remove items, decide what to keep, donate, relocate, or trash. Be honest with yourself! If you haven’t used something in a year, it’s probably time to let it go.
* Trash: Dispose of anything broken, unusable, or unwanted.
* Donate: Gather items in good condition that you no longer need and place them in a donation box or bag.
* Relocate: Put items that belong in other rooms in a separate box or bin to be moved later.
* Keep: Set aside the items you want to keep and will return to the surfaces.
3. Dust and Wipe Down Empty Surfaces: Before putting anything back, dust and wipe down all the empty surfaces. Use a damp cloth with your cleaning solution to remove any dirt or grime.
4. Tackle the Knick-Knacks: Dust each item you’re keeping individually before placing it back on the surface. This prevents you from just moving dust around.
5. Repeat for Each Section: Continue this process for each section of the living and dining rooms until all surfaces are clear and decluttered.
Phase 2: Deep Cleaning the Living Room
Now that we’ve decluttered, it’s time for the real cleaning to begin! We’ll start with the living room, focusing on the areas that tend to accumulate the most dirt and dust.
* Focus Areas: Sofas, chairs, carpets/rugs, windows, electronics, and light fixtures.
Step-by-Step Instructions:
1. Vacuum the Upholstery: Use the upholstery attachment on your vacuum cleaner to thoroughly vacuum sofas, chairs, and any other upholstered furniture. Pay special attention to crevices and seams where dust and crumbs tend to hide.
2. Spot Clean Upholstery: If you notice any stains on your upholstery, spot clean them with a fabric cleaner. Always test the cleaner on an inconspicuous area first to ensure it doesn’t damage the fabric. I usually use a mild soap and water solution for most fabrics.
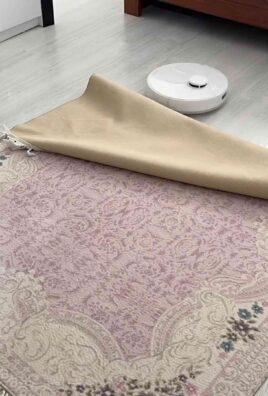
3. Clean the Carpets and Rugs: Vacuum carpets and rugs thoroughly. If you have a carpet cleaner, now is the time to use it for a deep clean. If not, you can sprinkle baking soda on the carpet, let it sit for 30 minutes, and then vacuum it up. This helps to absorb odors and freshen the carpet.
4. Dust Electronics: Use a microfiber cloth to dust your TV screen, speakers, and other electronic devices. Avoid using harsh chemicals or liquids on electronics. For screens, a slightly damp cloth is usually sufficient.
5. Clean Windows and Mirrors: Use a glass cleaner and a clean cloth to clean windows and mirrors. Wipe in a circular motion and then buff with a dry cloth to prevent streaks. I find newspaper works wonders for streak-free shine!
6. Dust Light Fixtures: Turn off the lights and let the bulbs cool down before dusting light fixtures. Use a duster or a damp cloth to remove dust and grime. Be careful not to get water inside the fixture.
7. Clean Baseboards and Trim: Wipe down baseboards and trim with a damp cloth to remove dust and dirt. You can use a mild soap and water solution for this.
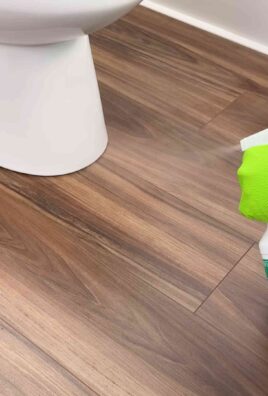
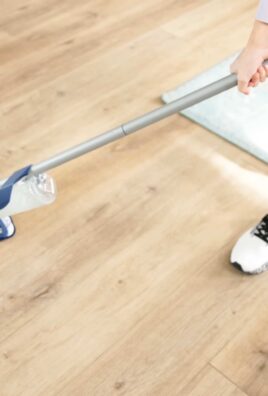
8. Vacuum or Mop the Floors: Finally, vacuum or mop the floors to remove any remaining dust and dirt.
Phase 3: Deep Cleaning the Dining Room
Next up, the dining room! We’ll focus on the dining table, chairs, and any other furniture in the space.
* Focus Areas: Dining table, chairs, sideboards, china cabinets, and any decorative items.
Step-by-Step Instructions:
1. Clean the Dining Table: Wipe down the dining table with a damp cloth and your preferred cleaning solution. If your table is made of wood, use a wood cleaner to protect the finish. For glass tables, use a glass cleaner.
2. Clean the Dining Chairs: Clean the dining chairs according to their material. For upholstered chairs, follow the same steps as for the living room upholstery. For wooden chairs, wipe them down with a damp cloth and wood cleaner.
3. Clean Sideboards and China Cabinets: Dust and wipe down sideboards and china cabinets. If you have glass doors, clean them with a glass cleaner.
4. Polish Silverware and China: If you have silverware or china that you only use occasionally, now is a good time to polish it. Use a silver polish for silverware and a mild soap and water solution for china.
5. Dust Decorative Items: Dust any decorative items in the dining room, such as vases, candles, and artwork.
6. Clean the Floors: Vacuum or mop the floors to remove any remaining dust and dirt.
Phase 4: Finishing Touches and Organization
We’re almost there! Now it’s time for the finishing touches that will really make your living and dining rooms shine.
* Focus Areas: Reorganizing kept items, adding fresh touches, and maintaining cleanliness.
Step-by-Step Instructions:
1. Return Items to Surfaces: Carefully place the items you kept back on the surfaces. Arrange them in a way that is both aesthetically pleasing and functional.
2. Organize Storage Spaces: If you have any storage spaces in the living or dining rooms, such as shelves or cabinets, take some time to organize them. Get rid of anything you don’t need and arrange the remaining items in a neat and orderly fashion.
3. Add Fresh Touches: Add some fresh touches to your living and dining rooms to brighten them up. This could include fresh flowers, a new throw pillow, or a scented candle.
4. Maintain Cleanliness: To keep your living and dining rooms looking their best, make it a habit to clean them regularly. This could include dusting once a week, vacuuming once a week, and spot cleaning as needed.
Bonus Tips for a Sparkling Home
* Air it Out: Open windows to air out the rooms and let in fresh air.
* Freshen Fabrics: Use a fabric refresher spray on sofas, chairs, and curtains.
* Clean Your Cleaning Tools: Don’t forget to clean your vacuum cleaner, mop, and cleaning cloths after you’re done.
* Delegate: If you have family members, enlist their help! Cleaning is much faster and more enjoyable when you’re working together.
* Take Breaks: Don’t try to do everything at once. Take breaks as needed to avoid burnout.
And there you have it! Your living and dining rooms are now sparkling clean and ready for spring. Remember, the key to a clean home is consistency. By incorporating these tips into your regular cleaning routine, you can keep your living and dining rooms looking their best all year round. Happy cleaning!

Conclusion
So, there you have it! Transforming your living and dining rooms into sparkling, refreshed spaces doesn’t require expensive professional services or harsh chemicals. This simple, effective DIY spring cleaning trick is a game-changer for anyone looking to revitalize their home environment. We’ve shown you how to tackle dust, grime, and lingering odors with readily available ingredients and a little elbow grease.
Why is this a must-try? Because it’s not just about cleaning; it’s about creating a healthier, happier home. Store-bought cleaners often contain volatile organic compounds (VOCs) that can irritate your respiratory system and contribute to indoor air pollution. Our DIY method utilizes natural ingredients, minimizing your exposure to harmful chemicals and promoting a cleaner, fresher atmosphere for you and your family. Plus, it’s incredibly cost-effective! You’ll be amazed at how much money you can save by ditching those pricey commercial cleaners.
But the benefits don’t stop there. This DIY spring cleaning trick is also incredibly versatile. Feel free to adapt it to your specific needs and preferences. For example, if you have stubborn stains on your upholstery, try adding a tablespoon of baking soda to your cleaning solution. For a more intense deodorizing effect, consider simmering a pot of water with lemon slices and cinnamon sticks while you clean. If you prefer a different scent, experiment with essential oils like lavender, eucalyptus, or tea tree oil. Just be sure to test any new cleaning solution on an inconspicuous area first to ensure it doesn’t damage the surface.
Don’t be afraid to get creative and personalize your cleaning routine! The key is to find what works best for you and your home.
We’re confident that once you try this DIY spring cleaning trick, you’ll be hooked. It’s a simple, effective, and eco-friendly way to achieve a sparkling clean living and dining room without breaking the bank or compromising your health.
Now, it’s your turn! We encourage you to give this DIY spring cleaning trick a try and see the amazing results for yourself. We’re eager to hear about your experiences. Did you find it easy to implement? Did you notice a significant difference in the cleanliness and freshness of your living and dining rooms? What variations did you try?
Share your thoughts, tips, and photos in the comments section below. Let’s create a community of DIY cleaning enthusiasts and inspire each other to create healthier, happier homes! We believe in the power of shared knowledge and experiences, and we can’t wait to learn from you. So, roll up your sleeves, gather your supplies, and get ready to transform your living and dining rooms with this incredible DIY spring cleaning trick!
FAQ
What exactly is the “DIY spring cleaning trick” you’re referring to?
The DIY spring cleaning trick involves using a combination of readily available household ingredients like vinegar, baking soda, lemon juice, and water to create effective and safe cleaning solutions for your living and dining rooms. It’s a natural alternative to harsh chemical cleaners, focusing on removing dust, grime, and odors while minimizing exposure to harmful VOCs. The specific recipes and methods will vary depending on the surface you’re cleaning, but the core principle remains the same: using natural ingredients for a thorough and eco-friendly clean.
Is vinegar safe to use on all surfaces?
While vinegar is a fantastic cleaning agent, it’s not suitable for all surfaces. Avoid using vinegar on natural stone surfaces like marble, granite, and limestone, as the acidity can etch and damage them. It’s also best to avoid using vinegar on waxed wood furniture, as it can strip the wax finish. Always test a small, inconspicuous area first before applying vinegar to a larger surface. For delicate surfaces, consider diluting the vinegar with more water or using alternative cleaning solutions like baking soda paste.
How do I get rid of lingering odors in my living room?
Lingering odors can be tackled in several ways. First, ensure you’ve thoroughly cleaned all surfaces, including carpets, upholstery, and curtains. Baking soda is an excellent odor absorber. Sprinkle it liberally on carpets and upholstery, let it sit for at least 30 minutes (or even overnight), and then vacuum it up. You can also place bowls of baking soda in various locations around the room to absorb odors. Simmering a pot of water with lemon slices, cinnamon sticks, or cloves can also create a pleasant and natural fragrance. Finally, ensure proper ventilation by opening windows and doors to allow fresh air to circulate.
What’s the best way to clean upholstered furniture?
Cleaning upholstered furniture requires a gentle approach. Start by vacuuming the upholstery thoroughly to remove loose dirt and debris. Then, test your chosen cleaning solution (whether it’s a DIY mixture or a commercial product) on a hidden area of the upholstery to ensure it doesn’t cause discoloration or damage. For general cleaning, you can mix a solution of mild dish soap and water. Dip a clean cloth into the solution, wring it out well, and gently blot the upholstery. Avoid saturating the fabric. For stubborn stains, consider using a specialized upholstery cleaner or consulting a professional cleaning service. Always allow the upholstery to air dry completely after cleaning.
Can I use essential oils in my DIY cleaning solutions?
Yes, essential oils can be a wonderful addition to your DIY cleaning solutions, adding a pleasant fragrance and potentially offering antibacterial or antifungal properties. Popular choices for cleaning include lavender, tea tree, eucalyptus, lemon, and peppermint. However, it’s important to use essential oils safely and responsibly. Always dilute essential oils with water or a carrier oil (like vinegar or baking soda) before applying them to surfaces. Avoid using essential oils on surfaces that may be sensitive to them, such as polished wood or plastic. Also, be mindful of potential allergies or sensitivities to certain essential oils. If you’re unsure, test a small, inconspicuous area first.
How often should I perform this spring cleaning routine?
The frequency of your spring cleaning routine depends on your lifestyle and the amount of traffic your living and dining rooms receive. A thorough spring cleaning once or twice a year is generally recommended. However, you may need to clean more frequently if you have pets, children, or if you entertain guests often. Regular maintenance cleaning, such as dusting, vacuuming, and spot cleaning, should be performed weekly to keep your living and dining rooms looking their best.
What if I don’t have all the ingredients listed in the recipe?
Don’t worry if you’re missing some ingredients. The beauty of DIY cleaning is that you can often substitute ingredients based on what you have available. For example, if you don’t have lemon juice, you can use more vinegar. If you don’t have baking soda, you can use borax (though be cautious when using borax around children and pets). The key is to experiment and find what works best for you. Remember to always test any new cleaning solution on a small, inconspicuous area first.
How can I make this cleaning routine more eco-friendly?
There are several ways to make your cleaning routine even more eco-friendly. Use reusable cleaning cloths instead of paper towels. Invest in a refillable spray bottle to reduce plastic waste. Compost food scraps instead of throwing them away. Choose cleaning products that are biodegradable and free of harsh chemicals. Consider using a steam cleaner for certain surfaces, as it uses only water and no cleaning solutions. By making small changes to your cleaning habits, you can significantly reduce your environmental impact.
Leave a Comment