

Toothpaste Cleaning Hack: Who knew that the secret to a sparkling clean home could be hiding in your bathroom cabinet? I’m always on the lookout for clever, cost-effective ways to tackle household chores, and let me tell you, this one is a game-changer! Forget expensive, chemical-laden cleaners – we’re diving into the surprisingly versatile world of toothpaste!
While toothpaste has been around in various forms for centuries, its primary purpose has always been oral hygiene. But did you know that its mild abrasive properties and cleaning agents make it a fantastic multi-purpose cleaner? Think of it as a gentle scrub with a refreshing minty scent! For generations, resourceful individuals have whispered about using toothpaste for cleaning, and now I’m here to share these amazing secrets with you.
In today’s world, we’re all looking for ways to save money and reduce our environmental impact. That’s where this toothpaste cleaning hack comes in. It’s a simple, effective, and often overlooked solution for tackling everything from stubborn stains to tarnished silver. I’m going to show you how to use this everyday item to achieve a spotless home without breaking the bank or relying on harsh chemicals. Get ready to be amazed by the cleaning power of toothpaste!

DIY Toothpaste Cleaning Power: Beyond Brushing Your Teeth!
Hey there, fellow DIY enthusiasts! I’m about to let you in on a little secret weapon I’ve been using for ages: toothpaste! Yes, that minty fresh stuff you use to keep your pearly whites sparkling can do so much more than just clean your teeth. It’s a surprisingly effective and affordable cleaning agent for a whole host of household items. Get ready to be amazed!
Why Toothpaste Works as a Cleaner
Before we dive into the how-to, let’s quickly understand why toothpaste is such a versatile cleaner. It’s all about the ingredients! Most toothpastes contain:
* Mild Abrasives: These gently scrub away stains and grime without being overly harsh. Think of it as a super-fine sandpaper for your household items.
* Detergents: These help to lift dirt and grease, making it easier to wipe away.
* Fluoride: While primarily for dental health, fluoride can also help to brighten and polish certain surfaces.
* Hydrating Agents: These prevent the toothpaste from drying out too quickly, giving you time to work with it.
Important Note: Always use *white* toothpaste for cleaning. Gel toothpastes and those with colored stripes can sometimes stain surfaces. Also, always test in an inconspicuous area first to ensure it doesn’t damage the material.
Cleaning Silverware and Jewelry
Tarnished silverware and jewelry can look dull and lifeless. But don’t worry, toothpaste can bring back their shine!
What you’ll need:
* White toothpaste (non-gel)
* Soft cloth or toothbrush
* Warm water
* Clean, dry cloth
Step-by-Step Instructions:
1. Apply a small amount of toothpaste: Squeeze a pea-sized amount of toothpaste onto a soft cloth or toothbrush.
2. Gently rub the item: Gently rub the toothpaste onto the tarnished silverware or jewelry, focusing on the areas with the most tarnish. Use small, circular motions. For intricate designs, a soft toothbrush can help you reach those hard-to-clean spots.
3. Rinse thoroughly: Rinse the item thoroughly with warm water to remove all traces of toothpaste.
4. Dry and polish: Use a clean, dry cloth to dry the item completely and polish it to a brilliant shine.
Pro Tip: For heavily tarnished items, you may need to repeat the process a few times.
Removing Scuff Marks from Shoes
Those pesky scuff marks on your shoes can be a real eyesore. Toothpaste to the rescue! This works particularly well on white-soled sneakers and leather shoes.
What you’ll need:
* White toothpaste (non-gel)
* Soft cloth or toothbrush
* Warm water
* Clean, dry cloth
Step-by-Step Instructions:
1. Apply toothpaste to the scuff mark: Apply a small amount of toothpaste directly onto the scuff mark.
2. Rub gently: Use a soft cloth or toothbrush to gently rub the toothpaste into the scuff mark. Use circular motions.
3. Wipe away the toothpaste: Wipe away the toothpaste with a damp cloth.
4. Dry the area: Dry the area with a clean, dry cloth.
Pro Tip: For stubborn scuff marks, let the toothpaste sit on the mark for a few minutes before rubbing.
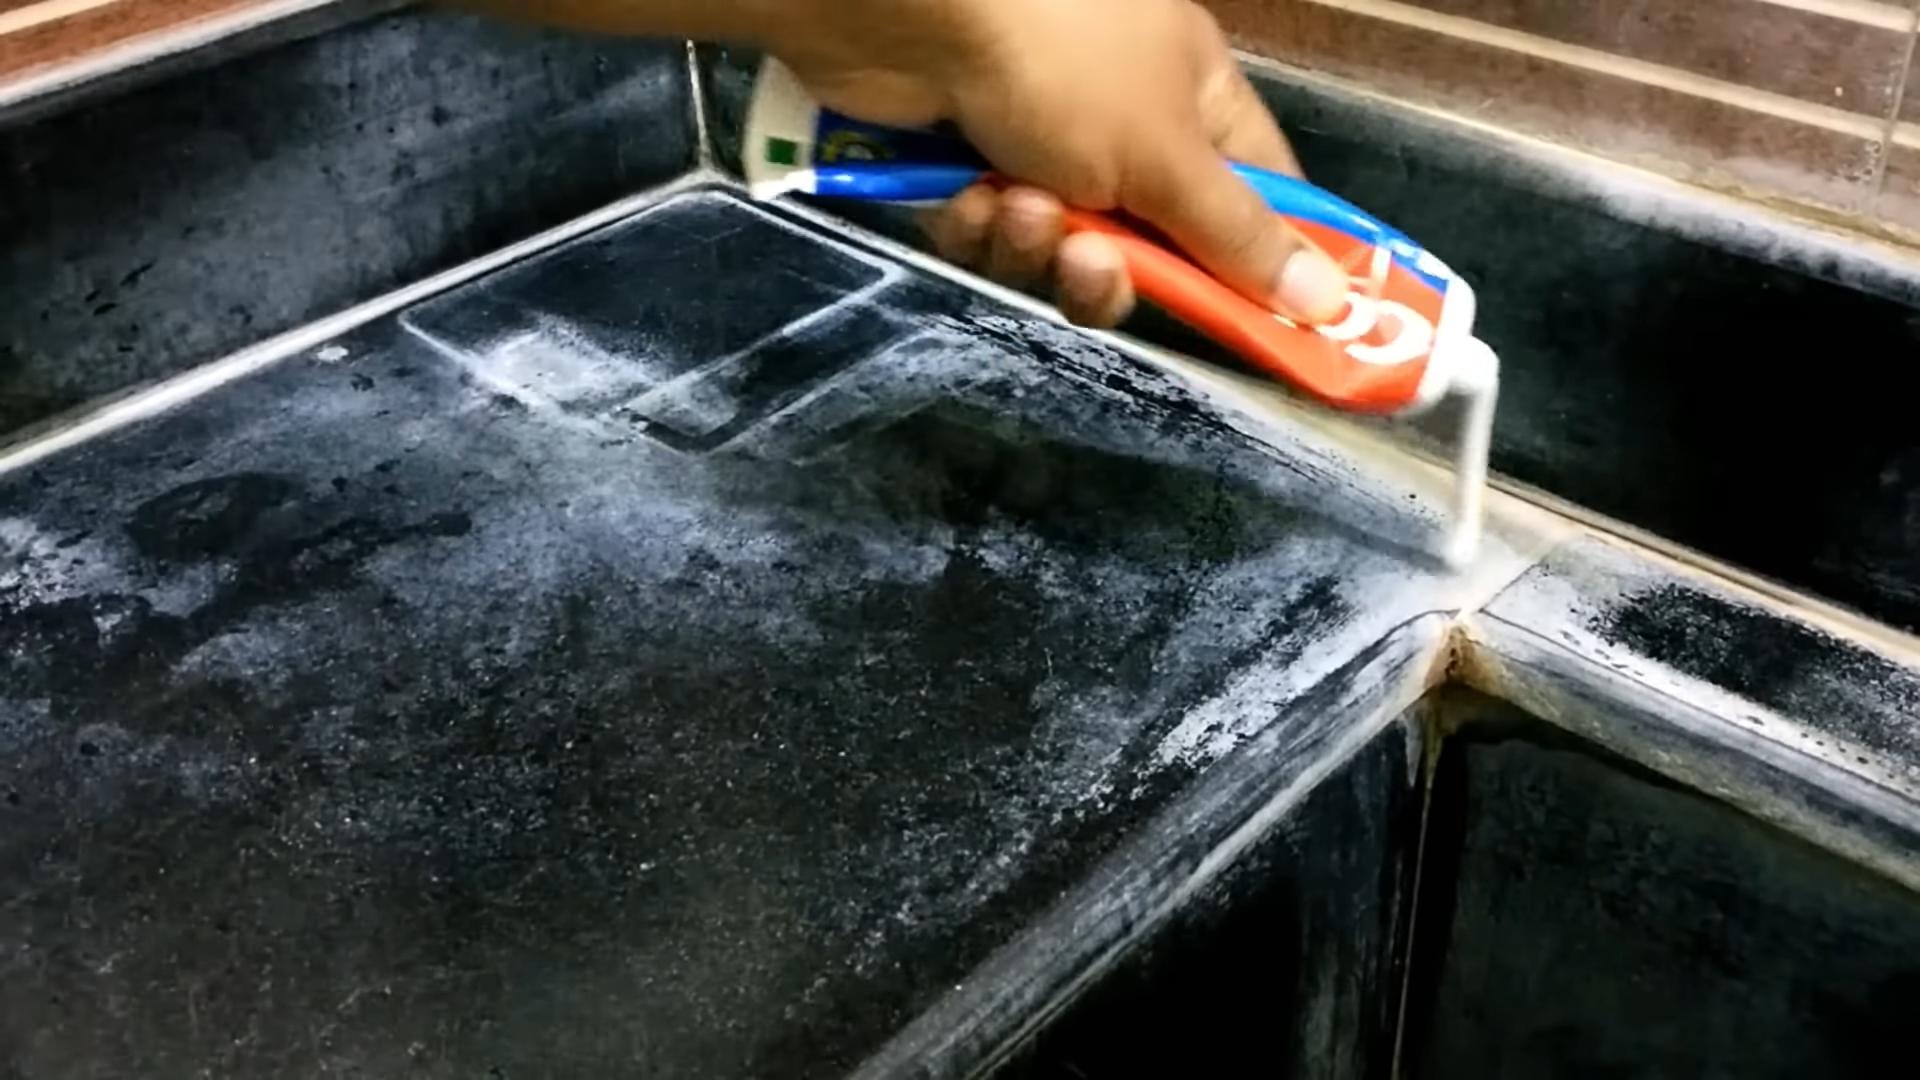
Cleaning Bathroom Fixtures
Toothpaste can work wonders on bathroom fixtures like faucets, showerheads, and sinks, removing water spots and soap scum.
What you’ll need:
* White toothpaste (non-gel)
* Soft cloth or sponge
* Warm water
* Clean, dry cloth
Step-by-Step Instructions:
1. Apply toothpaste to the fixture: Apply a small amount of toothpaste to the fixture.
2. Rub gently: Use a soft cloth or sponge to gently rub the toothpaste onto the fixture.
3. Rinse thoroughly: Rinse the fixture thoroughly with warm water.
4. Dry and polish: Use a clean, dry cloth to dry the fixture and polish it to a shine.
Pro Tip: For hard water stains, you can let the toothpaste sit on the fixture for a few minutes before rinsing.
Removing Ink Stains
Accidentally got ink on your clothes or furniture? Don’t panic! Toothpaste can sometimes help to lift the stain.
What you’ll need:
* White toothpaste (non-gel)
* Soft cloth
* Warm water
Step-by-Step Instructions:
1. Apply toothpaste to the stain: Apply a generous amount of toothpaste directly onto the ink stain.
2. Let it sit: Let the toothpaste sit on the stain for at least 10-15 minutes.
3. Gently rub: Gently rub the toothpaste into the stain with a soft cloth.
4. Rinse thoroughly: Rinse the area thoroughly with warm water.
5. Launder as usual: If the stain is on clothing, launder the item as usual.
Important Note: This method works best on fresh ink stains. Older stains may be more difficult to remove. Also, test in an inconspicuous area first, especially on delicate fabrics.
Defogging Bathroom Mirrors
Tired of foggy bathroom mirrors after a hot shower? Toothpaste can help with that too!
What you’ll need:
* White toothpaste (non-gel)
* Soft cloth
* Warm water
Step-by-Step Instructions:
1. Apply a thin layer of toothpaste: Apply a very thin layer of toothpaste to the entire surface of the mirror.
2. Wipe it off: Wipe off the toothpaste with a damp cloth.
3. Dry the mirror: Dry the mirror with a clean, dry cloth.
Pro Tip: This will create a protective layer that prevents the mirror from fogging up. You’ll need to reapply it every few weeks.
Cleaning Your Iron
Over time, your iron can develop a build-up of residue that can transfer to your clothes. Toothpaste can help to clean the soleplate and keep your iron working smoothly.
What you’ll need:
* White toothpaste (non-gel)
* Soft cloth
* Warm water
Step-by-Step Instructions:
1. Make sure the iron is cool and unplugged: This is crucial for safety!
2. Apply toothpaste to the soleplate: Apply a small amount of toothpaste to the soleplate of the iron.
3. Rub gently: Use a soft cloth to gently rub the toothpaste onto the soleplate, focusing on areas with residue.
4. Wipe away the toothpaste: Wipe away the toothpaste with a damp cloth.
5. Dry the soleplate: Dry the soleplate with a clean, dry cloth.
Pro Tip: For stubborn residue, you can use a cotton swab to clean around the steam vents.
Removing Crayon Marks from Walls
If you have kids, you know the struggle of crayon marks on walls. Toothpaste can be a surprisingly effective way to remove them.
What you’ll need:
* White toothpaste (non-gel)
* Soft cloth
* Warm water
Step-by-Step Instructions:
1. Apply toothpaste to the crayon mark: Apply a small amount of toothpaste directly onto the crayon mark.
2. Rub gently: Use a soft cloth to gently rub the toothpaste into the crayon mark.
3. Wipe away the toothpaste: Wipe away the toothpaste with a damp cloth.
4. Dry the area: Dry the area with a clean, dry cloth.
Important Note: Test in an inconspicuous area first to ensure the toothpaste doesn’t damage the paint.
Brightening Headlights
Cloudy headlights can reduce visibility and make your car look older. Toothpaste can help to brighten them up.
What you’ll need:
* White toothpaste (non-gel)
* Soft cloth or sponge
* Water
* Masking tape
Step-by-Step Instructions:
1. Tape off the surrounding area: Use masking tape to protect the paint around the headlights.
2. Apply toothpaste to the headlight: Apply a generous amount of toothpaste to the headlight.
3. Rub vigorously: Use a soft cloth or sponge to rub the toothpaste into the headlight in circular motions. Apply some elbow grease!
4. Rinse thoroughly: Rinse the headlight thoroughly with water.
5. Dry and remove tape: Dry the headlight with a clean cloth and remove the masking tape.
Pro Tip: You may need to repeat this process a few times for heavily clouded headlights.
Cleaning Your Cell Phone Screen
Our cell
Conclusion
So, there you have it! This simple, yet incredibly effective, toothpaste cleaning hack is a game-changer for anyone looking to tackle stubborn stains and restore shine to various surfaces around the house. We’ve explored how this everyday item, readily available in most bathrooms, can be transformed into a powerful cleaning agent, saving you money and reducing your reliance on harsh chemicals.
Why is this a must-try? Because it’s accessible, affordable, and surprisingly versatile. Forget spending a fortune on specialized cleaning products that promise the world but often fall short. Toothpaste, with its mild abrasives and cleaning agents, offers a gentle yet effective solution for everything from removing scuff marks on shoes to polishing silverware and even tackling those pesky water stains on your bathroom fixtures.
But the beauty of this DIY trick lies not only in its effectiveness but also in its adaptability. Feel free to experiment with different types of toothpaste to find what works best for your specific needs. For instance, a whitening toothpaste might be particularly effective for brightening dull surfaces, while a gel toothpaste could be gentler on delicate materials. You can also enhance the cleaning power by adding a small amount of baking soda to your toothpaste mixture for extra scrubbing action. Remember to always test a small, inconspicuous area first to ensure the toothpaste doesn’t damage the surface.
Consider these variations:
* For chrome fixtures: Apply a thin layer of toothpaste, let it sit for a few minutes, and then buff with a soft cloth for a sparkling shine.
* For removing crayon marks from walls: Gently rub toothpaste onto the crayon marks, let it sit for a minute or two, and then wipe clean with a damp cloth.
* For cleaning sneakers: Use an old toothbrush to scrub toothpaste onto the rubber soles and sides of your sneakers to remove dirt and grime.
* For polishing jewelry: Apply a small amount of toothpaste to a soft cloth and gently rub your jewelry to restore its shine. Rinse thoroughly with water and dry with a clean cloth.
We are confident that once you try this toothpaste cleaning hack, you’ll be amazed by the results. It’s a simple, cost-effective, and environmentally friendly way to keep your home looking its best.
Now, it’s your turn! We encourage you to give this DIY cleaning trick a try and see the magic for yourself. Don’t be afraid to experiment and find what works best for you. And most importantly, we want to hear about your experience! Share your before-and-after photos, your tips and tricks, and any variations you’ve discovered in the comments section below. Let’s build a community of cleaning enthusiasts who are passionate about finding simple, effective, and affordable solutions for a sparkling clean home. Your feedback will not only help other readers but also inspire us to continue sharing valuable DIY tips and tricks. So, grab your toothpaste, get cleaning, and let us know how it goes!
Frequently Asked Questions (FAQ)
Is this toothpaste cleaning hack safe for all surfaces?
While toothpaste is generally safe for many surfaces, it’s crucial to exercise caution and test it on an inconspicuous area first. The abrasiveness of toothpaste can vary depending on the brand and type, so it’s always best to err on the side of caution. Avoid using toothpaste on delicate or easily scratched surfaces such as painted walls, certain types of plastic, or antique furniture. For these surfaces, consider using a gentler cleaning solution. If you are unsure about a particular surface, consult the manufacturer’s instructions or a professional cleaner.
What type of toothpaste works best for cleaning?
The best type of toothpaste for cleaning depends on the specific task at hand. For general cleaning purposes, a standard white toothpaste with mild abrasives is usually sufficient. Whitening toothpaste can be effective for brightening dull surfaces, but it may be slightly more abrasive, so use it with caution. Gel toothpaste is generally less abrasive and may be a better option for delicate surfaces. Avoid using toothpaste with added ingredients like charcoal or fluoride in high concentrations, as these may cause staining or damage to certain materials. Experiment with different types of toothpaste to find what works best for your needs, but always test on a small, hidden area first.
Can I use toothpaste to clean my teeth?
Yes, toothpaste is primarily designed for cleaning teeth! The toothpaste cleaning hack discussed here refers to its use as a cleaning agent for various household surfaces, not as a replacement for regular oral hygiene practices. Always use toothpaste as directed by your dentist for brushing your teeth.
How do I remove toothpaste residue after cleaning?
Removing toothpaste residue is usually quite simple. After applying and scrubbing with toothpaste, use a clean, damp cloth to wipe away any remaining residue. You may need to rinse the area with water to ensure all the toothpaste is removed. For stubborn residue, try using a mild soap solution or a vinegar and water mixture. Dry the surface thoroughly with a clean cloth to prevent water spots.
Will toothpaste damage my stainless steel appliances?
Toothpaste can be used to clean stainless steel appliances, but it’s important to use it sparingly and with caution. The abrasives in toothpaste can potentially scratch the surface of stainless steel if used too aggressively. Apply a small amount of toothpaste to a soft cloth and gently rub the appliance in the direction of the grain. Rinse thoroughly with water and dry with a clean cloth. Avoid using toothpaste on brushed stainless steel, as it may alter the finish. Always test on an inconspicuous area first to ensure it doesn’t cause any damage.
Is this toothpaste cleaning hack environmentally friendly?
Compared to many commercial cleaning products, using toothpaste as a cleaning agent can be considered a more environmentally friendly option. Toothpaste typically contains fewer harsh chemicals than specialized cleaning solutions, and it’s readily biodegradable. However, it’s still important to be mindful of the ingredients in your toothpaste and choose brands that are environmentally conscious. Consider using toothpaste with natural ingredients and avoiding those with excessive packaging. Additionally, using toothpaste sparingly and disposing of it properly can further minimize its environmental impact.
How often can I use this toothpaste cleaning hack?
The frequency with which you can use this toothpaste cleaning hack depends on the surface you’re cleaning and the severity of the stains. For surfaces that are prone to staining or require frequent cleaning, such as bathroom fixtures or kitchen countertops, you can use toothpaste as needed. However, for more delicate surfaces or those that are easily scratched, it’s best to limit the use of toothpaste to occasional cleaning. Always assess the condition of the surface and use toothpaste sparingly to avoid any potential damage.
Can I use toothpaste to remove scratches from my phone screen?
While some sources suggest that toothpaste can be used to remove minor scratches from phone screens, it’s generally not recommended. The abrasives in toothpaste can potentially damage the screen’s coating or create more scratches. There are specialized products designed specifically for removing scratches from phone screens that are safer and more effective. If you’re considering using toothpaste on your phone screen, proceed with extreme caution and test it on a small, inconspicuous area first. Alternatively, consider consulting a professional phone repair service for assistance.


Leave a Comment