

Wall Mounted Veggie Garden: Imagine stepping outside your door and harvesting fresh, flavorful vegetables just inches from your kitchen! Sounds like a dream, right? Well, it doesn’t have to be! I’m here to show you how to create your very own thriving vertical garden, even if you have limited space. Forget sprawling plots and back-breaking labor; we’re going vertical!
The concept of vertical gardening isn’t new. In fact, it dates back to ancient civilizations, with the Hanging Gardens of Babylon being one of the most iconic examples. While we might not be building wonders of the world, we are bringing that same ingenuity and resourcefulness to our modern lives. For centuries, cultures around the globe have utilized vertical spaces to cultivate food and flowers, maximizing yields in urban environments and adding a touch of green to otherwise barren landscapes.
In today’s world, where space is often a luxury, a wall mounted veggie garden offers a fantastic solution for anyone craving fresh produce without sacrificing precious square footage. Whether you live in a small apartment with a balcony or simply want to add a unique and visually appealing element to your patio, this DIY project is for you. Plus, it’s a fantastic way to reduce your carbon footprint, save money on groceries, and enjoy the satisfaction of growing your own food. So, let’s dive in and transform that blank wall into a vibrant, edible masterpiece!
DIY Wall-Mounted Veggie Garden: Bring the Green Indoors (or Out!)
Okay, let’s get our hands dirty! I’m so excited to share this project with you – a wall-mounted veggie garden. It’s perfect for small spaces, adds a touch of greenery to any room (or patio!), and lets you grow your own fresh herbs and veggies right at your fingertips. Plus, it’s a really fun and rewarding DIY project.
Materials You’ll Need:
Before we dive in, let’s gather everything we need. This will make the whole process smoother and less frustrating. Trust me, I’ve learned this the hard way!
* Wooden Pallet: Look for a clean, sturdy pallet. Avoid pallets that have been treated with chemicals (look for the “HT” stamp, which means heat-treated). You can often find these for free at local businesses, construction sites, or online marketplaces.
* Heavy-Duty Landscape Fabric: This will line the pallet and create pockets for the soil.
* Staple Gun and Staples: Essential for securing the landscape fabric to the pallet. A heavy-duty staple gun is recommended for a secure hold.
* Gloves: Protect your hands from splinters and dirt.
* Scissors or Utility Knife: For cutting the landscape fabric.
* Measuring Tape: To ensure accurate cuts and spacing.
* Potting Soil: Choose a high-quality potting mix specifically designed for vegetables and herbs.
* Vegetable or Herb Seedlings: Select your favorite herbs and veggies! Consider things like sunlight exposure and space requirements when choosing your plants. I personally love growing basil, mint, lettuce, and strawberries.
* Sandpaper (Optional): If your pallet is rough, a little sanding can make it smoother and safer.
* Wood Stain or Paint (Optional): To customize the look of your pallet garden.
* Wall Mounting Hardware: Depending on the weight of your filled pallet and the type of wall you’re mounting it on, you’ll need appropriate screws, anchors, and possibly a French cleat system.
* Drill: For pre-drilling holes for the mounting hardware.
* Level: To ensure your garden is straight when mounted.
* Safety Glasses: Protect your eyes from flying debris, especially when sanding or stapling.
Step-by-Step Instructions:
Alright, let’s get started! Follow these steps carefully, and you’ll have your own wall-mounted veggie garden in no time.
1. Prepare the Pallet:
* Inspect the Pallet: Carefully examine the pallet for any loose nails, splinters, or damage. Remove any loose nails and sand down any rough spots with sandpaper.
* Clean the Pallet: Thoroughly clean the pallet with soap and water to remove any dirt or debris. Let it dry completely before moving on.
* (Optional) Stain or Paint the Pallet: If you want to customize the look of your garden, now’s the time to stain or paint the pallet. Choose a weather-resistant stain or paint if you plan to keep your garden outdoors. Let it dry completely before proceeding. I personally love a natural wood look, but a pop of color can be really fun too!
2. Create the Planting Pockets:
* Measure and Cut the Landscape Fabric: Measure the width and depth of each section of the pallet where you want to create a planting pocket. Add a few extra inches to each measurement to allow for overlap and secure stapling. Cut the landscape fabric accordingly. You’ll need enough fabric to create a pocket in each section.
* Staple the Fabric to the Pallet: Starting at the bottom of one section, fold the landscape fabric over the bottom slat and staple it securely to the inside of the pallet. Make sure the staples are close together to prevent the fabric from tearing.
* Create the Pocket: Fold the fabric up to create a pocket, ensuring it’s deep enough to hold a good amount of soil. Staple the sides of the fabric to the pallet, creating a secure and sturdy pocket. Repeat this process for each section of the pallet where you want to plant. I like to double-check that the pockets are strong enough to hold the weight of the soil before moving on.
* Reinforce the Pockets (Optional): For extra durability, you can add an extra layer of landscape fabric to the bottom of each pocket. This will help prevent the fabric from tearing under the weight of the soil and plants.
3. Prepare for Planting:
* Add Drainage Holes: Before adding soil, poke a few small drainage holes in the bottom of each landscape fabric pocket. This will allow excess water to drain out and prevent the soil from becoming waterlogged.
* Add Potting Soil: Fill each pocket with high-quality potting soil, leaving about an inch of space at the top. Gently pat down the soil to remove any air pockets.
4. Plant Your Veggies and Herbs:
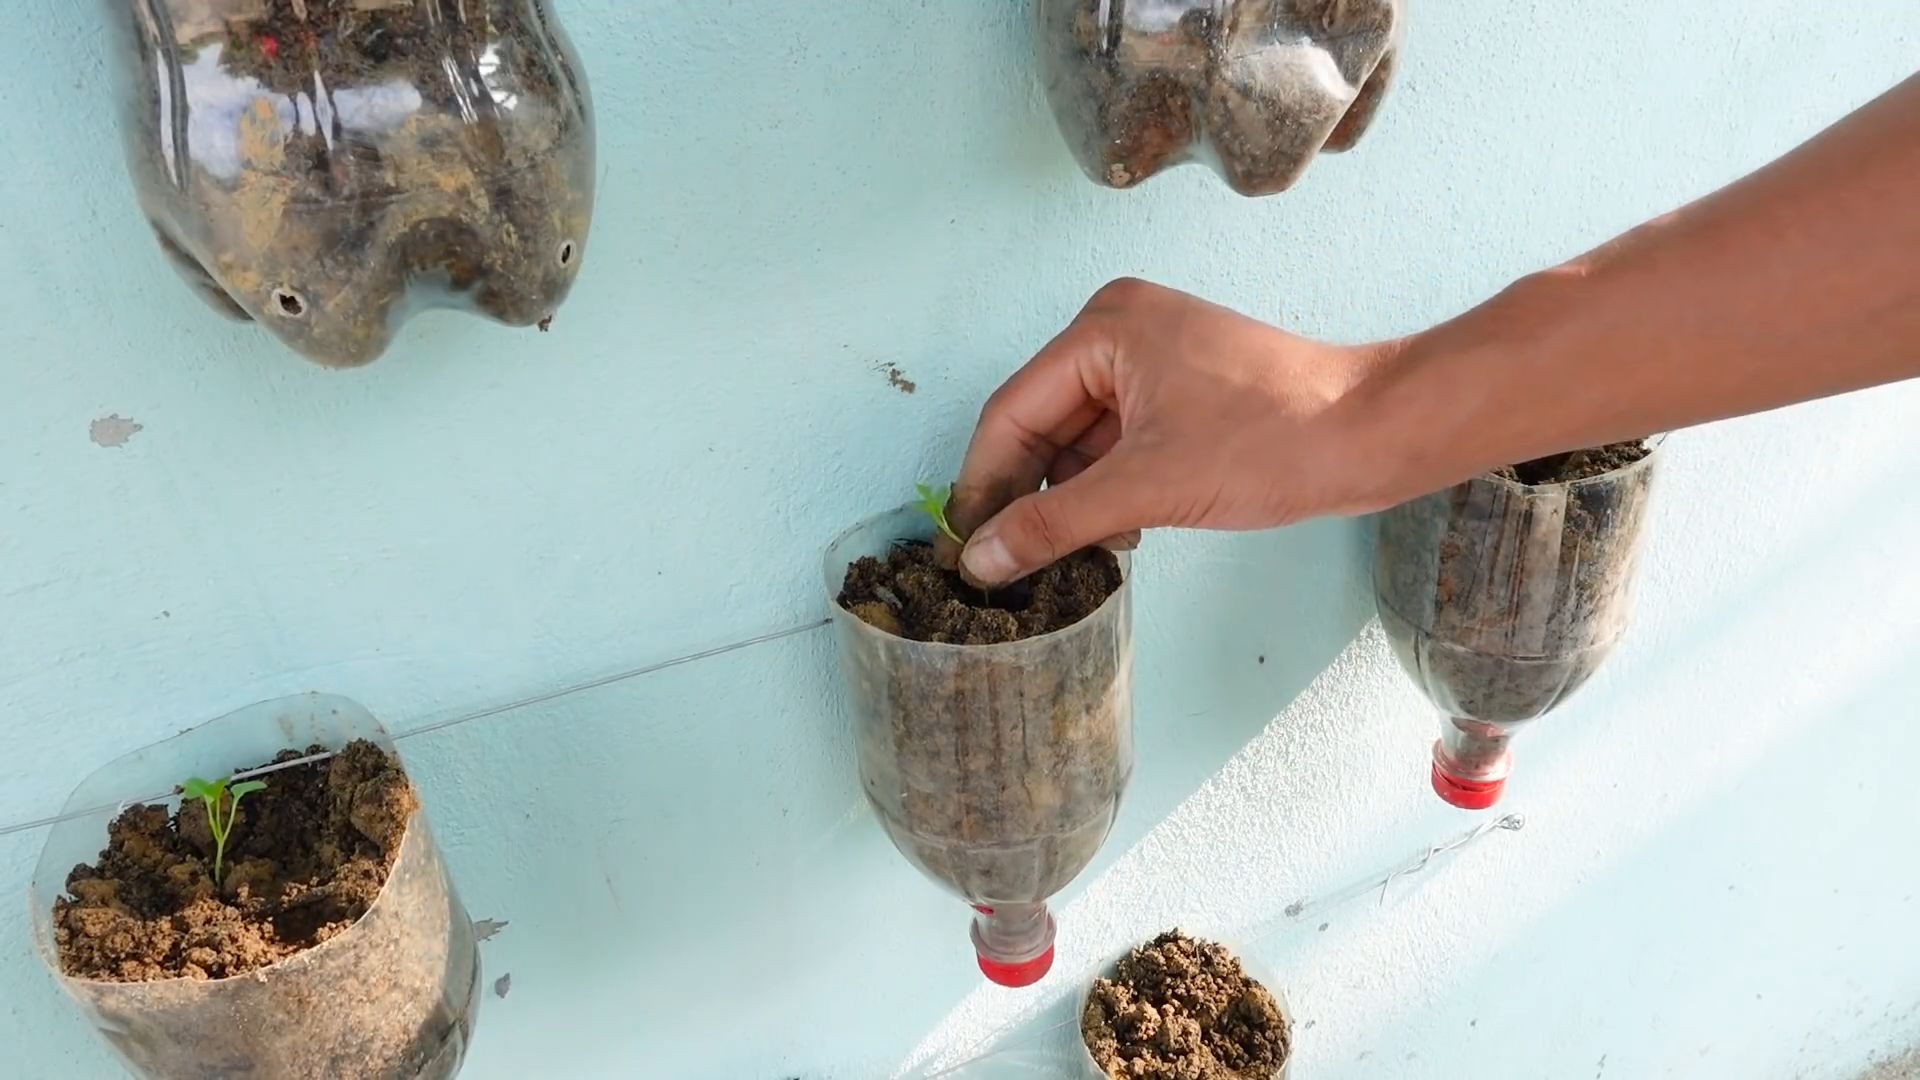
* Carefully Remove Seedlings from Their Containers: Gently squeeze the sides of the container to loosen the soil and carefully remove the seedlings.
* Plant the Seedlings: Dig a small hole in the soil in each pocket and plant the seedlings, making sure the roots are covered with soil. Space the plants according to their mature size.
* Water Thoroughly: Water the plants thoroughly after planting, making sure the soil is evenly moist.
5. Mount the Pallet Garden:
* Choose a Location: Select a location that receives adequate sunlight for your chosen plants. Consider the weight of the filled pallet and choose a wall that can support it.
* Determine Mounting Method: There are several ways to mount your pallet garden. A French cleat system is a popular option, as it allows you to easily remove the garden for maintenance. You can also use heavy-duty screws and anchors.
* Install Mounting Hardware: Follow the instructions for your chosen mounting hardware to install it securely on the wall. Make sure to use a level to ensure the hardware is straight.
* Mount the Pallet Garden: Carefully lift the filled pallet garden and attach it to the mounting hardware on the wall. Double-check that it’s securely mounted before letting go.
6. Care and Maintenance:
* Water Regularly: Water your plants regularly, especially during hot weather. Check the soil moisture by sticking your finger into the soil. If it feels dry, it’s time to water.
* Fertilize as Needed: Fertilize your plants every few weeks with a balanced liquid fertilizer.
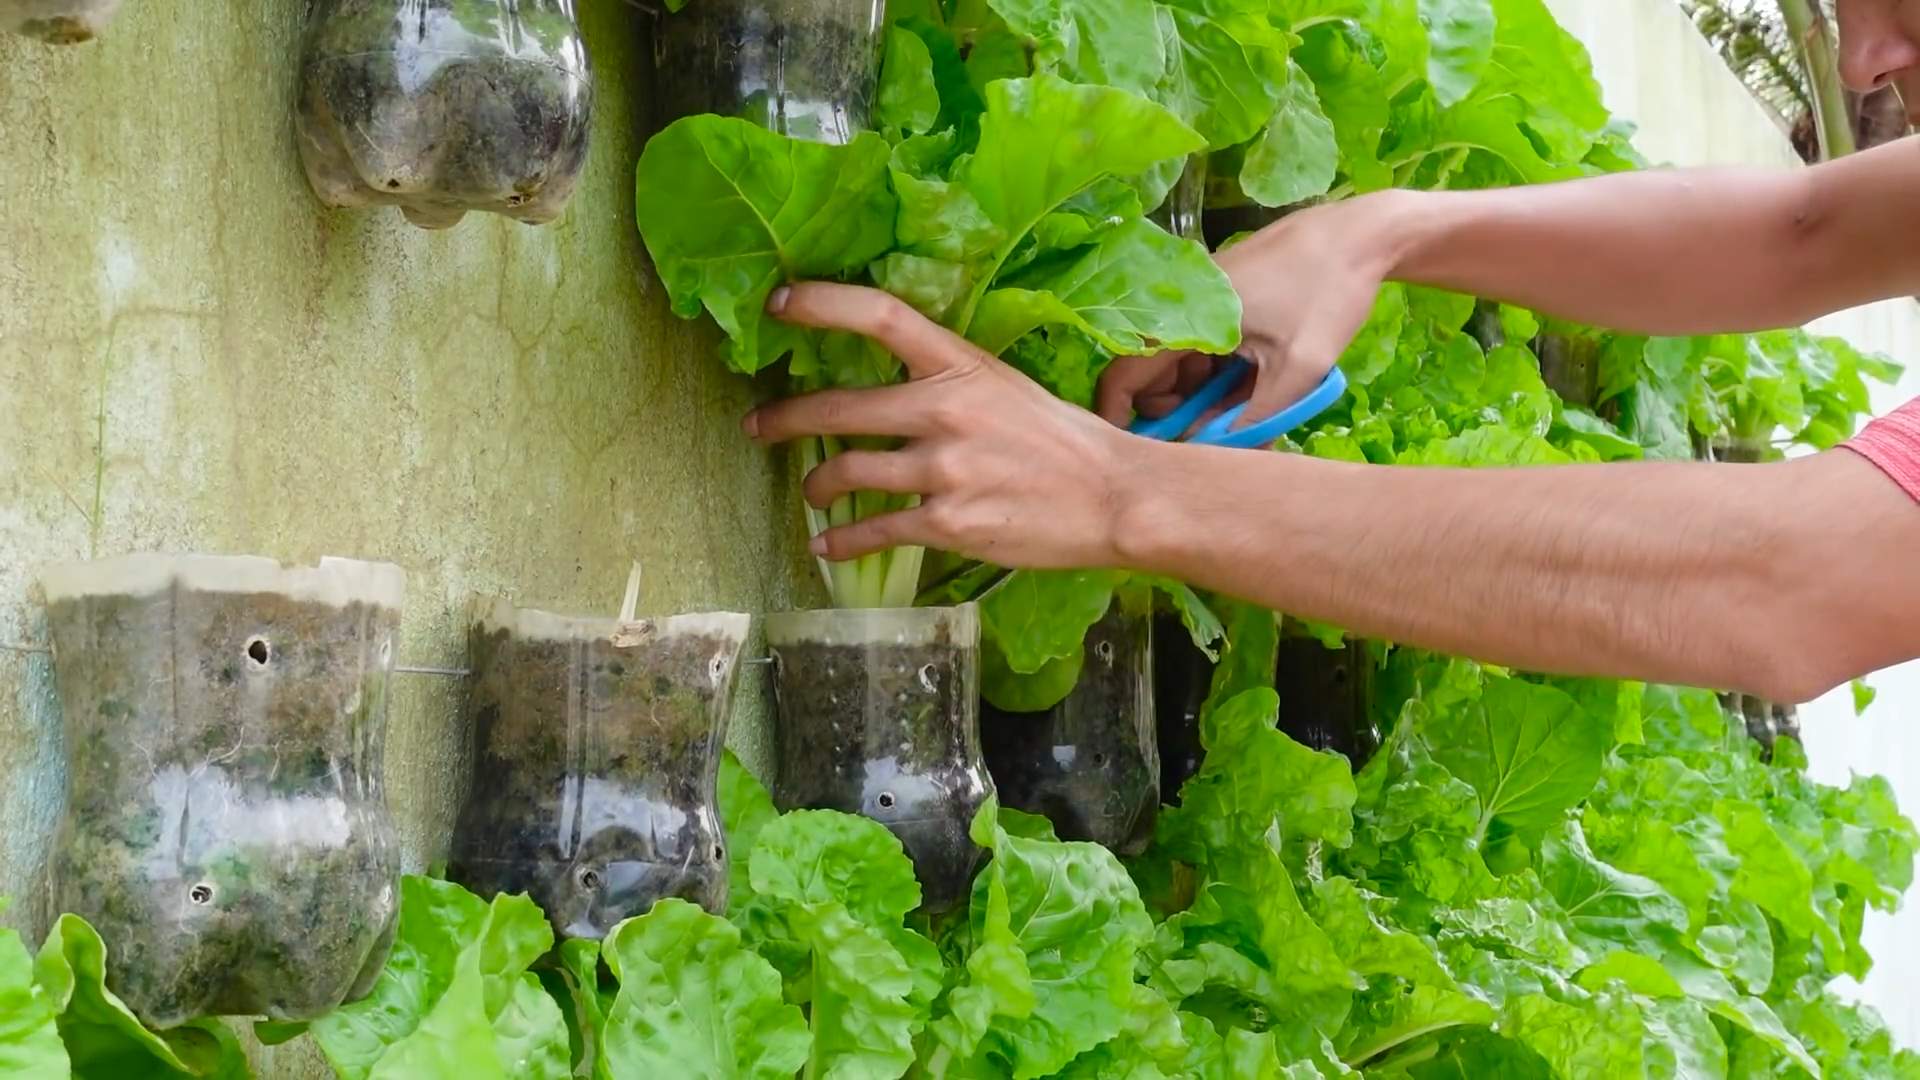
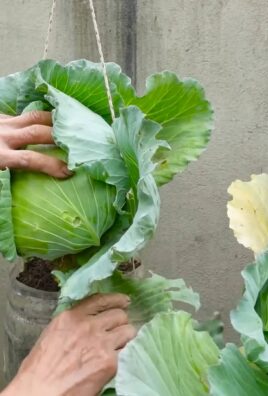
* Prune and Harvest: Prune your plants regularly to encourage growth and harvest your veggies and herbs as they ripen.
* Monitor for Pests and Diseases: Keep an eye out for pests and diseases and take action promptly if you notice any problems.
Choosing the Right Plants:
This is where the fun really begins! Selecting the right plants for your wall-mounted garden is crucial for success. Here are a few things to consider:
* Sunlight: How much sunlight does your chosen location receive? Choose plants that thrive in the amount of sunlight available. Leafy greens like lettuce and spinach can tolerate partial shade, while herbs like basil and rosemary need at least six hours of sunlight per day.
* Space: Consider the mature size of the plants you choose. Avoid planting large, sprawling plants in small pockets. Compact herbs like thyme and oregano are great choices for smaller spaces.
* Water Requirements: Choose plants with similar water requirements to make watering easier.
* Personal Preference: Of course, you should also choose plants that you enjoy eating!
Here are a few of my favorite plants for wall-mounted gardens:
* Herbs: Basil, mint, thyme, oregano, rosemary, chives, parsley
* Leafy Greens: Lettuce, spinach, kale, arugula
* Strawberries: Compact strawberry varieties are perfect for hanging baskets and wall-mounted gardens.
* Peppers: Small pepper varieties like chili peppers and bell peppers can also be grown in wall-mounted gardens.
* Tomatoes: Dwarf tomato varieties are best suited for this type of garden.
Troubleshooting Tips:
Even with the best planning, things can sometimes go wrong. Here are a few common problems and how to fix them:
* Plants are Wilting: This could be due to underwatering, overwatering, or too much sunlight. Check the soil moisture and adjust your watering schedule accordingly. If the plants are getting too much sun, move them to a shadier location.
* Leaves are Turning Yellow: This could be due to nutrient deficiencies. Fertilize your plants with a balanced liquid fertilizer.
* Pests: Inspect your plants regularly for pests like aphids, spider mites, and whiteflies. Treat infestations with insecticidal soap or neem oil.
* Fabric is Tearing:
Conclusion
So, there you have it! Creating your own wall mounted veggie garden isn’t just a trendy Pinterest project; it’s a genuinely rewarding experience that brings fresh, homegrown goodness right to your fingertips. We’ve explored the simplicity and versatility of this DIY project, highlighting how it can transform even the smallest spaces into thriving edible landscapes.
But why is this a must-try? Because it’s more than just gardening; it’s about reclaiming control over your food source, connecting with nature, and adding a touch of personalized beauty to your home. Imagine stepping outside your kitchen door and snipping fresh basil for your pasta, plucking ripe cherry tomatoes for a salad, or harvesting vibrant lettuce for a sandwich – all grown with your own hands, free from harmful pesticides, and bursting with flavor.
Beyond the practical benefits, a wall mounted veggie garden offers a unique aesthetic appeal. It’s a living piece of art that evolves with the seasons, adding color, texture, and life to any wall. Whether you live in a sprawling suburban home or a compact city apartment, this DIY project allows you to embrace the joys of gardening without sacrificing valuable space.
Feeling adventurous? Consider these variations to personalize your wall mounted veggie garden:
* Vertical Herb Garden: Focus solely on herbs like rosemary, thyme, mint, and oregano. This is perfect for culinary enthusiasts who want a constant supply of fresh herbs for cooking.
* Strawberry Wall: Create a dedicated strawberry wall using tiered planters or repurposed pallets. Imagine the delight of picking sweet, juicy strawberries right from your wall!
* Succulent and Veggie Combo: Combine drought-tolerant succulents with herbs or small vegetables for a visually stunning and low-maintenance garden.
* Pallet Garden with Lights: Add string lights or solar-powered lights to your pallet garden for a magical nighttime ambiance.
* Repurposed Gutter Garden: Use old gutters to create a unique and cost-effective wall mounted garden.
The possibilities are truly endless! Don’t be afraid to experiment with different materials, plant combinations, and design layouts to create a wall mounted veggie garden that reflects your personal style and preferences.
We’re confident that you’ll find this DIY project to be both enjoyable and rewarding. It’s a chance to unleash your creativity, connect with nature, and enjoy the delicious fruits (and vegetables!) of your labor.
So, what are you waiting for? Gather your materials, roll up your sleeves, and embark on this exciting gardening adventure. We encourage you to try this wall mounted veggie garden project and share your experiences with us! Post photos of your creations on social media using #DIYVeggieWall and let us know what you’re growing. We can’t wait to see your amazing wall mounted veggie gardens! Let’s cultivate a community of urban gardeners, one wall at a time.
Frequently Asked Questions (FAQ)
What vegetables grow best in a wall mounted garden?
Choosing the right vegetables is crucial for success. Compact varieties that don’t require deep root systems are ideal. Some excellent choices include:
* Lettuce and Salad Greens: These are shallow-rooted and thrive in containers. Opt for loose-leaf varieties for continuous harvesting.
* Spinach: Similar to lettuce, spinach is easy to grow and harvest in a wall mounted garden.
* Radishes: These fast-growing root vegetables are perfect for small spaces.
* Cherry Tomatoes: Choose determinate (bush) varieties that stay compact. Provide support as they grow.
* Peppers: Smaller pepper varieties like chili peppers or bell peppers can thrive in containers.
* Strawberries: As mentioned earlier, strawberries are a great option for a dedicated wall.
* Herbs: Basil, mint, oregano, thyme, rosemary, and parsley are all excellent choices for a wall mounted herb garden.
* Bush Beans: These compact bean varieties are well-suited for container gardening.
* Edible Flowers: Nasturtiums, pansies, and violas add beauty and flavor to your garden.
Avoid vegetables that require a lot of space or have deep root systems, such as corn, pumpkins, or watermelons.
What type of soil should I use for my wall mounted veggie garden?
Using the right soil is essential for healthy plant growth. Avoid using garden soil, as it can be too heavy and compacted for containers. Instead, opt for a high-quality potting mix specifically designed for container gardening. These mixes are typically lightweight, well-draining, and contain essential nutrients. You can also amend your potting mix with compost or other organic matter to improve its fertility and water retention.
How often should I water my wall mounted veggie garden?
Watering frequency depends on several factors, including the type of plants, the weather, and the type of container you’re using. Generally, you should water your plants when the top inch of soil feels dry to the touch. Avoid overwatering, as this can lead to root rot. During hot, dry weather, you may need to water your plants daily. Consider using a self-watering system or adding water-retaining crystals to your potting mix to help conserve moisture.
How much sunlight does my wall mounted veggie garden need?
Most vegetables require at least 6 hours of direct sunlight per day to thrive. However, some leafy greens and herbs can tolerate partial shade. Observe your garden throughout the day to determine how much sunlight it receives. If your garden doesn’t get enough sunlight, you may need to supplement with grow lights.
How do I fertilize my wall mounted veggie garden?
Container-grown plants require regular fertilization, as nutrients can leach out of the soil over time. Use a balanced, water-soluble fertilizer specifically formulated for vegetables. Follow the instructions on the fertilizer package for application rates and frequency. You can also use organic fertilizers, such as compost tea or fish emulsion.
How do I protect my wall mounted veggie garden from pests and diseases?
Prevention is key when it comes to pests and diseases. Inspect your plants regularly for signs of problems. Remove any diseased or infested leaves or plants immediately. Use organic pest control methods, such as insecticidal soap or neem oil, to control pests. Ensure good air circulation to prevent fungal diseases.
What materials can I use to build my wall mounted veggie garden?
The possibilities are endless! You can use a variety of materials, including:
* Pallets: Repurposed pallets are a popular and cost-effective option.
* Wooden Planters: You can purchase pre-made wooden planters or build your own.
* Plastic Containers: Recycled plastic containers can be a budget-friendly choice.
* Metal Containers: Galvanized steel or other metal containers can add a modern touch.
* Fabric Grow Bags: These lightweight and breathable bags are ideal for wall mounted gardens.
* Repurposed Gutters: Old gutters can be transformed into unique planters.
Choose materials that are durable, weather-resistant, and appropriate for the size and weight of your plants.
How do I ensure proper drainage in my wall mounted veggie garden?
Proper drainage is essential to prevent root rot. Make sure your containers have drainage holes at the bottom. You can also add a layer of gravel or pebbles to the bottom of the container to improve drainage. Avoid using saucers under your containers, as this can trap water and lead to overwatering.
How do I choose the right location for my wall mounted veggie garden?
Consider the amount of sunlight, water access, and wind exposure when choosing a location for your wall mounted veggie garden. Choose a location that receives at least 6 hours of direct sunlight per day and is easily accessible for watering. Avoid locations that are exposed to strong winds, as this can damage your plants.
Can I grow a wall mounted veggie garden indoors?
Yes, you can grow a wall mounted veggie garden indoors, but you’ll need to provide adequate light. Use grow lights to supplement natural sunlight. Choose plants that tolerate low light conditions, such as lettuce, spinach, and herbs. Ensure good air circulation to prevent fungal diseases.

Leave a Comment