

Washer deep clean DIY: Is your washing machine starting to smell a little funky, or maybe not cleaning your clothes as effectively as it used to? Don’t worry, you’re not alone! We’ve all been there. It’s easy to forget that our trusty washing machines, the very things that keep our clothes fresh and clean, need a little TLC themselves.
For generations, keeping clothes clean has been a cornerstone of hygiene and well-being. From ancient river washing rituals to the invention of the modern washing machine, the pursuit of clean clothes has been a constant. But even the most advanced machines require regular maintenance to perform at their best. Think of it like this: you wouldn’t expect your car to run smoothly without oil changes, right? The same goes for your washing machine!
That’s where this washer deep clean DIY guide comes in. I’m going to show you a simple, effective, and affordable way to deep clean your washing machine using common household ingredients. Why is this important? Because a clean washing machine not only keeps your clothes smelling fresh and looking their best, but it also extends the life of your appliance, saving you money in the long run. Plus, it eliminates nasty bacteria and mold that can build up over time. So, let’s get started and give your washing machine the spa day it deserves!
DIY Deep Clean: Revive Your Washing Machine!
Okay, let’s face it, we often forget about the unsung hero of our laundry routine: the washing machine itself! It diligently cleans our clothes, but who cleans the cleaner? Over time, soap scum, dirt, lint, and even mold can build up inside, leading to funky smells, reduced cleaning performance, and potentially even damage to your machine. But don’t worry, you don’t need to call a professional! I’m going to walk you through a super effective DIY deep clean that will leave your washer sparkling and smelling fresh.
What You’ll Need
Before we dive in, let’s gather our supplies. This is a pretty straightforward process, and you probably already have most of these items at home:
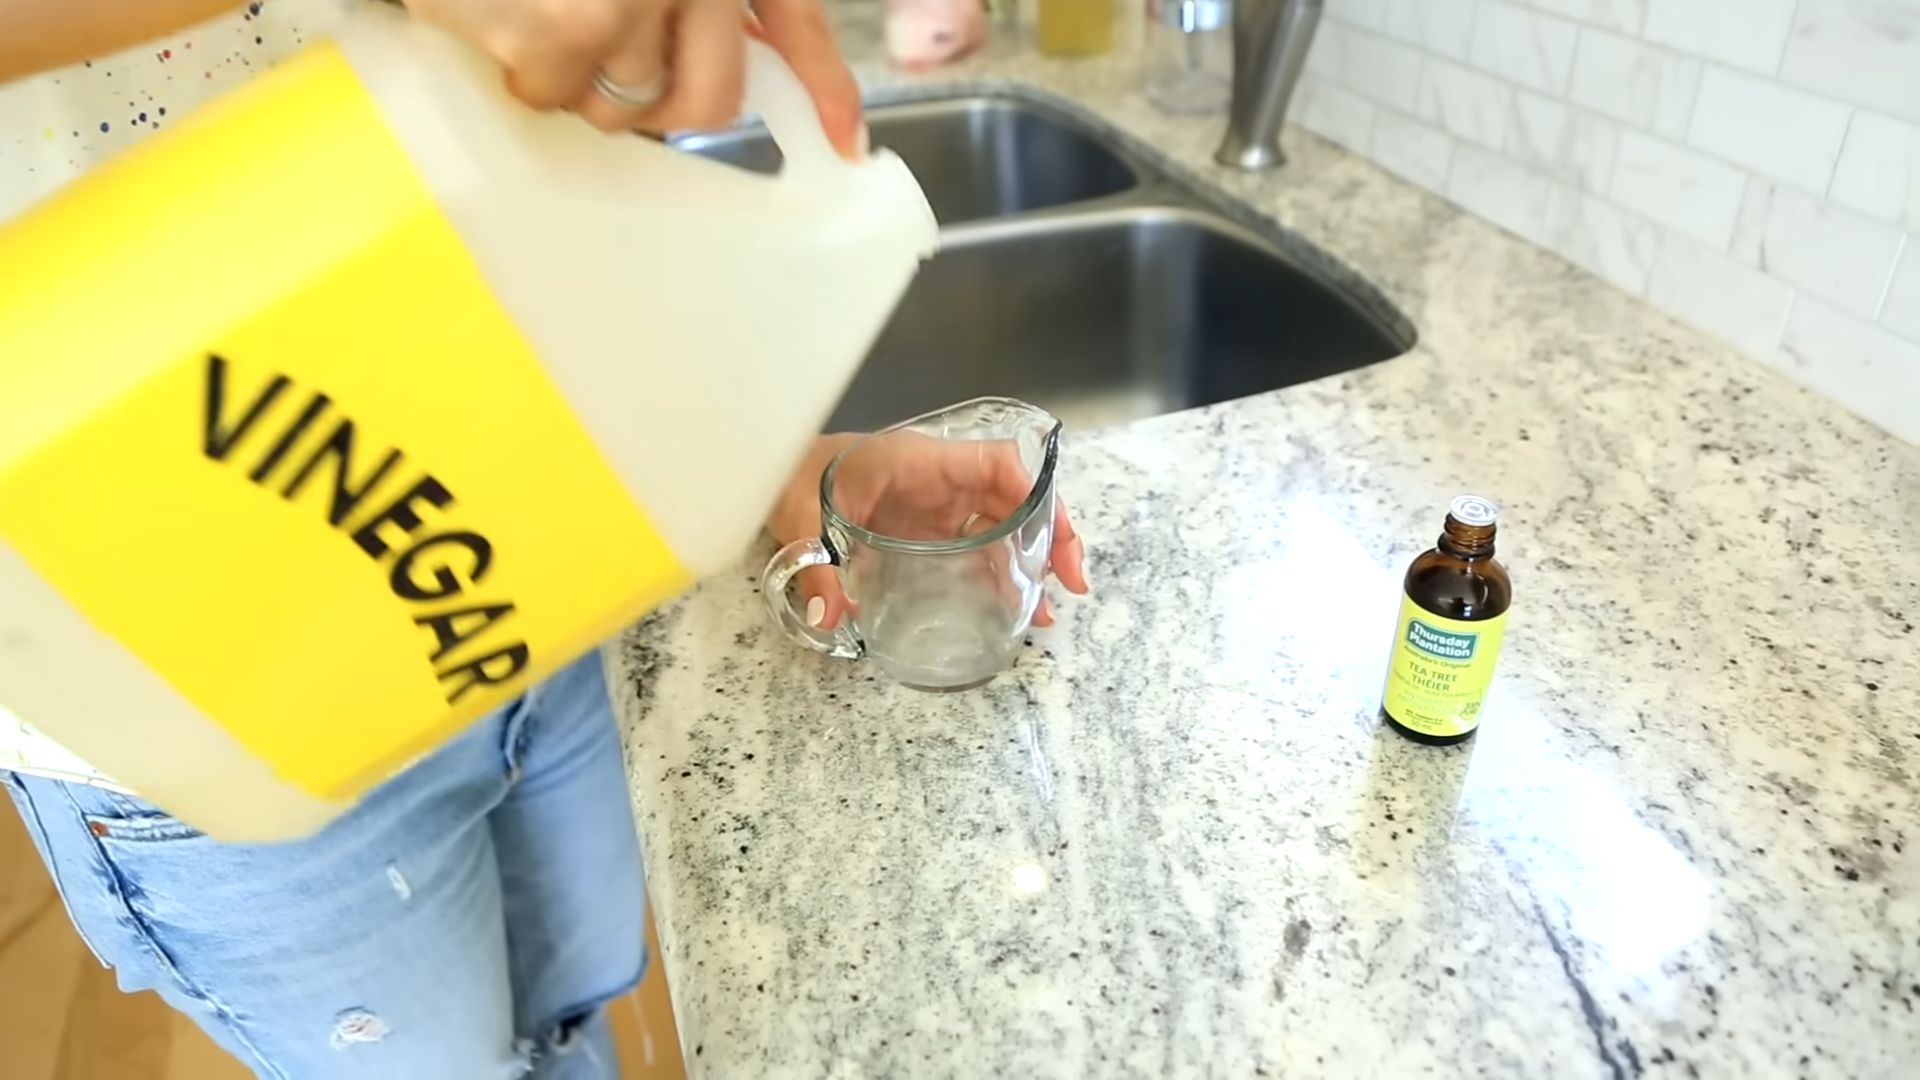
* White Vinegar: This is our star ingredient! Vinegar is a natural disinfectant and deodorizer, perfect for breaking down soap scum and mildew.
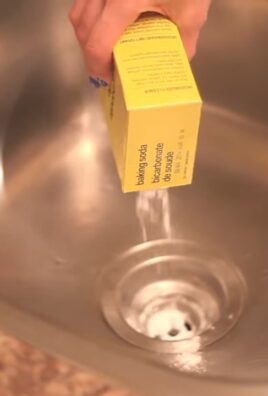
* Baking Soda: Another powerhouse cleaner! Baking soda helps to scrub away grime and neutralize odors.
* Bleach (Optional): If you’re dealing with stubborn mold or mildew, bleach can be a powerful ally. However, use it sparingly and only if your machine’s manual allows it. *Always* follow safety precautions when using bleach.
* Old Toothbrush or Scrub Brush: For getting into those hard-to-reach nooks and crannies.
* Microfiber Cloths or Sponges: For wiping down surfaces.
* Rubber Gloves: To protect your hands from harsh chemicals (especially if using bleach).
* Screwdriver (Possibly): Depending on your machine, you might need a screwdriver to remove the detergent dispenser or other parts for cleaning.
* Spray Bottle: For applying vinegar solution.
* Measuring Cup: For accurate measurements of vinegar, baking soda, and bleach (if using).
Deep Cleaning Your Washing Machine: Step-by-Step
Alright, let’s get started! I’ve broken down the process into easy-to-follow steps. Remember to consult your washing machine’s manual for specific instructions or recommendations.
1. Prepare the Washing Machine:
* First things first, make sure your washing machine is completely empty. No stray socks allowed!
* Unplug the washing machine from the power outlet for safety.
* If you have a front-loading machine, check the rubber gasket (the rubber seal around the door) for any trapped items like coins, buttons, or lint. Remove anything you find.
2. Clean the Detergent Dispenser:
* This is often a breeding ground for mold and mildew. Remove the detergent dispenser drawer (most models have a release button or lever).
* Rinse the dispenser thoroughly with hot water to remove any loose residue.
* In a small bowl, mix equal parts white vinegar and hot water.
* Soak the dispenser in the vinegar solution for at least 30 minutes. This will help loosen any stubborn buildup.
* Use an old toothbrush or scrub brush to scrub away any remaining residue. Pay close attention to the corners and crevices.
* Rinse the dispenser thoroughly with clean water and allow it to air dry completely before reinserting it into the machine.
* If your dispenser is *really* grimy, you can try soaking it in a solution of bleach and water (1 part bleach to 10 parts water). *Always* wear gloves and eye protection when working with bleach. Rinse thoroughly!
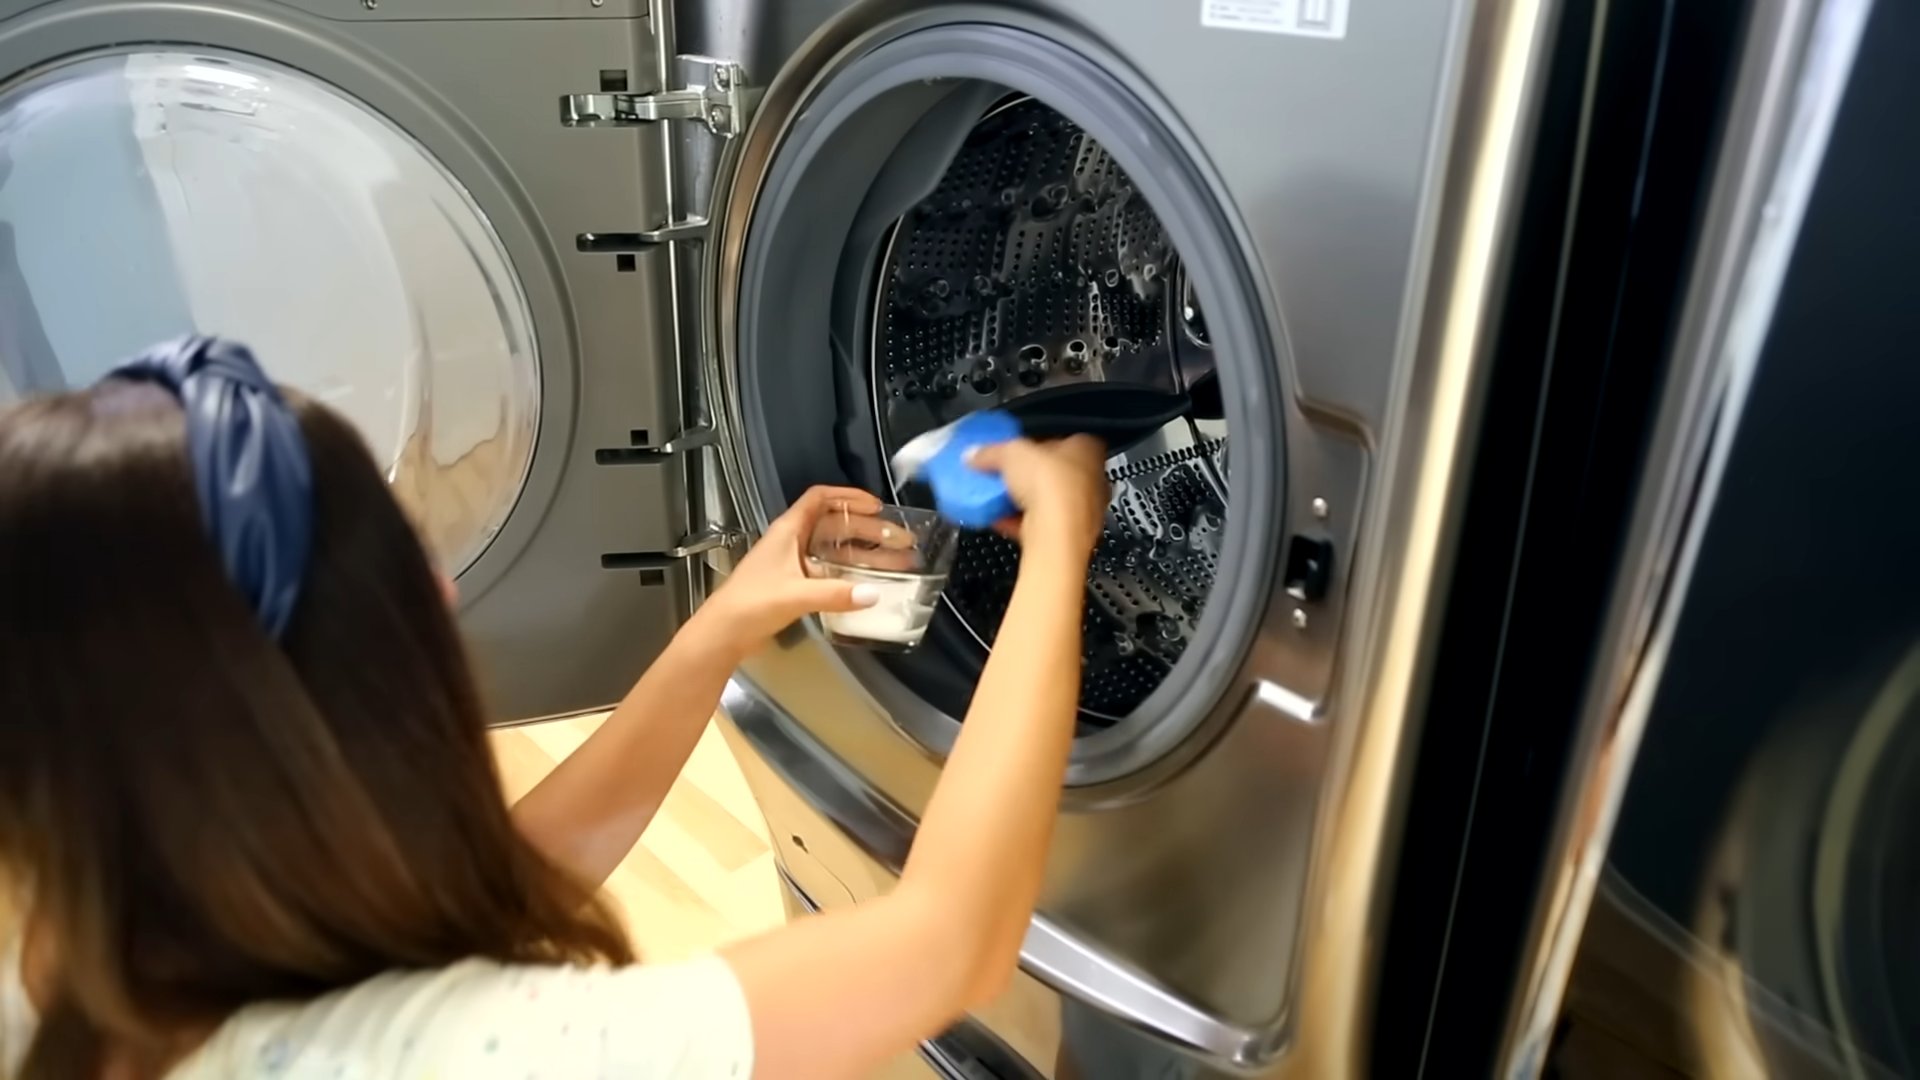
3. Clean the Washing Machine Drum:
* This is where the magic happens! We’re going to use a combination of vinegar and baking soda to deep clean the drum.
* For Top-Loading Machines:
* Fill the washing machine with hot water.
* Add 4 cups of white vinegar to the water.
* Add 1 cup of baking soda to the water.
* Allow the mixture to agitate for a minute or two to mix everything together.
* Stop the machine and let the vinegar and baking soda solution soak in the drum for at least 30 minutes (or even overnight for a really deep clean).
* After soaking, run a complete wash cycle on the hottest setting.
* For Front-Loading Machines:
* Pour 2 cups of white vinegar into the detergent dispenser.
* Sprinkle 1/4 cup of baking soda directly into the drum.
* Run a complete wash cycle on the hottest setting. If your machine has a “clean washer” cycle, use that.
* If you’re using bleach, add 1/2 cup of bleach to the bleach dispenser instead of vinegar. *Never* mix bleach and vinegar!
4. Clean the Rubber Gasket (Front-Loading Machines):
* This is a crucial step for front-loading machines, as the rubber gasket is prone to mold and mildew growth.
* Mix a solution of equal parts white vinegar and water in a spray bottle.
* Spray the vinegar solution onto the rubber gasket, paying close attention to the folds and crevices.
* Let the solution sit for a few minutes to loosen any buildup.
* Use an old toothbrush or scrub brush to scrub away any mold or mildew.
* Wipe the gasket clean with a microfiber cloth or sponge.
* For stubborn mold, you can use a bleach solution (1 part bleach to 10 parts water). *Always* wear gloves and eye protection when working with bleach. Rinse thoroughly!
* Leave the washing machine door open after cleaning to allow the gasket to air dry completely. This will help prevent future mold growth.
5. Clean the Exterior of the Washing Machine:
* Don’t forget to give the outside of your washing machine some love!
* Wipe down the exterior surfaces with a damp microfiber cloth or sponge.
* For stubborn stains or spills, you can use a mild all-purpose cleaner.
* Pay attention to the control panel and any buttons or knobs.
* Dry the exterior with a clean microfiber cloth.
6. Clean the Drain Pump Filter (If Applicable):
* Some washing machines have a drain pump filter that needs to be cleaned periodically. This filter traps lint, hair, and other debris that can clog the drain pump.
* Consult your washing machine’s manual to locate the drain pump filter. It’s usually located at the bottom front of the machine, behind a small access panel.
* Place a shallow pan or towel under the access panel to catch any water that may spill out.
* Carefully remove the drain pump filter.
* Rinse the filter thoroughly with water to remove any debris.
* Reinstall the filter and close the access panel.
7. Run a Final Rinse Cycle:
* After completing all the cleaning steps, run one final rinse cycle with hot water to ensure that all traces of vinegar, baking soda, or bleach are removed.
* This will also help to flush out any remaining debris from the drum and drain.
8. Dry the Washing Machine:
* After the final rinse cycle, leave the washing machine door open to allow the drum and gasket to air dry completely. This is especially important for front-loading machines to prevent mold growth.
* You can also use a clean microfiber cloth to wipe down the drum and gasket to speed up the drying process.
Maintaining a Clean Washing Machine
Now that you’ve deep cleaned your washing machine, let’s talk about how to keep it clean and fresh between deep cleans. Here are a few tips:
* Use the Right Amount of Detergent: Using too much detergent can lead to buildup and residue. Follow the manufacturer’s instructions and use only the recommended amount.
* Use High-Efficiency (HE) Detergent: If you have a high-efficiency washing machine, be sure to use HE detergent. HE detergent is formulated to produce less suds, which helps prevent buildup.
* Leave the Door Ajar: After each wash, leave the washing machine door ajar to allow air to circulate and prevent moisture buildup. This is especially important for front-loading machines.
* Wipe Down the Gasket: After each wash, wipe down the rubber gasket (on front-loading machines) with a clean cloth to remove any moisture or debris.
* Run a Cleaning Cycle Regularly: Most washing machines have a “clean washer” cycle. Run this cycle once a month (or more often if needed) to keep your machine clean and fresh. You can use vinegar or a commercial washing machine cleaner.
* Clean the Detergent Dispenser Regularly: Remove and clean the detergent dispenser drawer every few weeks to prevent buildup.
* Use Hot Water Washes Occasionally: Hot water washes help to kill bacteria and remove buildup. Use hot water washes for heavily soiled items or when you want to give your machine a boost.
Troubleshooting Common Washing Machine Issues
Sometimes, even with regular cleaning
Conclusion
So, there you have it! A simple, effective, and budget-friendly way to tackle that grimy washing machine and restore it to its former glory. We’ve walked you through the steps to a sparkling clean washer, and hopefully, dispelled any myths about needing expensive, specialized cleaners. This washer deep clean DIY method isn’t just about aesthetics; it’s about extending the life of your appliance, improving its performance, and ensuring your clothes are truly getting clean.
Think about it: all that detergent residue, fabric softener buildup, and general grime accumulating inside your washing machine can create a breeding ground for bacteria and mold. Not only can this lead to unpleasant odors that transfer to your freshly laundered clothes, but it can also impact the efficiency of your machine, forcing it to work harder and potentially shortening its lifespan. By regularly performing this deep clean, you’re actively preventing these issues and ensuring your washing machine operates at its best.
But the benefits don’t stop there. A clean washing machine also means cleaner clothes. When your machine is free of buildup and grime, your detergent can work more effectively, resulting in brighter, fresher, and truly clean laundry. You’ll notice the difference in the way your clothes smell and feel, and you’ll have the peace of mind knowing that you’re not washing your clothes in a dirty environment.
Now, let’s talk about variations. While the baking soda and vinegar combination is a powerhouse cleaning duo, you can certainly experiment with other natural ingredients. For instance, if you have hard water, adding a cup of citric acid to the hot water cycle can help dissolve mineral deposits and further enhance the cleaning power. Alternatively, a few drops of your favorite essential oil, like tea tree or lavender, can add a pleasant scent to your machine after the cleaning cycle is complete. Just be sure to use essential oils sparingly and avoid using them if you have any sensitivities or allergies.
Another variation to consider is the frequency of cleaning. While we recommend deep cleaning your washing machine every three to six months, depending on usage, you may need to adjust this frequency based on your specific circumstances. If you frequently wash heavily soiled items or use a lot of detergent, you may need to clean your machine more often. Conversely, if you only do laundry occasionally, you may be able to stretch the cleaning intervals a bit longer. The key is to pay attention to your machine and clean it whenever you notice signs of buildup or odor.
We understand that trying a new DIY method can sometimes feel daunting, but trust us, this washer deep clean DIY is incredibly easy and rewarding. The satisfaction of seeing your washing machine sparkling clean and knowing that you’re extending its lifespan is well worth the effort. So, gather your supplies, follow our simple steps, and prepare to be amazed by the results.
We’re confident that you’ll love this DIY trick, and we can’t wait to hear about your experience. Share your before-and-after photos, tips, and variations in the comments below. Let’s create a community of clean washing machine enthusiasts and help each other keep our appliances running smoothly for years to come! Don’t forget to tag us in your social media posts using #WasherDeepCleanDIY – we’d love to see your sparkling machines!
Frequently Asked Questions (FAQ)
Why is it important to deep clean my washing machine?
Deep cleaning your washing machine is crucial for several reasons. Firstly, it removes accumulated detergent residue, fabric softener buildup, and general grime that can create a breeding ground for bacteria and mold. This buildup can lead to unpleasant odors that transfer to your clothes and can even affect the machine’s performance. Secondly, a clean washing machine operates more efficiently, saving you energy and extending its lifespan. Finally, a clean machine ensures that your clothes are truly getting clean, as the detergent can work more effectively without being hindered by buildup. Regular deep cleaning prevents these issues and keeps your washing machine in optimal condition.
How often should I deep clean my washing machine?
The frequency of deep cleaning depends on your washing machine usage and the types of laundry you typically do. As a general guideline, we recommend deep cleaning your washing machine every three to six months. However, if you frequently wash heavily soiled items, use a lot of detergent, or live in an area with hard water, you may need to clean it more often, perhaps every one to three months. Conversely, if you only do laundry occasionally, you may be able to stretch the cleaning intervals a bit longer. Pay attention to your machine and clean it whenever you notice signs of buildup, odor, or reduced cleaning performance.
Can I use bleach instead of vinegar for deep cleaning?
While bleach is a powerful disinfectant, we generally recommend using vinegar for deep cleaning your washing machine. Vinegar is a natural, non-toxic alternative that effectively removes detergent residue, mineral deposits, and odors. Bleach, on the other hand, can be harsh on your machine’s components and may leave behind a strong chemical odor. Additionally, mixing bleach with other cleaning agents, such as ammonia, can create dangerous fumes. If you choose to use bleach, be sure to follow the manufacturer’s instructions carefully and never mix it with other cleaning products. Always ensure proper ventilation when using bleach. For a safer and more environmentally friendly option, stick with vinegar.
What if my washing machine has a self-cleaning cycle?
If your washing machine has a self-cleaning cycle, that’s great! It can certainly simplify the deep cleaning process. However, even with a self-cleaning cycle, it’s still a good idea to supplement it with the baking soda and vinegar method occasionally. The self-cleaning cycle may not always remove all the buildup and grime, especially in hard-to-reach areas. Use the baking soda and vinegar method every other time you would normally run the self-cleaning cycle to ensure a thorough clean. Refer to your washing machine’s manual for specific instructions on using the self-cleaning cycle.
What if I have a front-loading washing machine? Are there any special considerations?
Yes, front-loading washing machines require some special considerations when deep cleaning. Front-loaders are more prone to mold and mildew buildup due to the rubber gasket around the door. Be sure to pay extra attention to cleaning this gasket thoroughly. Wipe it down with a solution of vinegar and water after each load to prevent buildup. When deep cleaning, leave the door slightly ajar after the cycle is complete to allow the machine to air out and prevent moisture from trapping inside. Also, check the detergent dispenser regularly and clean it to remove any residue.
Can I use this method on a high-efficiency (HE) washing machine?
Yes, this method is safe to use on high-efficiency (HE) washing machines. Both baking soda and vinegar are gentle enough not to damage the internal components of HE machines. However, it’s crucial to use the correct amount of detergent when doing regular laundry in an HE machine. Using too much detergent can lead to excessive suds and buildup, which can negatively impact the machine’s performance. Always use HE-specific detergent and follow the manufacturer’s instructions for the correct amount.
What if my washing machine still smells after deep cleaning?
If your washing machine still smells after deep cleaning, there could be a few reasons. First, ensure that you’ve thoroughly cleaned all parts of the machine, including the detergent dispenser, the rubber gasket (for front-loaders), and the interior drum. Second, try running another cleaning cycle with a cup of white vinegar and a few drops of tea tree oil, which has antifungal properties. Finally, make sure to leave the door slightly ajar after each load to allow the machine to air out and prevent moisture buildup. If the smell persists, you may need to consult a professional appliance repair technician.
Where does the baking soda go?
The baking soda is added directly to the drum of the washing machine. You sprinkle it around the drum before starting the cleaning cycle. The baking soda acts as a mild abrasive and helps to loosen dirt and grime.
What type of vinegar should I use?
Plain white vinegar is the best type of vinegar to use for deep cleaning your washing machine. It’s inexpensive, readily available, and effective at removing detergent residue, mineral deposits, and odors. Avoid using flavored vinegars, as they may contain sugars or other additives that could leave a sticky residue in your machine.
Is it safe to mix baking soda and vinegar?
While baking soda and vinegar react when mixed, producing carbon dioxide and water, the reaction is generally safe for cleaning purposes, especially in the diluted amounts used in this DIY method. The fizzing action can actually help to loosen dirt and grime. However, it’s important to note that mixing large quantities of baking soda and vinegar in a closed container can create pressure and potentially cause an explosion. Therefore, always use the recommended amounts and avoid mixing them in a sealed container.

Leave a Comment